Headband braid - weaving based on the “motives” of the French braid and waterfall. How to braid a headband from hair, photo and video Headband from a braid how to weave for yourself
Do not want to mess with long hair and think that it is a complete torment from them? You are not right. A few seasons at the peak of fashion hairstyles from long hair. Stylists advise using braids and pigtails in different types hairstyles - both simple and complex. Among them are the French braid, the fishtail braid, even all sorts of plaits and the notorious braid a la Yulia Tymoshenko ...
Braids can be, depending on the hairstyle, both elegant and feminine, as well as mischievous and romantic. The time has passed when the braids were only braided tightly and smoothly. Now in fashion you can see both rigor and negligence, giving the hairstyle an unforgettable charm. Such hairstyles are not at all difficult to do by yourself. As in any business, the main thing is to have a desire, and everything else comes with experience.
Today we want to tell our readers how to braid a headband that will help diversify and update your image. We are sure that braiding will give you some foundation for creativity and will serve as a good incentive to strive to update something in yourself, not be afraid to be better.
Simple braids are able to braid, that's all there is to hide. Do not be afraid to try to weave original pigtails. We will help you learn how to braid complex braids. Skill comes with experience, and in order to get it, you must at least have the desire and not be afraid to do something new.
There are several ways to braid a headband. In any case, you will need a comb or hair brush, gel or hairspray for fixation, elastic bands and hair ornaments.
How to weave a headband
1 way.
simple and fashionable option weaving. The scythe bezel is braided from one ear to the other:
1. Comb your hair and separate the "working" part of the hair from ear to ear forward, gathering unnecessary curls in a ponytail so that they do not interfere.
2. Taking a small strand just above the ear, start braiding the braid, moving to the other ear. For weaving, we take not too small strands, but you should not use large ones either. We continue to weave the bezel to the ear.
3. When you reach the end, secure the braid with an elastic band that matches your hair color. If the strands for weaving end, we fix the hair in the tail or continue to weave the length. The scythe bezel should not be perfectly even, negligence is acceptable in the hairstyle. You can make the braid more voluminous with a weak weave.
In order for the bezel braid to be tight enough and hold on for a long time, but not too tight, you need to weave not too loosely, and not too tighten the strands. Be sure to fix the end of the braid. You can braid a thin or thick rim, which will depend on the thickness of the braid strands.
2 way.
And here is another option for you how to braid a bezel - instead of one braid we make two:
1. We start weaving the braid - we follow from the left ear to the right, then we do the opposite - from the right to the left.
2. When we finish weaving the braid, we tie it with an elastic band. We repeat the same with the other side. As a result, we get two parallel pigtails.
3. With the remaining hair, you can do whatever you want, think of anything, try experimenting.

The headband is perfect for almost any type of hair: curls, waves or straight strands. In everyday life, you can build your image based on careless hairstyles, and to look more elegant, or to make yourself more chic for the upcoming event, straighten your hair with a curling iron. The braid rim looks especially good with bangs.
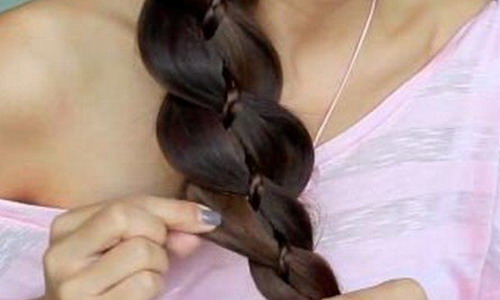
I would like to add that the headband braid can be braided as a spikelet, or simply with separate pigtails. For example, as in the following photo lesson:


If you want to make a completely extravagant and daring hairstyle, then try curling the waves that would be in harmony with the pigtail. Also, if you have a special event coming up, the waves will give your image a more chic and at the same time romantic look. And if you want to look stunning at all and conquer everyone with your appearance, we can assure you that the curls and braided headband crown will do the desired effect. Also, you can use this move - pin a chic hairpin on one side of the headband to achieve maximum effect. You should and can look great, so don't be afraid to add variety to your hairstyles.
Lessons on how to braid fishnet braids in our article.
Every girl in her arsenal should have a few tricks to quickly and beautifully clean her hair, and one of these tricks is the ability to braid hair band.
Long hair in themselves they are a wonderful feminine adornment, but it is not always convenient for us to walk with loose hair. This is especially true for hot summer days or holidays when you want to pull your hair up, opening your neck and shoulders. It is for this occasion that we offer you our first hairstyle.
You've probably already seen how to braid hair band around the head (), starting weaving from the ear or from the parting, but in this case the braid passing over the forehead turns out to be thin. To get a thick rim of hair, we offer you a little trick - start weaving the rim from the bottom of the back of the head. And one more trick that will give the braid thickness - we will not weave an ordinary French braid, but a reverse Dutch one ().
The length of the hair for this hairstyle should be at least up to the shoulder blades.

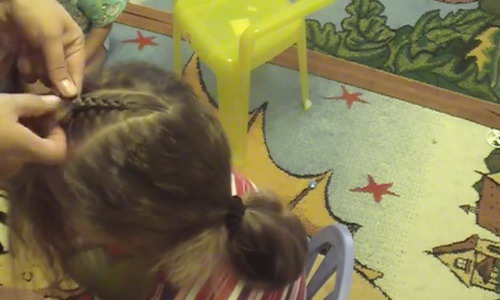
Comb your hair by combing it forward (over your face). Leave three strands at the back of the head. Tilt your head to the side towards which you will weave the headband. Take in three selected strands and start weaving a Dutch braid.

Start adding loose hair to the weave (add it from the crown side). The headband starts at the back of our head, then we weave it along the hairline (past the ear, along the forehead). To make it convenient for you to braid yourself, as you move the braid, turn your head tilted down. When weaving to the top point, the head can be raised, so it will be more convenient to finish weaving. When you have braided all the loose hair, braid the pigtail to the end, secure with an elastic band.

The pigtails should be enough to wrap the rest of the head with it, connecting the tip to the beginning of the rim. Hide the tip under the beginning of the braid, securing it with invisibility.
How to braid a headband on loose hair:
It is not necessary to remove all the hair by weaving the headband, you can use only a small strand for it, and leave the bulk of the hair loose on the back. This hairstyle option is also very convenient, as it removes all the hair from the face, and you will not need to constantly adjust the strands that have fallen forward.
Comb your hair, separate a small part in your ear. So that the rest of the hair does not interfere, they can be collected in a ponytail at the back of the head. Braid a regular three-strand pigtail from the selected part. Starting to weave a braid, keep it perpendicular to the head. Braid to the very tip, secure with a thin elastic band.

Now we will make a headband from the pigtail - lay it along the hairline (closer or further from the forehead, as you like). Fasten the tip behind the ear with a pair of invisible hair (lifting loose hair if you don’t have it in a ponytail).

Now let your hair down (or loose your ponytail).
Combing and styling your hair, making for example
Today's lesson will be devoted to weaving a braid-headband: we will learn how to make a headband from hair using the techniques "French braid", "lace braid" ("French half braid"), "Dutch braid" and "Dutch half-braid".
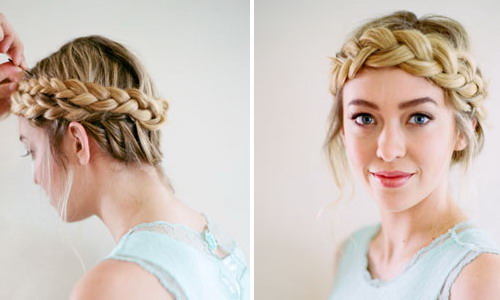
Hairstyles with headbands are at the peak of the fashion wave today, they can be seen with equal success on the catwalks and in celebrity photographs. A great way to diversify a similar hairstyle is, instead of wearing a store-bought headband, take and braid it from your own hair. In this lesson, we'll look at four interesting options headband braids, all of which are, great, easy to do.
Which option do you like best? Unsubscribe in the comments!

Headband of hair in the technique of "French braid"
Step 1. Start by separating the front section of hair from the parting towards the left ear. Pull the rest of your hair back and secure with a bobby pin.
Step 2
Step 3
Step 4
Step 5 Cross the back section over the middle section again, and then grab the loose hair that is on the same level as the first and include it in this section.
Step 7
Step 8
Step 9

Headband made of hair in the technique of "Braid-lace" ("French half-braid")
Step 1.
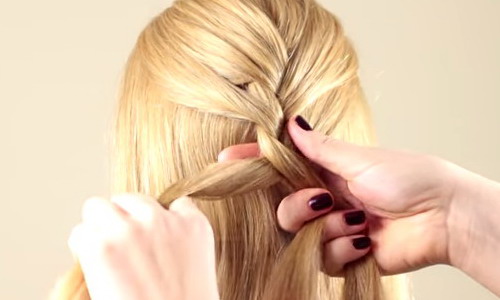
Step 2 Take a section of hair right next to the parting (on the wider side) and divide it into three strands.
Step 3 Cross the back strand over the middle strand.
Step 4 Now cross the front strand over the middle strand.
Step 5 Pass the back strand over the middle again. .
Step 7 Repeat steps 5 and 6 until you reach the point at the tip of your left ear.
Step 8 Secure the braid with one or two invisible hairpins.
Step 9 Let down the hair that was previously pinned up at the back.

Headband of hair in the technique of "Dutch braid"
Step 1. Start by separating the front section of hair from the parting to the left ear, pull the rest of the hair back and secure with a bobby pin.
Step 2 Take a section of hair right next to the parting (on the wider side) and divide it into three strands.
Step 3
Step 4
Step 5 Pass the back section under the middle section again, and then grab the loose hair that is on the same level as the first and include it in this section.
Step 7 Repeat steps 5 and 6 until you reach the point at the tip of your left ear.
Step 8 Secure the braid with one or two invisible hairpins.
Step 9 Let down the hair that was previously pinned up at the back.

Headband made of hair in the technique of "Dutch half-braid"
Step 1. Start by separating the front section of hair from the parting to the left ear, pull the rest of the hair back and secure with a bobby pin.
Step 2 Take a section of hair right next to the parting (on the wider side) and divide it into three strands.
Step 3 Pass the back section under the middle section.
Step 4 Now thread the front section under the middle section.
Step 5 Pass the back section under the middle one again. (without braiding extra hair).
Step 7 Repeat steps 5 and 6 until you reach the point at the tip of your left ear.
Step 8 Secure the braid with one or two invisible hairpins.
Step 9 Let down the hair that was previously pinned up at the back.

This post is a translation of a tutorial from popular beauty blogger and braiding expert MissySue! You can find the original. I also accept orders for translations of other lessons that interest you (unsubscribe in a personal message or in the comments). Translation from Ray. ^_^
A variety of weaving options allow you to create new styling, experiment with shape and style. Spikelets give femininity, elegance, lightness to the image. An evening event, daily chores, a long-awaited date - hairstyles will be appropriate for any occasion. Braid bezel has several options for weaving. Depending on the structure, the length of the hair may not be limited to one model.
general description
In ancient Rome, styling fashion changed quite often. Empresses were the legislators, who gave new forms to curls several times a day. For the first time, headband braids are mentioned in the Ancient Roman Empire, which were part of the frame hairstyle. Weaved in several tiers around the head, and the first hairdressers in that period were slaves. you will find on our website.
A new round of popularity braids on the forehead received in the last century. Revolutions, wars left their mark on trends hairdressing. Women's short, practical haircuts appeared, facilitating daily care. Those who did not want to say goodbye to long curls braided them into neat braids rims.
The hairstyle has several names - a braid on the forehead, a spikelet rim, a hoop. Weaving is located in the parietal region, hair can be collected on the top of the head, the back of the head. You can braid short, medium and strands below shoulder level. A braid is created on a straight, curly structure. It goes well with bangs, for young ladies with a neat forehead, a model without a lock on the face will do.

Pigtail with loose hair
- Comb the hair, using a flat comb, perform a bouffant in the area of \u200b\u200bthe crown and crown.
- Select strands symmetrically at the left and right temples.
- From the selected curls, alternately braid three-beam braids, tie the ends with elastic bands.
- Throw the right pigtail around the head to the left side, fix under the fleece with invisibility.
- Lay out the left pigtail in the same way.
- Loose hair can be twisted into playful curls.
A variety of options for weaving and styling braids
Spikelet bezel on average length suitable for those with flawless facial features. Emphasizes the correct oval, corrects the elongated, triangular, rhomboid shape. Suitable as an everyday styling, a hairstyle is also appropriate for exceptional, solemn events. It is important to give skin tone, maximum emphasis on the face, so the covers must be flawless.
The collected spikelet around the head suits slender girls. It is not recommended to use chubby young ladies, the shape of the hairstyle will only highlight the flaws. Stylish styling worth emphasizing bright makeup, as well as pick up decorations appropriate for the event. You can weave not only a standard spikelet. By experimenting with the techniques of fishtail, reverse braid, it is easy to achieve perfection.
goes well with braided curls. suitable for elongated and triangular shapes, careless, graduated - ideally hides imperfections in appearance, corrects the oval. The hairstyle opens the neck line, emphasizes the graceful silhouette.
The combination of bangs and strands on the face has the properties of contouring the shape of an oval, will hide skin imperfections. Universal styling is suitable for different age categories, it is also appropriate for a business dress code. Careless execution creates a light, romantic image, emphasizes femininity, softness of lines.
Smooth spikelets, duplicating the shape of the head, are suitable for young girls, model parameters. The hairstyle looks stylish, modern, the classic model emphasizes the freshness, beauty of youth. original jewelry turn a practical, everyday styling into an identical hairstyle.
You can create a braid rim on short and medium length curls. Laid strands give a neat shape to the hair, the hairstyle suits different types of appearance. You can do without accessories, the spikelet will decorate the whole image.
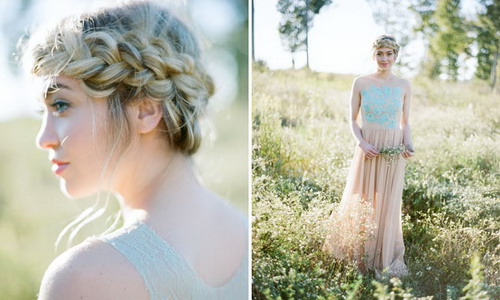
Spikelet around the head on long, loose curls is suitable for special occasions. Great styling to emphasize luxurious flowing strands. The hairstyle visually makes you taller, slimmer, half-collected hair with a braid creates the image of a goddess.
Pros and cons
Traditional styling and today does not lose popularity. Features of execution, advantages and disadvantages will allow you to determine the optimal model.
Pros:
- simplicity, ease of execution, you can weave a pigtail for yourself;
- practical hairstyle keeps a neat shape throughout the day;
- suitable for different styles and directions;
- various variations of execution allow you to choose styling for each type of appearance;
- has a rejuvenating, corrective effect;
- performed on a short, medium length, looks luxurious on long curls, you can create weaving on straight, curly, curly hair;
- corresponds to the latest trends in hairdressing;
- it is possible to use it as a hairstyle for every day, even without accessories, an elegant model is suitable for a secular evening.
Minuses:
- requires the use of styling products;
- models with collected curls do not fit round and square ovals.
Star examples
Selena Gomez chooses a braid model around the head with loose strands.
Jessica Alba use classic styling, captivating with external perfection at social events.
Taylor Swift chose for one of the ceremonies a thin pigtail rim and elongated bangs. Mysterious and gentle image did not go unnoticed by the paparazzi.
Drew Barrymore also went out with a neatly collected scythe.


The simplest braids can be mastered not only by women, but also by men who have to collect their daughters in Kindergarten or school. The simplest braids are three-strand braids. Weaving braids of four strands is more difficult, but it's worth it - such hairstyles look very unusual. What can we say about all sorts of other modifications - French braids, dragons, plaits, daisies and other methods! Having mastered these simple and beautiful ways weaving braids, you will become a real master and be able to change hairstyles every day.
Braids are worn by both girls, girls, and women on weekdays and holidays. It all depends on what kind of braid your style will be. To master the simple weaving of braids, it is better to first practice in weaving a simple braid. It's easy to do. With the right easy way weaving braids will get a neat hairstyle, and its owner will not have uncomfortable sensations.
How to weave the simplest braids

The simplest braid weaving begins with combing. Comb your back hair with a wide-toothed comb. First comb the ends of the hair, then gradually move higher and higher.

In this case, you minimally injure the hair, combing will be almost painless, the hair will easily unravel.


Before weaving simple braids, go through the hair with a soft massage brush. Divide all the hair on your head into three sections. Take in left hand the left part of the hair, in the right hand - the right.

Lay the side strands alternately on the middle strand. In this case, the strand from the left hand will become central, and the strand that previously lay in the middle will go to the left hand.


During weaving, periodically iron the strands of hair with your hands so that they do not tangle with each other, are smooth and even. Weave the braid as long as you like.


Pay attention to the photo of a simple weaving of braids - at the end they always leave a tail 10-20 cm long and fix it with an elastic band or a hairpin.
Weaving a braid of four strands (with photo)
A four-strand braid is woven similarly to a simple braid. Look at the photo of a braid of four strands - before weaving, the hair is divided not into three, but into four parts and overlaps each other alternately. Follow the course of the strands in the figure, and you will be able to braid such a braid yourself.


1. To do beautiful hairstyle with braids like this, first part your hair with a straight part, then separate the nape of your hair and pin it up so it doesn't get in the way.


2. On each side of the head, weave four strands of braids and strengthen their ponytails with elastic bands.


3. Then comb the hair at the back of the head and connect the braids with them. Secure your hair at the back of your head with a hairpin or elastic.

4. Comb loose hair. It turned out such a hairstyle: original pigtails on the sides of the head, and a tail in the back.
Weaving a French braid with step by step photos
Below is step by step description weaving a french braid with photos.


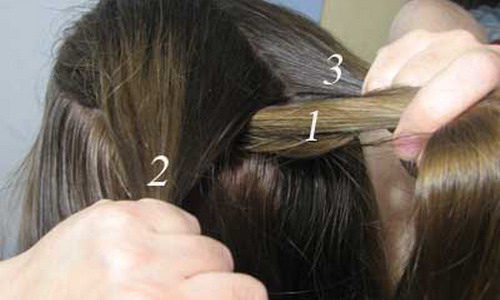
2. Separate the hair on the top of the head and divide it into three strands.

3. Put one side strand on the middle one, like weaving a simple braid.

4. Lay the second side strand over the new middle strand. Now all three strands should be in one hand (left), but separately.
5. Next, grab a strand of loose hair near the side strands on each side, combine the strands on the sides and continue weaving. Put the enlarged side strands on the middle one and weave them as in a simple weave.

6. Thus, continue weaving, adding loose hair to the side strands and shifting the strands from one hand to the other. While braiding, grab your hair tightly and keep your hands as close to your head as possible. Then the braid will turn out neat and will stay on the head for a long time.

7. Gradually grabbing all the new loose hair on the sides of the braid, continue weaving to the very back of the head.

8. Having reached the back of the head, you can immediately fasten the loose hair with an elastic band - make a ponytail at the end of the French braid. And you can continue to weave loose hair in the form of a simple braid. The choice is yours.


Look at step by step photos weaving a French braid to consolidate the information received.
Reverse French braid

1. Weaving a reverse French braid, like all other braids, begins with combing. Below are step-by-step photos of a French braid with a reverse weave.


2. Such a braid is woven like a French one. But there are some differences here. Loose hair, when added to the side strands, creeps up from below. As a result, the braid becomes embossed.


3. Having braided the hair to the back of the head, you can also immediately fix it with an elastic band or continue weaving in the form of a simple braid.


The braid needs to be weaved tightly, then it will look neat and beautiful.


4. Comb the remaining ponytail with a brush. A longer ponytail looks more interesting, and a short ponytail looks childish.
Step-by-step weaving braid "Fishtail"
Step by step, the Fishtail braid is performed in the following order.

1. Comb the hair thrown back.

2. This braid is woven from two strands. First, divide all the hair into two equal parts with a vertical parting at the back of the head.


3. Next step step weaving braids "Fishtail" - separation from the hair of one part along a small strand and throwing it to the hair of the other part.

4. Do the same with the hair of the other half of the head.

5. Repeat all the steps many times until you braid the braid.


6. Leave loose hair of the desired length (tail) and secure the braid with an elastic band.
Simple beautiful braid weaving with a tourniquet

1. Before weaving a braid, comb your hair with a brush.

2. Gather clean, dry hair into a high ponytail at the crown.

3. Divide the tail into three equal parts.


4. Twist each part of the hair to the right or left side but definitely one.


5. Twist the three parts of the hair together in the opposite direction.
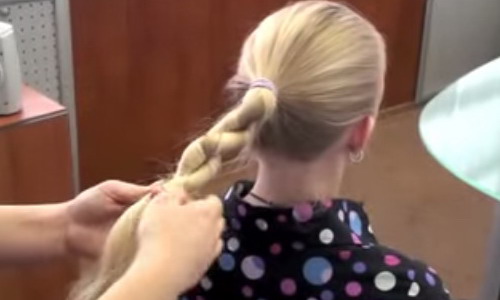
6. Secure the resulting tourniquet from below with a hair band.


7. Loose hair (tail) comb.
Simple weaving: how to braid a headband braid (with photo)

1. Comb your hair, you can comb it back or make a side parting on the left.

2. Weaving a braid-rim begins with dividing the hair into two parts with a parting that goes through the parietal part of the head from one ear to the other.

3. Before braiding the headband, fasten the back of the hair temporarily into a ponytail.

4. From the left ear or from the side parting on the left towards the right ear, weave a French braid.

You can do the classic version or with reverse weaving.

5. Gradually weave into the braid all the hair of the separated upper part of the head. Grab the new hair strand by strand.


6. Having braided the braid to the right ear, you can continue weaving a simple braid or make a tail.


You can strengthen the end of the French braid, and combine the free part of the hair with the total mass of hair at the back of the head.
Weaving braids: how to braid pigtails
1. Before weaving braids with bundles, comb your hair and divide it with a vertical parting from the forehead to the back of the head into two parts.

2. Before braiding the braids, temporarily fix one part of the hair with an elastic band so that it does not interfere.

3. Separate a strand of hair from the forehead with a horizontal parting in the direction from the vertical parting to the temple and twist it 2-3 times to make a flagellum. Hold the flagellum in your right palm.

4. Separate the next strand of hair with a parallel parting and twist it in the same way with your left hand.

5. Twist both flagella between each other in your hands.

6. With your left hand, take the next similar strand and again make a flagellum out of it.

7. Do the same with your right hand. Do not let go of the part of the braided braid while doing this.

8. Continue braiding on one half of the head to the back of the head.

9. Secure the finished braid with an elastic band at the back of the head.

10. Similarly, braid the braid on the other half of the head.

Spit "Double drop"
1. Wash your hair and dry well. With two horizontal partings, divide the hair into three parts (one at the level of the top of the head, the second at the level of the upper part of the ears), secure each part of the hair with elastic bands.

2. Divide the upper part of the hair into two parts using a vertical parting.

3. On each half, French braid at the top of your head. Weave first on one side, then on the other. Then combine the free ends of the hair together and secure with an elastic band.

4. middle part also divide the hair on the head with a vertical parting in half. French braid first one half of the middle part of the hair, and then the other. Fasten the free ends of the hair with an elastic band, as in the previous case.

5. At the end of the weaving of the “Double Drop” braid, simply comb the hair at the back of the head and leave it loose.
Weaving braids: how to weave a dragon braid


1. Before weaving the braid with a “dragon”, tilt your head and comb your hair against hair growth - in the direction forward.


2. Start weaving a French braid from the back of your head to the top of your head.


3. From the crown, continue to weave a simple braid, the end of which is secured with an elastic band.


4. The last step on how to weave a dragon braid is to roll up a simple braid and secure its end under a French braid.
Spit "Petals"

1. Comb your hair. Separate the hair on the left side of the head with a diagonal parting from the hairline on the right side of the head to the left ear.
2. Braid the separated section of hair into a French braid.


3. Separate a section of hair on the right half of the head in the same way. It will start from the French braid on the left half of the head and continue to the right ear.

4. Braid the second French braid on the right half of the head.

5. Thus, alternately braid the pigtails on the left and right on the head and reach the top of the head.

6. From the top of the head to the back of the head, you need to leave a wide vertical strand of hair. Around her, weave all the hair into French side braids.

7. Braid the vertical strand with a separate braid.


8. The final stage of weaving the “Petals” braid - on the back of the head, combine all the hair into one simple braid or ponytail and tie it with an elastic band. You can make several thin simple braids.
Weaving braids: how to weave a braid "Crown"

1. Weaving the braid "Crown" begins with combing from the crown in the direction of hair growth. Distribute them evenly in all directions.

2. From the back of your head, begin to French braid, gathering the hair growing from the top of your head to the hairline at the back of your head.
3. In the process of weaving the Crown braid, move around the circumference of the head in a clockwise direction.

4. Having reached the back of the head, where the weaving began, fasten the loose hair with an elastic band and hide it under the weaving.

5. Hair can be decorated with decorative hairpins and flowers.
The method of weaving braids "Mesh"
1. First, comb your hair. The method of weaving braids "Grid" begins with separating a rectangular strand from the middle of the forehead and fixing it with an elastic band.

2. In each direction, separate 2-3 more strands of a similar shape from it and secure each of them with elastic bands.
3. Divide each resulting tail into two parts.

4. Connect parts of adjacent ponytails into new ponytails and secure them with rubber bands too.
5. Tails near the ears do not need to be divided into parts. Combine them entirely with the adjacent, higher strands from the ponytails.

6. After the second row of elastic bands appears on the head, throw all the ponytails forward (on the face).

7. In the center of the head in the crown area, separate a rectangular-shaped strand, slightly smaller than the very first strand.

8. Connect the new strand to the halves of the neighboring strands and secure with an elastic band.
9. To the sides of them, continue the already familiar weaving.
10. You should have the third row of elastic bands, and the number of ponytails should equal the number of ponytails in the first row.

11. Comb your hair at the back of your head. Spray your hair with hairspray.
Weaving braid "Chamomile"
1. Comb your hair. Divide your hair with a vertical parting into two sections.
2. Divide each part from the crown with radial parting into four parts.

3. From the crown along the parting, begin to weave a French pigtail. Braid to the end, make a turn and start weaving a pigtail from the second part. At the crown, gather your hair into a ponytail.

4. Begin weaving the Daisy braid from the top of the head to the next French braid on the same half of the head. Do everything in the same way, with a turn to the next part of the hair.

5. Do the same weaving on the other half of the head.

6. Combine all loose hair into one ponytail or into a simple braid at the crown.
Braids "Shells"


1. Comb your hair. Divide your hair with a straight vertical parting into two parts.


2. On each side of the head, braid simple pigtails above the ears.


3. Twist each “Shell” braid in a spiral and reinforce with hairpins.


4. Decorate the "shells" with decorative hairpins or flowers.
Weaving method "Air cross"
1. Comb your hair with a brush. The “Air Cross” weaving method begins with dividing the hair with a vertical parting into four equal parts.

2. On each half of the head, make another diagonal parting - from the center of the back of the head to the top of the auricle.

3. Start French braiding on the left side of your head. At the same time, grab the hair of only the upper part of the head. The lower edge of the braid should be free, not connected with the hair of the lower occipital part of the head.

4. At the end of the French braid, make a simple braid and secure the loose hair with an elastic band.
5. French braid on the right in the same way.

6. Then begin to weave a French braid on the left half of the head at the back of the head. It will look like a continuation of the pigtail from the right half of the head. Finish with a short, simple braid.

7. Undo a simple braid, which is a continuation of the French braid on the left half of the head. Continue to weave it again, but now in the form of a French pigtail. Weave the hair of the lower right occipital part of the head into it.

8. Decorate two loose ponytails or simple braids on each half of the head with decorative elastic bands, it is possible with flowers.
Spit "Snail"


1. Comb your hair. Tilt your head slightly forward and comb your hair again in the direction of its growth, i.e. all hair should lie from the crown in the radial direction.


2. Start French braiding from the top of your head. Grab new strands of hair always from one side only.


3. Braid the "Evidence" braid in a spiral until the hair runs out.


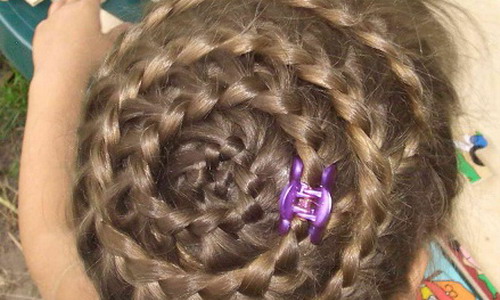
4. Loose hair can be secured with a ponytail or a simple braid. Hide a simple braid under the occipital strands braided into a French pigtail.
Tail with a "snail"


1. Comb your hair. Make a tail in the occipital-lateral part of the head.


2. Separate a third of the hair from the tail and weave a simple pigtail out of them.


3. Twist the pigtail in the form of a spiral at the base of the tail and pin it with hairpins.


4. Depending on your desire, you can decorate the tail with a "snail" with decorative hairpins or twist the ends of the tail with electric pliers.
Braided bun
A bun with a braided rim looks very strict and elegant.


1. Comb your hair. Make a low, tight ponytail at the back of your head, secure it with an elastic band. Part your hair over the elastic and thread the ends of the ponytail through the slit.


2. Divide the tail into two equal parts. From each part, weave a simple pigtail.


3. Wrap the braids around the base of the ponytail, which is now in a bun.


4. Fix the pigtails with hairpins and stealth. Make sure that the ends of the braids are well hidden.
swiss braid

The Swiss braid is woven with the help of an assistant.


1. Comb your hair. Make a low ponytail at the back of your head.


2. Divide the tail into three parts and twist the tourniquet from each, ask the assistant to hold them.


3. Weave a simple braid from the bundles. It will look more lush and voluminous than a regular braid.