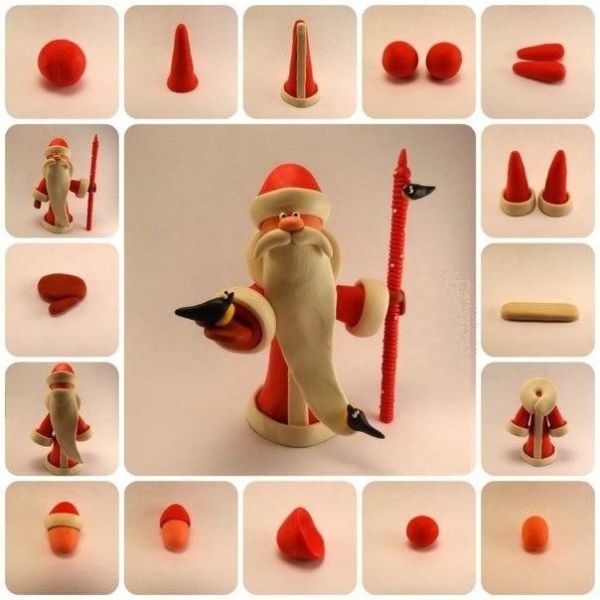
Make toys for the new year from bottles. DIY Christmas crafts from plastic bottles. Crafts from plastic bottles for the garden, vegetable garden and cottages
1. Christmas tree from plastic bottles
Make such a Christmas tree green plastic bottle, scotch, scissors(such that they can easily cut a plastic bottle, paper tube. The only thing that can be added to such a Christmas tree is that you can decorate it with beads by gluing them to the Christmas tree with glue. You can hang a ribbon of rain. You can do this craft with your kids. Next, we do everything as in the photo:
To make a decorative New Year's craft: a Christmas tree from plastic bottles, you will need the following:
- Plastic bottles - 3 pcs;
- Scotch;
- A sheet of thick paper, ideally whatman paper (A4);
- Scissors;
So, cut the bottle as shown in the photo below. That is, it is necessary to cut off the bottom and neck so that a straight pipe from the bottle remains.

Cut each plastic bottle lengthwise into 3 equal parts and only then adjust their sizes so that each subsequent tier is slightly smaller than the previous one. Then each blank must be "dissolved into needles." The neck of one of the bottles will serve as a stand for our future New Year crafts

The next step is to roll the paper into a tube. We insert it into the bottle neck and fix it with tape in a circle.

You can decorate the top of our Christmas tree with a homemade Christmas tree toy or complete the Christmas tree the way we did.
If you want to make a Christmas tree from PET bottles more fluffy, such as in the photo below, when making a Christmas tree, the needles need to be cut as thin as possible (more often).


2. For Christmas trees from plastic bottles you will need green bottles of various sizes and a wooden stick, with a diameter slightly smaller than the neck. The length of the stick will determine the height of the tree and the number of bottles.
Probably done.)
4. Another very interesting option

For the manufacture we need:
- scissors
- green bottle
- cork stopper
- round cup of cottage cheese dessert
- candle
- glue.

Also find foam rubber. We cut off a piece of kitchen sponge for washing dishes.

First, cut the green bottle into squares or circles of different sizes. For the lower part of the Christmas tree, the width of the square should be at least 6-7 cm, the middle one should be about 5 cm, and 2-3 cm is enough for the crown.


Now with scissors we densely break through the edges of the stars. You can call family members for help. In fact, the work is painstaking and requires a lot of patience. Time edging the edges takes about 30 minutes. To make the spruce paws look more natural, we will bring the plastic to the flame of the candle. The tips of our coniferous twigs gracefully wrap down. Here is the finished result.


The turn has come to apply glue and foam rubber. Cut the sponge into small pieces (1x1 cm).

Now we grease the largest spruce paw with glue, apply a cube of foam rubber on top. We drip glue again and cover it with green plastic.

We continue to work until the details run out. Do not forget that we are “building a pyramid”, and therefore, with each subsequent gluing, we focus on the size of the plastic star.


It remains to arrange the trunk of a coniferous tree. Of course, cork will play its role. However, to make the craft resistant to tipping over, we will place the Christmas tree in a small yellow bucket. Cut it out of a round glass.

Lubricate the bottom of the bucket with glue, put the cork barrel in the center. Set aside the part for 2-3 minutes, let it dry completely.

We connect the crown with the trunk. It turned out a slender emerald plastic bottle tree. A true forest beauty.

Outcome
5. By the way, the Christmas tree looks quite creative with larger “branches”
We cut the bottle into 3 parts. Only cuts are made in a circle to the center, straight.
In the center, a puncture is made with an awl and the needles are bent up and down in order. In the lid of a cream or mineral water, a puncture is made into which a skewer of the desired length is inserted.
The parts are strung in descending order, a large bead is placed on top of the glue. The Christmas tree can be decorated with foam, rain, etc.
Glue the Christmas tree to the stand from the disk.
Christmas tree is ready
Hello, friends! Well, have you already started New Year's Eve fuss? Yesterday we finally bought an artificial one, but the truth is that there is still nothing special to decorate it with. Therefore, an interesting idea came to my mind about how to make Christmas decorations with my own hands.
I want to invite you to do this exciting business. So throw laziness aside, call your kids and start creating New Year's!
After all, in any case, you have paper, glue, plastic bottles and other materials at hand. Well, there is, right? That's all we need today. From them you can make the faces of little animals, and carved ones, as well as the Snow Maiden and Santa Claus and a bunch of other wonderful decorations. So do not think for a long time, but rather start the fun process.
Moreover, there will be more than enough ideas for such an undertaking. I, as always, tried and found from the Internet the most best options making toys for the Christmas tree. And if you are ready, then we begin. 😉
Do not forget that in any case you need to use your own imagination. Only in this way you can get amazing and exclusive souvenirs.
DIY Christmas tree toys from improvised materials for children
First of all, I want to offer you interesting ideas for creating jewelry from different and almost any materials that are in every home.
Be sure to involve your children in creativity, because it is they who are most waiting for this magical holiday - the New Year. And they will be extremely pleased to hang toys that they will make themselves on the Christmas tree.
I suggest you make an interesting decoration in the form of a small Christmas tree from an egg tray.
"Christmas tree from an egg tray"

You will need:
- gouache;
- Super glue;
- paper packaging from eggs;
- scissors;
- brushes;
- PVA glue;
- thread;
- pencil.

Manufacturing process:
1. Take a paper egg carton and cut out 5-7 cells. Cut out the details from them as shown in the photo. Cut one of the cells in half, this will be the top.

2. Glue the pieces together to form a tree. Roll the parts that came out of the halves into a cone and glue at the top.

3. Take green gouache and paint the workpiece.

4. From leftovers paper packaging cut, and if necessary, then glue the decorations. Make small balls from a mixture of small pieces of paper and PVA glue.

5. Color in the decorations.

6. Decorate the Christmas tree by gluing all the decor. Don't forget to glue the thread with which you will weigh the toy.

7. Cover the product with a transparent varnish, dry. All is ready!

If you are a lover of expensive wine, then after emptying the bottle, do not rush to part with its cork. Collect them. And in right time they will be useful to you. For example, apply them for the following purpose.
"Wine Cork Souvenir"

You will need:
- 6 natural corks from wine bottles;
- natural twine;
- Super glue;
- scissors;
- confetti, small beads.

Manufacturing process:
1. Carefully cut each cork with a knife into 3 equal parts.

The knife must be sharp so that the corks do not crumble.
2. You should end up with 18 pieces.

3. Now lay out small triangles from these pieces on a hard surface. One triangle should consist of 6 pieces of traffic jams. There should be 3 triangles in total.

4. Glue each resulting triangle.

5. Cut three 40 cm ropes from the twine.

6. Tie each rope in the middle, forming a loop.

7. Take a dried triangle, attach a knot of loops to the top, while smearing the place of their contact with glue.

8. Circle the twine around the entire triangle, and tie the loose ends tightly in a knot.

9. For a tighter fixation, the thread can also be smeared with transparent glue.

10. Do the same with the two remaining triangular blanks.


Well, now try to make beautiful snowmen from iron corks.
"Snowmen"

You will need:
- tapes;
- bottle caps;
- acrylic paints;
- buttons;
- glue.
Manufacturing process:
1. Take three good, not deformed bottle caps. Wash and dry them. Then paint with white acrylic paint.

2. After the workpieces have dried, glue the covers onto the tape, while leaving a loop on top.


4. Cut a small strip from the satin ribbon. This will be a scarf. Tie it over the corks. And glue a button in the middle. bright decoration in the form of a snowman is completely ready.

You can also use not only corks, but the bottles themselves. Only not glass, but plastic. For example, cutting them into halves, and then gluing the parts to the desired length, you get an excellent blank for any toy. Dream up. And then, using paint, revive the plastic blanks.
That's how beautiful and bright you can make a penguin. I think the diagram will make it clear to you.

Or fill the bottles with any New Year's souvenirs, and decorate on top.

You can also cut strips of plastic and assemble a ball.


Here simple idea making small toys out of paper and satin ribbons. Find New Year's pictures on the Internet, print them in the shape of a circle, cut them out. Then glue onto cardboard. Weave the ribbons together and glue the contour with them. Glue the loop.

And here's a paper assembly for you. Also very simple product, just for kids. Print the diagram, cut it out. Assemble the craft along the fold lines, glue. Decorate with beads, plasticine, etc. Glue on the loop. That's all!

"Crystal Ball"

You will need:
- half beads made of glass and plastic;
- foam balls;
- trimming satin ribbons;
- scissors;
- glue gun.
Manufacturing process:
1. Take a foam ball and start pasting it in a circle with half beads. At the same time, you can lay out a certain pattern, or make the craft monophonic.
Remember that the glue must be applied in a thin layer, otherwise the foam will melt.
2. After you glue the entire ball over completely, you just have to embellish it a little more. Just tie a bow of satin scraps and glue to the product. Don't forget the loop too.

In the same way, you can make balls from buttons. Only first paint the foam balls with paint, and only then glue the multi-colored buttons.

A disposable plastic cups Generally a godsend for creativity. They just need to be turned upside down, and pasted over with paper decorations, sequins, duct tape or painted with paints. And as a result, ringing bells, funny snowmen can turn out.


For a change, choose a very simple product - sew or assemble a large Christmas tree bow. You can make many small bows.

I also came up with the idea to combine the purchase option with homemade art. Buy transparent balls for the Christmas tree, carefully unscrew the top and sprinkle sparkles there. Screw the item. Or apply glue on the surface of the ball in the form of any pattern and also sprinkle with sparkles. Very beautiful handicrafts.

Of course, do not forget about needlework from dense threads and ordinary glue.


Moreover, the use of this technology will allow you to make anything.

You can learn more about this technique here.

And here are the instructions on how such a miracle can be created.


Interesting products are obtained from pasta. Usually they are glued together and thus make snowflakes.


And a cool idea would be to decorate unnecessary old light bulbs. They are usually dyed acrylic paints and decorate with knitted, rag and other attributes.

Also, toys can be molded from salt dough, plasticine or clay.

Well, or bake real edible souvenirs.

In fact, there are still a lot of holiday products that you can make with your own hands from improvised means, and you can’t list everything. Therefore, we move on.
Christmas toys, crocheted with patterns
Now a selection for those who are fond of knitting. I found the coolest, in my opinion, crocheted souvenirs. I'm sending you along with the diagrams. Knit, to health!
- "Bell";

- "Herringbone";

- "Angel";

- "Snowflake";

- "Father Frost";

- "Sweetie" and "Sock";

- "Snowmen";

- "Dog";

- "Mouse";

- "Piggy".

Do-it-yourself Christmas toys for the Christmas tree made of felt and fabric (patterns and templates are included)
From crocheting, we move on to sewing from felt and any other fabric. Guys, this time I won’t explain to you what and how to sew, I’m sure you already know all this. After all, the main thing is to find patterns. That's exactly what I'll help you with.
Loaded up a variety of options. I kindly provide them to you. Save, cut and start sewing.


Master class on making a star on the top of a Christmas tree from paper and cardboard
Well, now let's start making almost the most important attribute of a green tree - a star.
Of course, you can choose another way to make it, but I really liked the following magical transformation.
"Shiny Cardboard Star"

You will need:
- shiny cardboard;
- scissors;
- glue gun.
Manufacturing process:
1. Take cardboard and cut out strips of the same width and length from it.

If your cardboard is shiny on only one side, then first glue two sheets of cardboard together so that both sides are shiny.

3. Now bring the free ends of the strips together and glue them together as shown in the photo.

4. Pin the side strips together. You should get something like this.

5. Repeat steps 1 to 4, that is, glue another exactly the same part.

6. Connect and glue the two blanks together so that you end up with an eight-pointed star. Your bulk star at the top of the spruce is ready.

I think that such a masterpiece will bring a lot of pleasure, especially when the lights will flash on the branches and the star will also sparkle with new colors.
Christmas tree toy 2019 in the form of a symbol of the year of the pig
Do you remember what year is coming? That's right, Year of the Pig. So do not forget to appease the Mistress and make souvenirs in the form of funny pigs.
"Pig made of colored paper"

You will need:
- double sided tape on foam;
- semi-cardboard pink and red;
- black marker;
- pencils;
- markers;
- glue;
- scissors.

Manufacturing process:
1. Take a pink semi-cardboard and cut out many strips from it 1 cm wide and 7 cm long.

2. Now, using a pencil or scissors, twist each strip.

3. Apply glue to the top of one of the strips, and attach another strip on top. Thus, glue the strips in a circle.

4. As a result, you should get such a blank.


6. Now cut out a long pink strip 0.5 cm wide.

7. Twist the strip so that you get a curl like a pig's tail.

8. Glue the tail to the ball.

9. Cut out two circles of different diameters and ears from half-cardboard. From red paper, cut out two small circles - these are the nostrils.

10. Glue a piece of double-sided tape on a circle of smaller diameter. Attach it to the big circle. Use glue to glue the "nostrils".

11. Draw eyes with a black marker and draw the contours.

12. From red paper, cut out two strips 2 cm wide, 5 cm long. Paint them all with the same black marker. This will be a scarf.

13. Glue the scarf to the back of the pig's head. Then glue the head to the body (3D ball). And don't forget to cut and glue the ribbon loop.

Agree, it's very easy craft and available for children's creativity.
Step-by-step instructions on how to make a New Year's toy from cotton wool
And ahead of us awaits detailed wizard class to create another Christmas decoration in the form of a bright cockerel. We will make it from ordinary cotton wool.
"Wadded Cockerel"

You will need:
- cardboard (dense, but cutting);
- cotton wool (from a pharmacy, regular in a roll);
- cotton pads;
- threads are white;
- potato starch;
- half-bead eyes in black;
- tailor's pin (with a loop at the end);
- paints for painting.
Manufacturing process:
1. Take the cardboard and draw the outline of the cockerel on it. Cut it out.

2. Unwind the cotton wool from the roll and tightly wrap the cut out contour to the legs with it.

3. Now wind the thread over the cotton. Do the same with the leg.


5. From cotton pads cut out wings (4 pcs.) and details for the tail (4 pcs.).

6. Cut out cotton pad one comb and two details per beard.

7. Cook a starch paste and coat our cockerel figure with it. Then wrap our product with thin pieces of dry cotton wool. Lubricate all irregularities with a paste. Next, soak all other parts with a paste and carefully attach them to the cockerel. Form folds, fluff the tail, additionally you can make a thin strip of cotton wool and stick it around the neck. Glue on the eyes.

8. Dry the product upside down (hang on the thread that we left). And then paint to your liking. Cut the thread and insert a pin, thread an elegant rope.

Use this technology to make other animals, fairy-tale heroes and characters.
Christmas tree toy "Garland" from plastic bottles
Now we will make a decoration in the form of a garland. Moreover, the garland will not be simple, but from plastic bottles. How do you like this idea? Personally, I'm delighted.
"Flower garland"

You will need:
- plastic bottles with caps;
- paints in spray cans;
- scissors;
- electric garland;
Manufacturing process:
1. Cut off the tops of the bottles. Make cuts to make a flower.

2. Round the petals and paint the blanks in any color.
3. While the flowers are drying, make cross cuts in the caps of these bottles. Insert light bulbs from an electric garland into the cuts.

4. When the blanks are dry, screw them to the lids, spread the product over the Christmas tree and turn on the electric garland. Enjoy the creation!

Well, a simple manufacturing option garlands of icicles Crafts for the Christmas tree from polymer clay
I will briefly tell you what figures can be molded from clay. You can also take plasticine as a material.
Here it is important to come up with a hero, mold the details, then put them together, well, make a loop.
Here are a couple of patterns for sculpting winter characters.
- Father Frost;
- Monkey;

- Girl;

- Snow Maiden;

- Piggy.

And options for finished work.


Video selection of the best toys for a Christmas tree made of wood
Well, if you are fond of woodworking, then you will be interested in the following story. It contains ideas for creating wooden toys at home. So watch and create. By the way, such souvenirs are perfect in quality.
And this is where I end today. I look forward to your comments! Am I helpful and creative? 😀 I think that it is undeniable - "yes".
I wish you to make what you like and decorate the Christmas tree with homemade toys together with the kids. With coming!
Making crafts for some people is a real pleasure. And it's especially nice to do it before the New Year. It is worth noting that New Year's crafts can be completely different. And they are created, as a rule, from those materials that are at hand. Plastic bottles are just such a material that is available in every home. But did you know that you can make wonderful New Year's crafts from plastic bottles with your own hands from them. And just such ideas we have collected in this article.
What crafts to make from bottles
Toys from plastic bottles for the New Year.
Many of you are probably already familiar with the elementary options for such crafts, but how do you like the idea of considering more complex toys? It is somewhat time consuming, but it is also more effective.
Snowman.
The first New Year's craft from plastic bottles to school can be made with your child. As a basis, you need a bottle consisting of a pair - a triple of connected spheres.

Also prepare the felt and thread to match it, the color is not important.
From this felt it is necessary to make a hat with a scarf, for a hat a felt rectangle is sewn along the cut line, and tightened with a cord or thread from above.
Any paint will paint the bottle white. We glue the cap to the cork, and tighten the scarf on the neck - the narrowing between the spheres.
If you glue tight balls from cotton pads and glue them in the middle of the body, you will get handles.
Eyes can be glued purchased from a needlework store, and buttons, nose and mouth can be painted with any paint.
Such a snowman on any Christmas tree will look very elegant.
Surprise in a box.
For the base you need a bottle without ribbing and without bends. If the neck is cut off, then in the work we use the remaining high part.

The bottom needs to be covered with artificial snow and in the center on a thin stick (for better stability) we place a snowman, also homemade, can be sewn using the soft toy technique.
From above we close our box with the bottom from another bottle of the same diameter. You can secure them with double sided tape.
On the connection line, you can stick an elegant ribbon.
The surprise is that when you shake the box, the snow begins to fall on the snowman.
closed tunnel.

As in the previous version, we cut 2 identical bottles and use only the upper parts with necks, only one is longer, the other is shorter.
At the bottom of the long part we place a felt toy in the form of a snowman, tightly connect both parts of the bottle, they should hold tightly.
We close the plugs with tinsel / rain, so that they would not be visible.
Like this christmas toy- a bauble.
Animals.
Here we need bottoms from bottles that are identical to each other. We connect them into one fixed part, you can use double-sided tape.
We paint the resulting part with white, after drying we paint her ears, nose and eyes, draw paws, and now she turns into a white teddy bear.
From black bottles in the same way, you can make a penguin.

Christmas tree.

It will require 3 green PVC bottles, and scissors with tape.
The bottoms and necks are cut off from all three bottles, and the even tubes obtained, having cut one of them, are twisted into a thinner tube and placed on a stand from one of the necks.
The remaining 2 are cut into rectangles 3x6 cm.
From the folded edge we cut the fringe, preferably from 1 to 5 mm.
Now we glue these blanks with fringe with adhesive tape around the tube to the stand.
We glue the next tier on top of the adhesive tape that fixes the previous tier.
We remember that the lower branches of the Christmas tree are longer, and the upper ones are shorter, we are also building our Christmas tree.
Finally
Of course, these are not all New Year crafts made from plastic bottles. In our article, only a part of them was given. A variety of toys from plastic bottles depends only on your imagination. Do not be afraid to turn it on at full power and be creative to the fullest, attract children, they will definitely serve you more than one interesting idea for crafts!
Material courtesy of svoimi-rukamy.com – Read original
You may like:
- Drawings on the windows for the New Year 2018 with toothpaste, ...
- Crochet knitted rugs: interesting models, patterns and ...
Plastic bottles accompany us throughout our lives. Most often, after emptying, we simply throw them away, not even suspecting what miracles of creativity can be practiced with ordinary plastic containers. Before the New Year, you still have time to save up plastic bottles to create marvelous decorations from them with your own hands.
New Year's crafts from a plastic bottle
Ideas for New Year's crafts from plastic bottles just a mass. And the simplest thing is decorating, in particular, plastic bottles with your own hands. Here are a few options for decorating plastic bottles, which are not difficult to make with your own hands.
New Year's bells
And here is a very simple example New Year's composition from plastic bottles, which even your child can make. Just imagine how much joy the realization will bring to him that he personally put diligence and a hand in creating a festive mood in the house on the eve of the most important celebration.
We start by cutting off the bottoms of small (0.5 liter) plastic bottles. You need to cut off about a third of the bottle. We cut the petals of these parts, not forgetting that the edges of the plastic are quite sharp and you can cut yourself on them.

We sharpen the petals, twist them with a knife blade, give the shape of a bell. With a metal knitting needle heated over a fire, we make 2 holes in the bottom of the bottle. We need them to secure the loops for which we will hang finished decoration on the tree

We paint our future Christmas decorations. Gold paint looks best - it contrasts perfectly with the green branches of the Christmas tree, in addition, it is golden bells - one of the symbols of the New Year.
Plastic bottles are used everywhere. As a rule, empty bottles immediately go to the scrap. However, if you have imagination, free time and desire, you can create stylish and unusual crafts based on them. In addition, the New Year is approaching, and Christmas tree decorations are quite expensive. So why not make them yourself using used plastic bottles, available materials and tools? In this article you will find how you can make DIY Christmas crafts for 2018 from plastic bottles, helpful tips and recommendations.
Delicate bells
Bells are one of the most popular symbols of the New Year and Christmas. It is believed that they bring happiness and good luck to the house. Therefore, they must be present in the festive decor. Such jewelry can be purchased at the store, or you can make a bell from a plastic bottle. To create a bell you will need simple materials and tools that can be found in every home. For decoration, you can also use various materials, such as rhinestones, beads, ribbons, nail polish or sparkles. Decor can be bright or subtle.
Materials and tools:
- Plastic bottles of various sizes.
- Scissors.
- Paints and brushes.
- Several types of nail polishes.
- Stationery knife.
- Candle.
- Awl or thick needle.
- Various decorative elements.
- Glue gun.
Most often, bells are made in pairs. Therefore, you will need at least two plastic bottles of the same size. The neck should be cut off from plastic bottles, after which you can proceed to coloring them. The height of the bell can be absolutely any, and depends on the size of the bottle, as well as on the distance at which the base is cut off. Then you should jinx the cut line. To do this, the easiest way is to hold the bell with the lower part over the candle flame. This must be done carefully so as to only slightly warm the bottle. Otherwise, it may be deformed.
It is recommended to give preference to bright colors and rather large ornaments. For this, it is not necessary to use paints. To make the bells bright and the lines thin and neat, you can use nail polishes instead of paint.
If you plan to decorate the bells with ribbons, you should make small holes in them. To do this, it is best to use an awl or a thick needle. In order for the tool to better enter the plastic, and also to leave a neat hole, the awl should first be heated over a candle. An additional hole should be made on top of the bells in order to attach a ribbon or rope to the bell, for which it will be attached to the Christmas tree.

You can decorate these bells in any way. Openwork braid, bows, ribbons, sequins, rhinestones, beads and other decorative elements will look great. The use of only lace and bows in combination with the painting of a bell in light currents will make such crafts incredibly delicate and beautiful. For those who love bright Christmas decorations, you can use tinsel, a large amount of sparkles and shiny sequins for decoration.
Christmas ball from a bottle - video
Snowflakes
The snowflake is a symbol of the New Year and is traditionally used to decorate the house and the Christmas tree. Delicate snowflake to decorate the Christmas tree original craft for the New Year from plastic bottles. Most often, plastic bottles are simply thrown away only for use. However, if you arm yourself with simple tools and imagination, you can make unusual snowflakes on your own that can decorate a Christmas tree, curtains, walls and other elements of festive decor. Snowflakes are made from the bottom of a plastic bottle, so for a large number of blanks you will have to collect bottles in advance.
Materials and tools:
- Plastic bottles of various sizes in transparent, blue or light blue.
- Stationery knife and scissors.
- Paints.
- Thin tape.
- Nail polish or oil paints.
- Tassel.
- Awl.
- Decorative elements, such as sequins, beads, beads, sequins and others.
First you need to make blanks. Of the entire plastic bottle, only the bottom is used to make a snowflake. It is most convenient to cut off the bottle with a clerical knife, and then trim the edges with scissors. Using an awl, it is necessary to make a hole in the workpiece, which will be used to attach the tape. This will allow you to hang the finished snowflake on the Christmas tree.
To apply a pattern on snowflakes from a plastic bottle, you can use white or blue paint. The choice of paint color depends on the color of the base. For a transparent bottle, any color of paint will work, but for blue or blue, it is best to use white paint. To make the drawing more vivid and the lines thin, it is recommended to use nail polish instead of paint. Additionally, you can cover the whitewash with glitter varnish. This will give it smoothness and shine.

To hang a toy on a Christmas tree, you need to attach a ribbon to the craft. If you hang a few snowflakes on long ribbon, you can make an original garland based on such snowflakes to decorate windows, walls or a Christmas tree.

Volumetric Christmas toys
Many people prefer to use to create stylish and unusual crafts to decorate the Christmas tree, improvised materials, for example, plastic bottles. This allows you to make exquisite things, save money, and also give new life unnecessary things. One of the most popular materials for creating Christmas decorations are plastic bottles.
New Year's toy from a plastic bottle can be different material depending on the size of the bottle itself. Therefore, plastic bottles can be used to make toys for decorating the Christmas tree at home or outside. Making such toys is quite simple, so even small children can be involved in the business.
Materials and tools:
- Plastic bottles of the same size and color.
- Small satin ribbons.
- Stationery knife, scissors.
- Double-sided tape.
- Enamel paints or nail polish.
- Brushes for paints of different thicknesses.
- Decorative elements to taste.
First you need to make blanks for toys. For the manufacture of toys, only the bottoms of the bottles should be used, so they must first be separated from the bottles. The easiest way to do this is with a utility knife. For one toy, two bottoms are required.
On the inside of each half of the toy, you should draw snowflakes, flowers or other ornaments. You can use paints of any color. Finished blanks should be connected in pairs, and attached with double-sided tape.

The original idea is to fill the toys with tinsel, confetti, sweets or other decorative elements.

Using an awl, make a hole into which you need to make satin ribbon or twine. This will allow you to hang the toy on the Christmas tree.
How to make a Christmas tree from a bottle - video
Christmas tree bells
It's hard to imagine Christmas tree no round balls. They can also be made from plastic bottles. For this, bottles are used that have round part near the neck.
Materials and tools:
- Plastic bottles with round necks.
- Gouache of various colors.
- Paint brushes.
- Tinsel.
- Sequins.
- Double sided tape.
- Sequins, sequins and other decorative elements.
First you need to make the bases for the toys. To do this, you need to cut off plastic bottles so that you get semicircular toys. The resulting toys should be painted with gouache, oil paints or nail polish, especially if the bottle is white or transparent.
Additionally, you should decorate the toy with tinsel, which is best attached with double-sided tape. Also, balls can be decorated with glitter, sequins, beads and other decorative elements. You can hang the balls on a ribbon, twine or thread.

Original crafts from plastic bottles for the New Year with your own hands will allow you to stylishly and unusually decorate the Christmas tree, as well as get the most out of making unusual crafts.
Santa Claus from a bottle - video