Dress of a figurative silhouette pattern from silk. Modeling lesson: dresses for different types of figures. A-line dress with sleeves
The style of the dress, narrowed at the top and gradually expanding towards the bottom, is suitable not only for perfect figure. With the help of such an outfit, it is possible to hide many flaws. That is why he is so popular among obese and thin women. Moreover, a self-sewn a-line dress has no less presentable appearance than one bought in a fashion boutique.
The style of the dress, narrowed at the top and gradually expanding towards the bottom, is suitable not only for the perfect figure

What is necessary:
- pencil;
- graph paper;
- centimeter;
- scissors;
- the cloth.
Pattern construction:
- Measure the circumference of the chest and divide the resulting number by four.
- Mark this value along the top edge of a sheet of paper.
- Now measure the distance from the shoulder to the armpit.
- Make a mark on paper and draw a perpendicular segment from the first mark.
- Take measurements of the circumference of the waist. Divide the resulting number by four.
- Make a mark on the left side of the sheet of paper.
- Measure the distance from the chest to the waist and mark this point on a perpendicular segment.
- Connect this point to the waist mark, thereby obtaining the shape of a trapezoid.
- Draw a neckline
- Mark on paper and the length of the future dress.
- Draw a straight line from the waistline to the very bottom, slightly expanding.
- For the front of the product, draw a similar drawing, but additionally make grooves.
- To do this, draw a straight line from the beginning of the neckline to the bottom of the armhole, add another five centimeters and put a dot.
- Draw an isosceles rectangle, the base of which should be equal to two centimeters, from this point and directing to the side cut.
The finished pattern is transferred to the fabric. You can download ready-made patterns for free on the site.
Loose jersey A-line dress step by step (video)
A-line dress for the full: how to cut
Cut out a dress for fat woman not as difficult as it might seem at first. Universal pattern can be adjusted to any size. It is enough to take all the measurements.

Step-by-step instruction:
- Fold the fabric in half, but do not combine the edges, but simply arrange them parallel to each other.
- Leave a little space from the edge to the fold, where in the future you will need to place the details of the shelf and back.
- Make allowances of one centimeter on the sides, front, elbows and shoulders.
- Bottom seam allowance to make about three and a half centimeters.
- Mark the fabric on the sprout, neck and rollback without allowances.
- Circle the pattern along curved lines.
Cut the material behind the stroke line.
Sundress-trapeze do-it-yourself
You can tailor an A-line sundress in just five minutes. Sewing such an outfit is trusted even by beginners, since it is impossible to come up with a simpler model.
Progress:
- First of all, take three measurements, including the circumference of the hips and chest, as well as the height of the shelf.
- Fold the fabric in half first. front side inward, and then fold again.
- On the upper edge, set aside a quarter of the measurement of the circumference of the chest and add three centimeters.
- After that, draw a line of armhole depth., The length of which should be twenty-five centimeters.
- Measure the height of the shelf along the fold and set aside a quarter of the measured hip circumference at the same level, add another three centimeters to them.
- Connect two labels to form a base.
- In the corner draw a neck and draw a shoulder.
- Flare the outfit to the bottom.
- Cut, taking into account the seam allowances.
- Sew a couple of shoulder and side seams.
- Process the edges.

You can tailor an A-line sundress in just five minutes
Finish the hem, armholes and neckline with bias tape.
How to sew an a-line blouse
Sewing an A-line blouse with a length difference is a matter of a couple of hours. Despite the obvious ease of manufacture, a jacket or tunic made in this way will look amazing.
Progress:
- Using the basic pattern of a trapeze dress, first of all determine the length of the front shelf and the depth of the neckline.
- Measure from the neck line to the front shelf dewy 45 centimeters and put a mark.
- Draw a line perpendicular to the back and front line.
- Measure down the back another twenty centimeters. This length will be the difference in length.
- With an arcuate line, connect the lines of the back and drop.
- Divide the back and shelf into four identical parts and push these parts so that the distance between each strip is exactly ten centimeters.
- Determine the length of the sleeve by measuring down the resulting length and draw a line.
- In order to form the cuff, draw another line, just five centimeters below the previous one.
- Cut the sleeve pieces.
- Transfer the pattern first to paper and then to fabric.
Sew all details.
A-line dress in the style of the 60s
The classic outfit, invented back in the distant sixties, is popular to this day. It's convenient and Nice dress, which can be worn to work, to a party, even to dinner at a restaurant.
Progress:
- Measure the length of the sleeve and put on paper the value that was obtained as a result.
- Now measure the circumference of the arm, add ten centimeters to the resulting value and put this segment on paper.
- Draw a pair of perpendicular segments along these points.
- Set aside fifteen centimeters from the top line and draw a horizontal line.
- Divide in half and draw a vertical straight line in the center.
- Draw a triangle from the highest point to the lines of descent.
- Divide each half of the sleeve in half again and draw vertical segments along the entire length.
- Draw an arc to the bottom from the right edge to a vertical straight line, which should deviate a couple of centimeters from the side of the triangle.
- Draw the same arc on the left side, but here the deviation should be only half a centimeter.
- To the right of the center of the right part of the triangle and to the highest point, make an arc upwards. The deviation in this case should be only one and a half centimeters.
- Draw an armhole line.
- Cut out the detail. Its right side will refer to the front, and the left to the back.
A-line dress on a yoke: a master class
This outfit looks perfect even without additional details. If desired, it can also be modernized, equipped with a flounce, instead of the usual sleeve, model a raglan.
Progress:
- Measure the length to the middle of the shoulder blade, first from the chest, and then from the shoulder.
- Also measure the circumference of the chest and divide this value in half.
- Draw a rectangle using the given data.
- Draw lines along the shoulder.
- On the right side, round the neckline to the required depth.
- Measure the depth of the armhole and make a mark on the left side.
- Set aside from below and above from the shoulder a segment corresponding to the length of the armhole.
- Round the line, deepening three centimeters in front.
- Unfold all other elements.
- The chest circumference corresponds to the top line of the dress.
- Now draw a length line.
- To expand, set aside seven centimeters.
- Cut out all the details without exception and transfer them to the fabric.
This outfit looks perfect even without additional details.
Stitch and stitch all seams.
How to make an a-line dress for a girl
In order to sew a trapeze dress for a girl, you can use absolutely any pattern that is used when sewing an outfit for adults. It is only necessary to take all the measurements and cut out in accordance with them.
Also pay attention to the fabric. Children's clothing must be soft, pleasant to the touch. The dress can be white, black, red and even pink, but under no circumstances should it cause discomfort. That is why it is not recommended to sew it from gabardine. It is better to use chiffon or satin.
A-line dress pattern (video)
VictoriaI heard that the dress is suitable for pregnant women. Once the sister is in position, so the information is very handy.
Inna
I really liked the 60s style A-line dress. I'll sew one of these days.
A pear-shaped figure is very feminine, but sometimes it brings some difficulties to the owner when choosing a finished dress due to the difference in the girths of the hips and chest. You shouldn't get upset. First, let's figure out which style to choose. We narrow the bottom and focus on the upper part: a boat-shaped neckline, a large collar, a neckline, a bright print in the upper part of the dress, the bottom can be slightly flared, do not forget about the use of contrasting inserts that run along the dress and visually model the figure, as well as a little high waist, heels and matching tights will make you slimmer. We try to avoid decor in the hips, patch pockets, draperies, transverse stripes and large prints.
photo from the site, http://www.chieflady.com/
For an example of modeling, we will choose a simple sheath dress created on a pattern-based adjoining silhouette. The style is interesting in that the model lines forming the silhouette demonstrate the female figure of just the lower type in the best and most advantageous way. Dark inserts running along the side seams will help to visually hide the width of the hips, and the white silhouette, expanding upwards, will bring to the fore the built silhouette. But, here you can’t be too smart with excessive narrowing of the skirt, and if the difference between the girths of the chest and hips is large, it is better to expand the skirt a little to the bottom.


photo from http://www.stylishwife.com/
Modeling. On the details of the back and front pattern, draw model lines of reliefs passing from the armholes to the bottom of the dress through the waist darts, on the back, transfer part of the solution to the middle line of the back, for the greatest fit in this area. Breast tuck open in the armhole, read more about transferring tucks. It remains only to outline the allowance for the slot. If the difference between the circumferences of the waist and hips is large and the solutions of the tucks for fitting are more than 3-3.5 cm each, the tuck must be divided into two, otherwise finished product there will be ugly creases in the waist area.

In the second version of modeling, we propose to expand the skirt to the bottom, make it the so-called A-shaped silhouette, you can also make the dress cut off at the waist.

MODELING OF A DRESS FOR THE "INVERTED TRIANGLE" BODY TYPE
Your strong point is narrow hips and long slender legs. We focus on them. The whole decor, bright prints - down on the skirt. We reduce the width of the shoulders, raglan sleeves will help us here, or the absence of sleeves at all in summer clothes, a dress with a shoulder strap on one shoulder, a Greek silhouette, a loose tunic, a dress with a tulip skirt can become a lifesaver and be loved in your wardrobe. You can afford to wear puffy wide skirts, peplum skirts or trousers, straight-cut dresses, but not too voluminous and wide, with vertical seams or trim.
 photo from sites http://refinedstylefashion.com/ https://ru.pinterest.com/pin/454089574910263523/ http://stylowi.pl/
As an example, let's analyze the modeling of a simple dress pattern suitable for a given type of figurus. It features a fitted, sleeveless bodice and a tulip skirt that adds volume to the hips. The dress is cut off along the waistline, on the front panel of the skirt there are two opposite folds, on the back panel of the skirt a cut is made.
 photo from the site http://snowqueen.ru/
Let's start modeling by applying the basic pattern of the adjacent silhouette of embossed lines to the details of the back and shelves (if you want a better fit or knitted fabric is chosen, you can use the base pattern of the adjacent silhouette). We will arrange the thallium tucks on the front panel of the skirt into folds - cut the skirt part from the end of the tucks vertically down, push the parts apart so that in the upper part we get a gap of approximately 6-8 cm to form deep counter folds. At the bottom, the volume of the skirt will be kept in its original form.

MODELING OF A DRESS FOR THE "HOURGLASS" BODY TYPE
The type of figure "hourglass" is the most feminine, it is he who is rightfully considered the standard to follow and we try to bring our figure closer to it, at least with the help of clothes. Lucky women with this type of physique. The main advice is to focus on the waist, so you will further emphasize your femininity and sexuality. Necklines, bows, pencil skirts, stilettos - this is your win-win look.

photo from sites http://www.asos.com/ https://ru.pinterest.com/NatalieYoung29/

Let's model such a simple dress, in two versions.

photo taken from websites
The model is quite simple at first glance, but with the right choice of fabric and accessories, it is very effective. For modeling, we need a pattern for the base of the adjacent silhouette and a sleeve pattern. The dress is detachable along the waist line, the skirt is expanded to the bottom. Darts for fitting the chest are transferred to the neck: in the first version - darts from the neck are stitched with an allowance outward, a small sleeve with a fold, in the second version - darts on the chest are distributed into folds coming from the neck, there are no sleeves.
Modeling. Step 1 - on the details of the back, the tuck for the roundness of the shoulder can be neglected, because. the neckline of the back is deep enough and widened, but the amount of the opening must be taken from the length of the shoulder so as not to disturb the balance. For the convenience of modeling, we will translate the tuck on the shelf into an armhole. Cut the details of the skirt pattern lengthwise from the darts down.

Next, step 2 of the simulation. Let's outline a new neckline according to the sketch. We will transfer the thallium tuck on the shelf to the neck, and we will also transfer the tuck from the armhole there. Read more about the translation of tucks. When designing a detachable adjacent silhouette, the pattern of the shelf detail must be lowered by 1 cm around the waist, this will give a better fit and prevent it from pulling up when finished. Skirt. We connect the parts of the pattern, obtained after cutting the details of the skirt, so that the darts open to the bottom. We will correct the side sections and the bottom of the product.

Sleeve modeling. A pattern for the base of the sleeve can be taken on our website. First, shorten the length to the required. With the help of vertical cuts going from the edge to the bottom of the part, and the subsequent separation of the parts of the pattern, design an oncoming fold.

In the second version of the dress, the tucks on the shelf are translated into folds coming from the neck. Modeling will be discussed below.

MODELING OF A DRESS FOR THE "OVAL" BODY TYPE (APPLE)
Oval shape (apple). In the era of Rubens, women with this type of figure were the ideal of perfection. The silhouette is visually close in shape to the letter "o". strategy in right choice clothes will emphasize, accentuate the waist, this can be done by choosing a dress that expands slightly towards the bottom, as well as using belts, decorative inserts that make the waist visually narrower, the top of the dress should be somewhat expanded, for example, use a V-shaped neckline, collars. Sheath dresses, wraps, low waist, A-line dresses will suit you.
 photo from sites http://yourmothershouldknow.tumblr.com/ https://ru.pinterest.com/buyerselect/ https://ru.pinterest.com/nordstrom/ http://dresses-photo.ru/ http:/ /jenskie-hitrosti.ru/
Let's take this dress as an example. It is interesting because it has a contrasting decorative line running along the dress. Visually, this very stretches the silhouette and slims. In addition, the dress is loose at the waist and slightly expands towards the bottom, which is undoubtedly a plus for this type of figure. Clear cut lines and a choice of fabric that holds its shape create the right image and collect the figure as a whole. To model this model, we will use the basic pattern-base of the adjacent silhouette, for a better fit.
 photo from the site
Rectangle female figure. For modern models is the most typical. Therefore, when buying ready-made clothes, there are usually no problems, but sometimes you really want something special! That's where our modeling tips and patterns come in handy!)) Women with this body type do not need to try to look like Marilyn Monroe or Sophia Loren, this is not your style. Dresses and clothes in the image of Twiggy, Kate Moss, Nicole Kidman and Coco Chanel herself, that's what we are striving for.
 photo from sites http://ouiliviamoraes.com/ http://my.goodhouse.com.
Modeling takes place on the basic pattern-basis of a dress with a straight silhouette, without tucks. To begin with, we will get rid of the tuck on the back, on the shelf we will complete the depth of the fold, setting aside a distance of 12-15 cm from the middle of the part. Please note that one counter fold is laid at the top of the dress, while at the bottom there are two of them - one-sided, the depths are laid towards the side seams. The lines of the side seams are designed in such a way that an oval silhouette is formed. This model should be long above the knee, otherwise there may be excessive narrowing at the bottom.
Well, our lesson has come to an end, we have learned how to create simple patterns dresses based on a basic pattern, such that beginners can handle modeling and tailoring, we talked about the types of figures. I think now you can please yourself with a new thing. Good luck and be creative!
Dress fashionable style with cuffed sleeves. The owner of such a dress will look elegant and stylish, regardless of age and build.
In tailoring the dress is simple, here it is important to guess with the fabric. If you are just starting to learn tailoring, choose more docile fabrics. For masters with experience, advice is not needed, they will do everything correctly and without prompting.
Soft fabrics are great. A combined dress with sleeves made of transparent silk or lace fabric looks good.
The pattern is given in life size without seam allowances in four sizes. Printed on a regular printer.
Note: Regarding the size - here you should focus primarily on the girth of the chest, since the style of the dress is quite loose and the increases along the waist and along the hips are quite large.
The pattern is sent instantly by e-mail.
Click the button GET A PATTERN- a few simple manipulations and the pattern appears in your email box. It is this method of obtaining a pattern that is the most optimal for today - quickly, inexpensively, without advertising and without problems. When checking your mail, make sure that you have entered the address indicated on the site. You open a letter with a pattern, print it out on a regular printer, glue it, cut it out to the desired size and the patterns for cutting are ready.
Even in exceptional cases, if you have any questions upon receipt of the pattern, we will not leave you and will bring the matter to its logical conclusion.
Note: first print one sheet with a 10x10 cm control square. Check that its sides correspond to exactly 10 cm. Achieve this using your printer settings. Now you can print all the pattern sheets and assemble them into one puzzle, according to the pattern, using narrow adhesive tape or a glue stick.
Before cutting out the pattern pieces, take a tape measure and compare your measurements with the pattern dimensions. Check all girths, length of the product. Determine the optimal size for yourself and cut out the details of the pattern.
CUT DETAILS
Fabric consumption 1.8-2.0m (depending on size) with a width of 1.4-1.5m.
ATTENTION! The pattern is given without SEAM ALLOWANCES! (When cutting, you must add them).
- Before the dress - 1 piece with a fold
- The back of the dress - 2 parts
- Sleeve - 2 parts
- Cuffs - 2 parts
- Front neckline - 1 piece with a fold
- Turning the neck of the back - 2 parts
TAILORING THE DRESS
- Overcast all open cuts during sewing. Each knot after the sewing operation should be ironed (iron, ironed, etc.) - this process is called wet heat treatment (WTO).
- Reinforce the details of the facings and cuffs with an adhesive gasket.
- Process the darts on the front of the dress and on the back.
- Stitch the middle seam of the back to the mark, leaving a place on top for sewing in the zipper.
- Sew the zipper into the center back seam.
- Then connect the back and front along the side and shoulder sections.
- Stitch the shoulder sections of the facings. Finish the neck.
- Prepare the sleeves: stitch the cuts, gather the bottom, sew the cuffs.
- Stitch the sleeves into the armholes.
- It remains to hem the bottom of the dress.
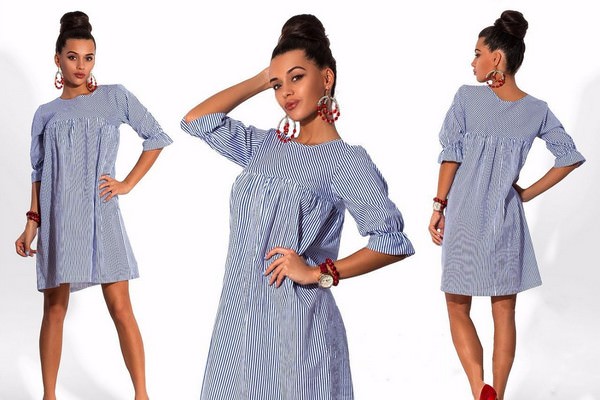
Recently, girls tend to stand out among men and emphasize their femininity. But not every figure will fit a small tight dress. A universal option for almost any situation is A-line dresses. They are models that are narrow on the chest, gradually expanding downwards. These dresses are similar in appearance to the letter "A". The same style resembles a trapezoid.
When did A-line dresses appear? One of the first fashion designers who began to use this outfit in his shows was Christian Dior. In the 1955 collection, he demonstrated in a jacket with a knee-length skirt, which were similar in design to a trapeze. Yves Saint Laurent also began to use a similar style, showing trapezoid options in the spring issue of dresses.
Almost at the same time, Cristobal Balenciaga released a bag dress covering the chest and hips.
Women in the 60s loved the idea of mini A-line dresses. And all because they liked the fashionable solution of "partial openness." In addition, the trend was geometry: a trapezoid, and then futuristic forms. The third reason why A-line dresses were worn is the length of the mini from John Bates and Mary Quant. Sexy mini-dresses became a symbol of that era.

Initially, the A-line cocktail dress did not attract the attention of the beauties of that time. But 10 years later, closer to the 70s, at a time when the term "freedom" sounded everywhere, light dresses with a flared bottom became incredibly relevant. And until now they are chosen by women on almost all continents!
Dress Features
The photo shows that often such outfits have a one-piece shape and a soft or hard skirt. Usually outfits are sewn without sleeves or with short sleeve, long sleeves come across less often. The collars of the A-line dress are varied. This is a stand-up collar, and a shark collar, and a turn-down.

Today, designers are making a lot of changes to the usual style of dresses, so you often come across products with an open neckline of various shapes. Especially the changes affect A-line wedding dresses.

Products with this form are monophonic, multi-colored, made in various colors. Retro trends are relevant, namely a cage, peas, a cucumber pattern, animalistic drawings. Initially, such a dress was something like an everyday uniform. It was quite short and was worn in everyday life. At the moment, fashion designers offer a wide selection of evening dresses for every taste. Wherein evening dresses A-silhouettes are distinguished by an even greater variety of shades and textures.
Who will suit?
It's interesting that A-line dresses will suit almost any figure. This model hides the flaws of female appearance and gives harmony. Ideally, the outfit sits on slender and tall women with a “slender column” figure type. In it, the girls look even more dazzling and fragile.

Owners of feminine stylists are also advised to wear these outfits. They are able to divert attention from the hips and full legs, hiding these shortcomings. If it comes to the “inverted triangle” silhouette, you can easily hide such disproportion under a long outfit.
Ideal for summer and warm A-line dresses. Girls whose figure is close to the shape of a "rectangle" can wear a dress without any problems, because it will help emphasize the waist and hide figure flaws. Also long and dress middle length will help to hide a small belly.
As you can see, this style will create an attractive look for almost any girl!
Creating an enduring look
In order to look stylish and attractive, you need to think over the whole look to the smallest detail. Equally important is the hairstyle under the A-line dress. It is necessary to choose a hairstyle depending on the cut and style of the dress. A modest bun is ideal or greek hairstyle. If the dress is sleeveless, you can create romantic curls. A French braid will help to embody an original and sophisticated look. Ordinary tails also do not go out of fashion.

When it comes to wedding attire, you can experiment and create a more extravagant hairstyle. This is careless styling, large curls, wedding hairstyles with weaves, exquisite buns and much more. The styles of such dresses allow you to show your imagination and choose the perfect styling!

There are also no restrictions on girls' make-up. Perfect option- make an attractive and discreet make-up, the shades of which correspond to the chosen outfit.
Wide range of styles
Designers offer an incredible number of styles and variations of this dress. A short dress deserves special attention, demonstrating the beauty of the legs and grace in every movement. This dress can be used in everyday life, as well as for important evening events.

A lace dress will help create a feminine and charming look. Lace can be made in the form of inserts, and designers also create dresses with lace sleeves.
Dresses with a train look original. This is not only a wedding dress, but also a bright formal dress for any important event.

In terms of shades, fashion designers are experimenting, offering beautiful girls a wide variety of colors. Not the first year, red, burgundy, nude, purple, black, dresses with a pattern and prints have been popular. Models with contrasting inserts and color options look original. Dresses in a cage and peas do not lose relevance.
The materials also differ. For the winter period, girls choose warm synthetic, knitted, leather outfits, for spring and summer - satin, suit fabric, cotton and elastane, viscose.
What to wear?
How and with what to wear a dress, each girl must decide for herself. We'll show you how to get the perfect look! First of all, remember that sleeveless business attires in this silhouette are combined with turtlenecks and blouses. Medium and cropped models look perfect with pumps and tights.

You can wear anything over the dress, but look best in combination with the outfit: bolero, leather jacket, cashmere coat. To along with long sleeve choose a vest made of fur. Regarding shoes, you can show imagination. Any sandals, shoes, ankle boots and boots with heels are allowed. It is worth refusing only rough men's shoes.

Casual outfits can be made more expressive with sophisticated accessories. To do this, you will need scarves, scarves, collars, auxiliary elements that make the image original and stylish. As accessories, you can use a long necklace or strings of pearls. Beautiful long gloves For a prom dress, this is the perfect choice. By the way, gloves were an invariable attribute of fashion in the 60s!
Do not forget an envelope bag, a small clutch - they will complete the look.
Fashion trends
Light and sophisticated models of A-line dresses are simple and understandable to us, and suitable for every day. The fashion of the 60s has been relevant for several years in a row, therefore, choosing such a dress for yourself, you definitely can’t go wrong. We advise you to wear such dresses all year round! They meet the criterion of excellent wearability, which is confirmed by many women.

Donatella Versace demonstrated the usual variation of A-line mini dresses with exquisite prints. While Raf Simons showed lace outfits with floral patterns. The Calvin Klein brand offered several options for such outfits from different materials and different shades made from knitwear and leather. In the Kenzo collection you will find dresses decorated with buttons, and Jason Wu offered women long variants the usual gray and black shades. The brands Dolce Gabbana, Chanel, Fendi do not lag behind fashion, offering checkered, red, with roses, emerald dresses with patterns.
Outfits for lush beauty

Can't be ignored beautiful women with large volumes. Designers present for fat girls with and a wide variety of models of these dresses. This style perfectly hides curvy hips and excess weight at the waist. Also, the A-line draws attention to the large bust and diverts attention from the stomach and legs. To enhance the influence of the style, add a neckerchief or necklace to the top.
Perfect style for a wedding
Wedding dresses of this style have a narrow and close-fitting top that perfectly highlights the chest and waist, as well as a beautiful long hem that gradually widens downwards. This silhouette is chosen by fabulous queens and princesses!

A-silhouette is considered the most suitable for all female figures. It is classic, and is able to make any bride attractive and slim. If there are extra centimeters at the hips or waist (none of us are perfect), choose Wedding Dress, flared down. Suitable style and the thinnest brides, as he will visually give them more volume.
The narrow fitting top perfectly supports the back, a woman in such a dress will have just a royal posture. A variety of finishing fabrics, as well as decor - beads, stones, rhinestones, lace, embroideries allow each bride to choose the right option! If you want your wedding ceremony to be fabulous, and your dress to be remembered for a lifetime, choose an A-line dress!
Building a base pattern is milestone in the creation of clothing, it is on its basis that the product is modeled (giving it uniqueness). There are various cutting systems and different methods for constructing basic patterns, professionals can use several of them when creating clothes.
In this article, I SHARE MY EXPERIENCE in building a pattern for the base of a dress straight silhouette on a conditionally standard figure according to the cut system "M. Muller and son", this system has stood the test of time and is still popular.
The construction of a dress pattern with a straight silhouette is relatively simple, because. due to the absence of traveling tucks, its construction requires less calculations compared to dress patterns of adjacent silhouettes.
(P, cm),
straight silhouette (with sleeves):
To the height of the armhole at the back (Vpr.z) + 2÷3;
To the width of the back (Ws) + 1.5÷2;
To the width of the armhole (Wpr) + 2.5÷3.5;
To chest width (Wg) + 1.5÷2
(cm), removed from the human figure:
- Chest girth (Og) = 85,
- Waist circumference (From) = 62,
- Hip circumference (Ob) \u003d 95,
- Length of the back to the waist (Dts) = 44,
- Product length (Di) = 100,
- Chest height I (BgI) = 34,
– Waist length in front I (ДтпI) = 56
Estimated measurements (cm),
with Og more than 80 cm:
- Armhole height at the back (Vpr.z) * \u003d Og / 10 + 10.5 \u003d 85/10 + 10.5 \u003d 19,
Vpr.z + P = 19 + 2÷3 = 19 + 2 = 21;
- Hip height (Wb) \u003d Vpr.z + Dts \u003d 19 + 44 \u003d 63;
- Neck width at the back (Wsh.z) \u003d Og / 20 + 2 \u003d 85/20 + 2 \u003d 6.3;
- Breast height II (ВгII) = ВгI - Шш.з = 34 - 6.3 = 27.7;
- Waist length in front II (DtpII) \u003d DtpI - Shsh.z \u003d 56 - 6.3 \u003d 49.7;
- Back width (Ws) * \u003d Og / 8 +5.5 \u003d 85/8 +5.5 \u003d 16, 125,
Shs + P \u003d 16.125 + 1.5 ÷ 2 \u003d 18;
- Armhole width (Wpr) * \u003d Og / 8 - 1.5 \u003d 85/8 - 1.5 \u003d 9.125,
Shpr + P \u003d 9.125 + 2.5 ÷ 3.5 \u003d 12;
- Chest width (Whg) * \u003d Og / 4 - 4 \u003d 85/4 - 4 \u003d 17.25,
Shg + P \u003d 17.25 + 1.5 ÷ 2 \u003d 19
*measurements that are taken during construction with allowances for freedom of fit (P)
CONTROL:[(Vpr.z+P) + (Shs+P) + (Spr+P) + (Sg+P)] should be equal to [Og/2+P] = [Og/2 + 5÷7.5]
Building a drawing of a basic pattern of a dress with a straight silhouette:
Prepare a rectangle of tracing paper, width Og / 2 + 30cm, length Di + 15cm.
- Base grid. In the upper right corner, stepping back from the top 10 cm, and from the edge 5 cm, put a point O. Draw a vertical line down.
From point O down the line, set aside OG \u003d Vpr.z + P \u003d 21cm; OT=Dts=44cm; OB=Wb=63cm; OH=Di=100cm.
From the points obtained, build horizontal lines to the left: O - top line, G - chest line, T - waist line, B - hip line, H - bottom line.

- Back center line. Set aside 2 cm from point B to the left, mark point B1. From point through point B1, draw a straight line to the bottom line. Mark its intersection with horizontal lines with dots, as in the drawing.
chest line. From the point G1 to the left, set aside G1G2 \u003d Ws + P \u003d 18cm; then alternately put aside to the left: G2G3 \u003d 2/3 * (Shpr + P) \u003d 8cm; Г3Г4=10÷13cm; G4G5=1/3*(Spr+P)=4cm; G5G6=Wg+P=19cm.
CONTROL: G6G4 + G3G1 \u003d (Og / 2 + P) \u003d 49 cm.
The line of the middle of the shelf. From the marked points, build verticals, as in the drawing. The vertical passing through the point G6 is the line of the middle of the shelf.
At the intersection of lines built from points O and G2, mark point O1.

- Back neckline. From point O to the left, set aside OO2 = Shsh.z = 6.3 cm. With a large value of Og OO2, you should take = Shsh.z-0.5 cm. From the point O2 upwards, build a perpendicular 2 cm long, mark the point O3. Connect points O and O3 along the pattern with a smooth line.
Back shoulder line. From point O1 down, set aside O1O4 = 1 ÷ 1.5 cm. Draw a straight line from point O3 through point O4. From the point O4 to the left along the line, set aside O4O5 \u003d 1.5 ÷ 2 cm (with a small size); 0÷1cm (for large size); 1 ÷ 1.5 cm (with an average size). 
- Back opening. Divide the segment G2O4 in half, mark the point P1, draw a horizontal line through P1 (line of the shoulder blades), set aside P1P1 '= 1cm to the left. Divide the segment P1G2 in half, mark the point P2. Construct a perpendicular to the left, mark point P4 at its intersection with the vertical from point G5, set aside P2P3 = 1.3 ÷ 1.5 cm to the left of P2 (the smaller the size, the smaller the value). From point O5 through P1'P3 to point G3, build an armhole line, smooth along the pattern, so that its beginning is perpendicular to the shoulder line.

- On the waistline, mark the points T1 and T2, as shown in the drawing. On the chest line, from the point G6 to the right, we postpone G6G7 \u003d Og / 10 + 0.5 \u003d 9 cm. We draw a vertical line, at its intersection with the waist line, mark the point T4. On the vertical from the point T4 upwards we set aside T4O7 \u003d DshpII \u003d 49.7 cm. From the point O7 vertically down, we lay aside O7G8 \u003d VgII \u003d 27.7 cm.
From the point G5 vertically upwards we set aside G5O6 \u003d G2O4-(1 ÷ 1.5) (we look at the figure, the greater the slope of the shoulder line, the greater the value must be subtracted).

- From points G8 and G5, through points O7 and O6 we draw arcs with radii G8O7 and G5O6, respectively.

From the point O6 along the arc to the right, we set aside O6O8 \u003d Og / 20- (0.5 ÷ 1) \u003d 3.25 cm. From the point O8 we draw an arc with a radius = O3O5-1 = 14 cm, where 1 cm is climbed for landing, this is the difference between the lengths of the back and front shoulder lines. At the intersection of the arcs, mark the point O9.
Armhole shelves. We connect the points O8 and P4 with a straight line, divide the segment in half, mark the point P5. From the point P5 to the left we build a perpendicular with a length = 1 cm, mark the point P6. From point O8 to point G4 through P6 and P4 we draw a smooth line along the pattern, do not forget that it starts perpendicular to the line of the shoulder. 
- Shelf neck. From the point O7 we build a perpendicular to the line of the middle of the shelf, mark the point O10. From the point O10 along the perpendicular to the right, we set aside O10O11 \u003d Shsh.z \u003d 6.3. At large values of Og, O10O11 = Wsh.z-0.5. From the point O10 vertically down, we set aside O10O12 = Shsh.z + 1 ÷ 2 = 7.5 cm. We connect the points O10 and G5 with a straight line, mark O10O13 \u003d Shsh.z + 0.5 ÷ 0.8 cm. Through the points O12O13O11 we draw a smooth line along the pattern.

- Shoulder shelf and tuck. From the point O9 we set aside O9O14 \u003d O11O7 \u003d 3cm. We connect O14 and G8 - this is Right side darts. From the point G8 vertically upwards, we postpone G8O15 \u003d G8O14. We connect O11 and O15 with a straight line.

- Place of tuck on the back. From the point O3 along the line of the back shoulder to the left, we set aside O3O16 = 3 ÷ 5cm. We draw a perpendicular to the horizontal of the shoulder blades, mark point L at the intersection. With the bulge of the shoulder blades and stoop, the dotted lines are cut and moved apart, as a result of which a tuck is formed, the back lengthens. I don't cut because my pattern is for a figure with a flat back.

- Control signs for stitching sleeves. On the back, Kc coincides with point P3. On the shelf from the point G5 vertically upwards, lay G5Kp = (Spr + P) / 4 = 3cm.
Side lines. Along the waistline from the point T2 to the left we set aside T2T5=1÷2cm, from the point T3 to the right we set aside T3T6=0.5÷1cm. From points G4 and G3 we draw straight lines through points T6 and T5 to the bottom line. At the intersection with the line of the hips, we mark points B2 and B3. The intersection of the line of the hips with the middle line of the shelf - point B4.
CONTROL:(B4B3+B2B1) should be more (R/2+3cm). Otherwise, you need to increase the expansion of the front and back along the side lines.

- Bottom line. From point H1 we build a perpendicular to the line of the middle of the back, its intersection with the line of the side of the back is denoted by point H2, from point H2 we draw a horizontal line to the left until it intersects with the side line of the shelf, we mark point H3. We build the line of the bottom of the shelf: a curved smooth line passing from point H3 to a perpendicular to the line of the middle of the shelf.
Offset shoulder line. We raise the line of the back shoulder in parallel by 1 cm. We lower the line of the shoulder of the shelf in parallel by 1 cm.

This is how the pattern looks like the basis of a dress with a straight silhouette, built according to the cut system “M. Muller and Son”.

To check its fit on the figure, it is necessary to transfer the pattern to plain fabric, sew and try on, more about this in the article.