Ribbon bow on the rim. Headband “Flower bow. Bezel in kanzashi technique in stages
Good day, my dear friends! When the time of the holidays approaches (especially the last calls and September 1), such an item as a ribbon bow becomes especially relevant. This accessory is so popular with schoolchildren, mothers and just needlewomen that I could not get around it and decided to dedicate a whole post to bows.
All sorts of bows are actually found in our lives so often that we don’t even notice it - in jewelry, clothes, they are even used as an element school uniform… In general, if you want to learn how to make bows from the most different types ribbons, welcome!
Beautiful do-it-yourself ribbon bows: master classes
In fact, learning how to tie even the most complex bows yourself is not so difficult. Instructions with a large number of photos, which I have prepared for you in abundance today, will help with this. There will be both selections from the Internet and unique master classes specially prepared for you.
How to make satin ribbon bows: step by step instructions
Satin ribbons are the most popular material for creating small masterpieces. Smooth, shiny, relatively inexpensive ribbons have always attracted the attention of needlewomen from all over the world. The material has found application in various fields of creativity, not an exception for steel and decorations based on various kinds of bows.
To create accessories, you can use ribbons of different widths, but it all depends on the chosen design and execution technique. Let's start with the simplest types.
The simplest classic bow
A basic bow that any beginner should learn to make is shown below. For him, you can take both a narrow and a very wide tape - it will turn out from any.
Work process:
- Fold the ribbon over the two halves of the ribbon over the index fingers of both hands.
- Cross the halves and slip one into the other.
- Tighten the product. Ready!

On the basis of such a bow, you can make a chic decoration. It will be enough just to fill it with waterproof glue or shiny acrylic varnish, then attach the rings to which the chain will be fastened.

It will not be difficult to tie the same bow on a fork, with its help it will turn out to be more accurate and even (although you can create a very beautiful accessory on your fingers). There is also a limitation for such an “assistant” - it is useful only when creating very small bows, for larger products you will have to resort to the traditional method.

double tape
The double bow is performed in a slightly different way from the previous one. Two rings of tape and a separately created center, obtained by sealing the edges, are useful for it.
Fold two rings in the middle and sew or glue so that they are in contact with the side parts. After that, the middle is closed with a pre-made part. The design can be attached to a hairpin or elastic band.
Note!
For this accessory, you need to take a medium or wide ribbon; such beauty will not come out of a thin, narrow material. If your choice goes to a width of 2.5-5 cm, then this will be the ideal solution.

A variation of such a bow of two ribbons can be such an analogue: in this case, two rings are superimposed in the middle on each other. You can also experiment with colors - for example, create a red or green bow, or even combine one or more shades in one product.
Try to make more than two layers, take ribbons of different widths and textures. Thus, from one scheme for creating a bow, you can create a wide variety of accessories.

Layered puffy bow
A great option for schoolgirls and not only. Such a bow is easy to put on a hairpin or comb to attach to your hair. It is based on two simple bows discussed earlier.
To fold this, you will need to make a base of two overlapping layers. From the ribbons folded in this way, the back will be obtained. The front is similar to the simplest first bow. At the end, they must be connected with glue or thread. Everything is held together by a central piece.

In this way, you can get more voluminous accessories, like the white bow below. There is one difference here - the basis is not two layers, but three.
Romantic and sophisticated, this addition to the image will please any graduate who wants to indulge in nostalgia. But this option, unlike jewelry for girls, is more adult and feminine, and this is exactly what is needed in such cases.

Twisted bow of 3-4 ribbons
Highly beautiful bow which is good for head decoration. To do this, three or four (or even more) pieces of tape of the same width, but different lengths you need to sew with the sign of infinity and put one into the other. Draw the middle as in a few microns earlier.

Kanzashi
Many beautiful bows are made using the kanzashi technique. This type of creativity came, as you might guess, from distant Japan. There, in this way, magnificent details are created to complement not only everyday, but also festive outfits.
Bow flower
Making such a flower is not difficult, but painstaking. You will need at least 12 petals, which will need to be pre-cut from a ribbon 2 and 4 cm wide (you can take a different width, but not less than 1.5 cm).
First, make the first layer by stringing six wide petals and pulling them together. Put some kind of decoration between the layers and attach the second layer made in the same way. Don't forget the bead in the middle.

Another variation of simple but beautiful petals is located below. Here the flowers come out more pointed.

More graceful White flower created below. In the step-by-step photos, you can see that the petals for the flower are made by twisting the ends inside the middle. Such a bow can consist of either a pair or five or six layers gradually increasing in number of elements.

Bow for discharge from the hospital
Newborns (and children in general) deserve the best! That is why I have found for you a beautiful bow that will suit both girls and boys. For him you need enough long ribbon(at least three meters).
In the middle, make a winding of several layers and then a knot as in the photo. After that, you will need to pull out a few petals formed by previously folded rings.
Why leave such long ends along the edges? The fact is that you will need to tie them around the long-awaited bundle, leaving a beautiful center in front. At one time, I generally purchased a five-meter ribbon - the nurse imposed such beauty from it that we still remember with a smile with the whole family.

How to tie a ribbon bow
Rep ribbon is good because, unlike satin, it is less prone to various kinds of damage. Satin should only be hooked once and that's it - appearance bow is damaged. With reps, such a trick will not work, but it also costs more.
Baby bows
The combination of several types of tapes looks very interesting. In this case, colors are also combined, which, nevertheless, look very organic. The polka dot ribbon is just perfect! Such a bow will decorate the girl's head for a holiday and in everyday life. For him, you will need to connect two tucked parts, as was seen earlier in the master classes. The top will be decorated with a classic variation.

On an elastic band
Collecting a magnificent bow on an elastic band is not difficult. To do this, you will need several layers of bows, decorated as we did earlier. The number of layers is limited only by your imagination and common sense. The difference of this accessory is that under it there is a semblance of crosses with serifs at the ends.
You can connect all this splendor with ribbons 1 cm wide, bandaging the middle. You can attach a bow to the elastic with a glue gun or something similar.

A bright school-themed bow explodes early ideas of what a school accessory should be. It's just a bomb!

Butterfly bow
With the help of rep ribbons, you can even make a semblance of a tie! Yes, the butterfly will turn out small, but very effective. To create it, fold the ribbon, bending the edges under each other, as in the photo below. You will need three of these layers. Under them, attach a longer ribbon so that you can tie it at the back. In MK it is very short, in this form it can be left for a simple accessory.

And here is another fun variation of a bow tie. Nothing more or less bird feathers are used here, connected by a ribbon in the middle. An interesting interpretation of the standard butterfly, isn't it?

By the way, a butterfly bow can also be made from fabric, a master class on this below.


Bows for gift boxes
To tie a bow on gift box you will need not only tape, but also different types of wrapping paper.
big bow
A very large accessory for a very large gift. Such a bow can be made from a ribbon, but it is better to use wrapping paper, which will take a lot for such a work.
Insert a small box into the base of the decorative element. It may be a surprise or it may just be the basis for such an accessory. Place it in the center of the square, which close its edges at the top and bottom. Tuck the free edges as in the photo below (as if wrapping an envelope). Press the middle and wrap it with a small piece of paper of sufficient length. Straighten the edges to make them as fluffy as possible.
This bow can be used on its own or as a decorative piece for a huge surprise.


Beautiful for a gift
The next fluffy bow has an incredible Christmas mood. They literally breathe from him! For this, you will need to fold the ribbon as shown below, overlapping and tying several layers together.
Place a few bows on top of the structure, folded as shown below. Decorate the middle with a beautiful bear in a cap or any other decorative element.

Paper bows: simple, cheap, original. All master classes describe their creation in great detail.


Do you want even more bows for a gift? Read about it in another article.
Nylon bows
Nylon ribbon is traditionally used for graduates and hair decoration. But for other purposes, such bows can be used.
A simple bow on a fork is created in just a couple of minutes. To do this, you take a fork, thread a thin ribbon in the middle, thicker on top of it. Wrap the thicker ribbon around the tines of the fork many times, forming a braid. A thinner ribbon becomes the central part of such a flower.

A semicircular metal template will help to “cut” the petals with a small resemblance of a soldering iron. To do this, two ribbons - nylon and satin - must be folded as shown below. After that, the middle is bent inward and you will need a lot of such petals. They merge into one layer, then another, and so on, until you get a fluffy layered bow that can be used to decorate hair.

In the next accessory, nylon ribbon is used only as an additional accessory, decorating the base made of fabric. You can create such beauty in a few minutes, and decorated with a nylon ribbon, it will look even richer.

The next bow belongs to the gift category, but I decided to put it in this section, because it is made of nylon ribbon. For it, you will need to fold the tape in many layers, and make an incision in the middle, which will need to be tied with a thin fishing line, around which the ends should be tied. The most milestone: you need to pull out all the ends of the folded tape to get a very curvy design.
Such a bow will decorate a Christmas tree or simply decorate an apartment.

A similar accessory can be made from more dense tape and even burlap. It will be more difficult to pull out the ends, but the effect will turn out to be more unexpected and extraordinary.

Photos of other beautiful bows
How are they not made out! In the form of elegant brooches, bracelets and much more. For example, the accessory below will be an interesting addition to a festive outfit.
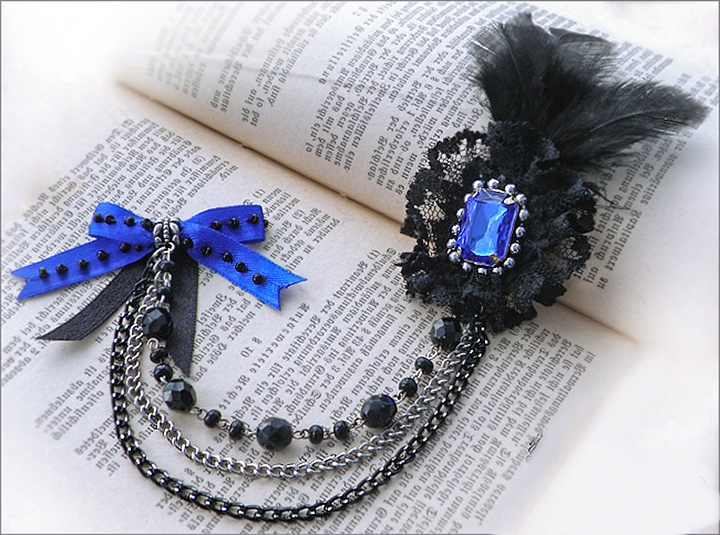

Another lace bow with a bead inside.
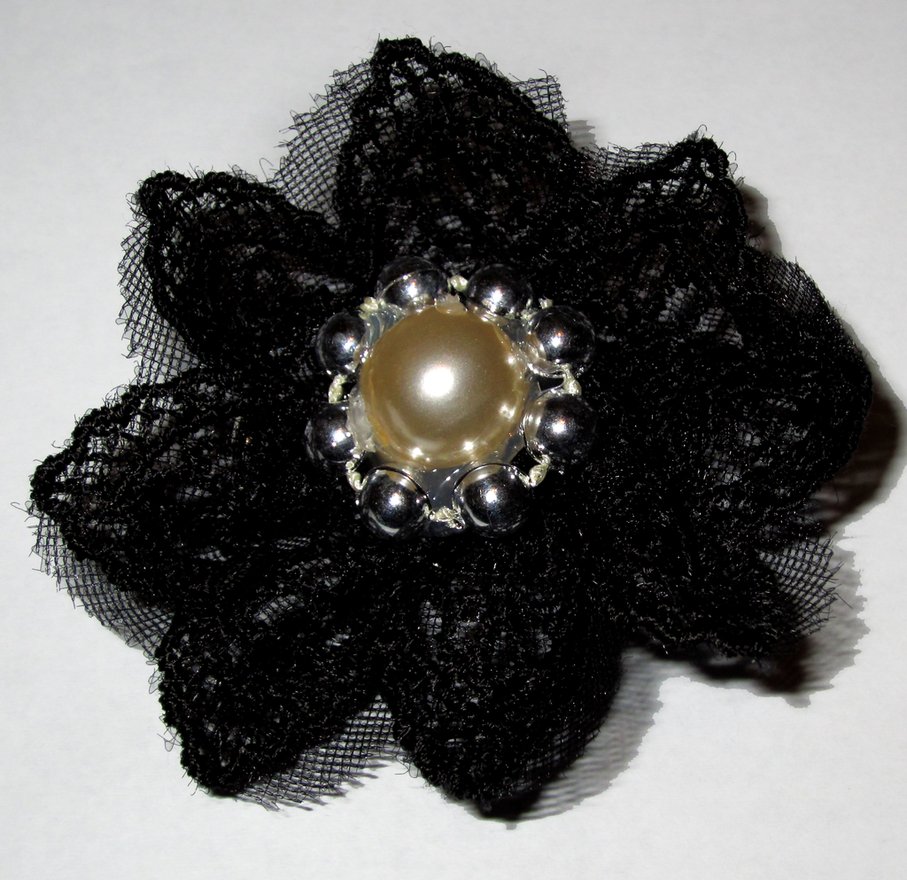
In general, thanks to lace, even the simplest design begins to look more original and festive.


Just look how you can spruce up your pen by adding layers of lace and satin ribbons to it.

A bow on the rim will turn an ordinary girl into a doll hurrying to the ball.


Roses as bows. Great, isn't it?

The bow on the dress looks very impressive and original.


Sincerely, Anastasia Skoreva
At the youngest daughter in the kindergarten at the matinee, the girls were supposed to appear in the form of pupae. And for the doll costume, we needed a large satin ribbon bow on the head. After some thought, it was decided to make a bow from a satin ribbon and tulle on the rim.
To make a tulle bow on the headband you will need:
- bezel;
- tulle;
- satin ribbon 2.5 cm wide;
- threads in tone;
- transparent glue (for example, Moment-gel).
How to make a headband with a bow with your own hands
The bow will consist of 3 layers: the lower, the most magnificent, tulle; middle - from the tape; and the top is also made of tulle.
We start making a bow from the bottom layer.
Cut out a rectangle of 15x35 cm from tulle.

Along the rectangle, in its middle we lay a running seam.

We tighten, forming a jumper on the bow.

We fasten the thread, but do not cut it.
For the second layer of the bow, we take a ribbon 2.5 cm wide. We wind the ribbon with a ring in 3 layers so that when this ring is “flattened”, the distance from one edge to the other is 13 cm. The beginning of the ribbon should be located in the middle of the flattened ring.

We attach the same thread to the tulle, do not cut the ribbon and thread.

We straighten the "petals" and fix in this position.

We cut out a piece of tulle 8x12 cm, assemble it in the same way as the first, large piece, and attach it from above, above the ribbon.

The remaining end of the ribbon is folded in half lengthwise and wrapped around all three layers, combining into one bow. We fix this whole structure with a thread. And only now you can cut both the tape and the thread.

Actually, the bow is ready. It remains to attach it to the rim.
If you have a fabric rim, then you can simply glue the bow to it. I have a “naked”, plastic bezel. Therefore, to begin with, I wrapped the ribbon around the place on the rim where the bow will be located. I glued the ends of a piece of tape together and glued it with wrong side rim. After that, I glued the bow on this fabric piece of the rim.
We drip transparent glue on the tulle in several places and sprinkle with sparkles.
Such a bow looks very beautiful and is appropriate not only as part of a doll's costume, but also in everyday life.

This headband is very simple, but it looks just great on the hair. The product is addressed to coquette girls who are constantly looking for options for new jewelry. Bows are perhaps the most girlish and delicate accessory. It always looks beautiful on the hair, whether it's a ponytail, a braid or a malvinka. And the headband is a universal decoration that even girls with short haircuts. And the hairstyle will always look fresh, fashionable. Doesn't have to grow long hair to try on bows, and this headband with a flirty decor is a direct confirmation of this.
For the actual accessory we need:
4 pieces of white ribbon with blue polka dots - 2.5 8 cm; 4 pieces of dark blue ribbon with white polka dots - 2.5 7 cm;
2 pieces of white ribbon with blue polka dots - 2.5 7 cm; 2 pieces of blue tape - 0.5 25 cm;
1 piece of white tape - 1.2 * 10 cm;
silver color hugger with sharp rays;
semi-bead-crystal of aquamarine color - 1.6 cm;
thin metal bezel, pasted over with white tape or without it.
The color scheme proposed for the bow looks very beautiful. This decoration is suitable for white, blue, blue, black outfit. But, of course, this option is far from the only one. For a little girl more suitable pink or other iridescent and variegated color. And this unique bow is rather an accessory for a schoolgirl. Why not put on a headband with a small bow in the morning before school. The decoration will not cause indignation of teachers, as it looks restrained and stylish.
The presented work is a great opportunity to practice handling the tape. You do not have to create some intricate petals, combine small satin blanks into ornate elements. Everything is extremely simple and clear. You will work with satin strips, which should be singeed, folded and formed into three-dimensional folds, then glued into a single product. Get ready for the fact that any kanzashi product is not made without sharp scissors, a lighter and a glue gun.
Bezel in kanzashi technique in stages
1. Choose accessories for work. Take a look at the list here, or choose your own, no less wonderful color combination. Perhaps, looking into the department of needlework supplies, another thought will visit you, you decide to experiment.
2. The bow will consist of three layers: the first - of four white loops in blue peas, the second - of four blue loops in white peas, the third - and two white loops in blue peas. All loops are performed in the same way, according to the same technique, which is shown in the photo. Fold the strips in half, letting the right side of the tape up.

3. Make 4 identical loops from a 2.5 * 8 cm tape. In addition to the fact that the ends of each strip should be closed, they also need to be gathered on both sides.

4. Make all 10 loop strips for beautiful decoration.


6. Gather a fluffy layered bow by gluing the individual tiers together.

7. This master class shows another type of simple loops that are often used when modeling American bows. But this element is optional. Take thin blue stripes and in each of them close both ends in the center so that you get two fastened rings.

8. Glue the two parts.

9. Glue the resulting rings on the bottom of the bow.

10. Add a few more pieces of fittings: a rim, a thin white tape for winding the middle and a hug with a half bead.

11. Wind the white ribbon around the center of the bow and glue the beautiful aquamarine center. All parts are glued with hot glue.

12. Finally, glue the bow to the hoop.

Despite its simplicity, the decoration on the hair looks very beautiful and elegant. Everyone can make the same product, its cost will be a penny. If creativity inspires you, then you can make the same bows in the shortest possible time for all occasions.

You might also be interested in:
 Kanzashi for beginners, step by step photo lesson,…
Buying beautiful headbands in stores is expensive and not very original. You can do them yourself. Materials and time will be required at a minimum.
It will come out very neat and beautiful, no one will guess that the hair accessory is made by hand.
We will need:
- bezel-base (preferably made of metal);
- satin ribbon of a pleasant color, about 1.5 cm wide;
- thread in color;
- glue gun or any good transparent glue with an elastic texture;
- needle;
- candle or lighter.
Beautiful headband with a bow:
1. Lubricate the base bezel gradually with glue, carefully wrap the winding with a satin ribbon. The metal ends of the rim should be hidden. You can wrap the entire rim once, and so that there is no ugly end, we wind it with a second layer to the place where our bow will be sewn.  2. We make three tape pieces. Two identical and one smaller. The approximate length of the short one is 10 cm. Those that are longer should be 15 centimeters each. Be sure to burn all the edges of the ribbons over the fire. Otherwise, the bow will quickly become sloppy in appearance.
3. We bend a small segment on both sides, sew it neatly with a thread, as shown in the photo.  4. We bend one large segment. We fold these two blanks of bows so that the small one is on top of the large one. We tighten so that it looks like bows. We sew them. Sew on the side of another blank bow from a long piece.


 5. Attach a solid bow to the rim. We wrap in the middle with the end of the tape, which was used to wrap the warp.
 6. With carefully neat stitches, we sew both the bow and the ribbon with which we made the middle. We burn the end of the winding tape over the candle, slip it under our two turns to form the middle, and hem it.
Our headband with a bow for a girl is ready! This is how a mother can make her daughter happy. And an older girl and on her own is able to make this simple decoration with her own hands. Site Non-standard children wishes you success.
All little fashionistas love different headbands and bows. Today I suggest you combine two tasks and make a very beautiful and stylish headband with a bow.
It is not at all difficult to make it, even a novice needlewoman can handle it.
To make an openwork bow you will need:
satin ribbon 5 cm wide (approximately 30 cm)
satin ribbon 1 cm wide
beads
needle and thread in the color of the ribbons.
Let's start making:
We fold the wide ribbon in half so that the sections are in the middle. We sew at the junction and slightly gather, thus forming a bow.

And now we proceed to decorate our bow with flounces made from a narrow ribbon.
We make two stitches per needle, and with the third we sew a shuttlecock to a bow. We cling only the upper part of the bow.


Here is such a folded shuttlecock I get.

The sewn fold needs to be fixed again, so that it does not “walk” along the thread later.
 Sew rows.

We turn.


We hide the ends.

Beads can be sewn immediately, or you can already use a ready-made bow. At your discretion, the beads can be sewn on, or glued with a hot gun.

We attach the bow to the rim with a ribbon.

That's all, the original headband with an openwork bow is ready.
I can imagine how much happiness your little fashionista will have, who received such beauty as a gift.

Get inspired and create.

New Year and others winter holidays just around the corner, but you can still have time to buy something on the Chinese site to give the house conviviality and comfort. We have made for you a top selection of popular jewelry and other products that you can’t do without this holidays. Let's see what interesting products this year can be ordered on the Aliexpress website.