How to make a box from a plastic bottle. A beautiful box made of plastic bottles with your own hands. Materials and tools
Pleasant little things can be created from the most unusual materials and tools. In our master class, we will tell readers about creating such an element as a box from self-decorated plastic bottles quickly and easily by hand.
Master class on creating a box of plastic bottles with your own hands
A box made using such non-standard materials and tools will allow you to keep your jewelry and accessories in order. Let's learn how to do it, because it is for this that we offer you the following detailed master class.
Before starting all work, prepare all the material you need:
- Plastic bottle with a volume of two and a half liters;
- Sharp knife;
- Sheets of thick cardboard;
- Fabric in several colors of your choice;
- Threads;
- Centimeter tailor's tape;
- Glue or glue gun;
- Lighter or candle;
- Thick sewing needle;
- Sharp awl;
- Decorative items such as lace, beads, sequins, rhinestones and so on.
Start creating a decorative box:
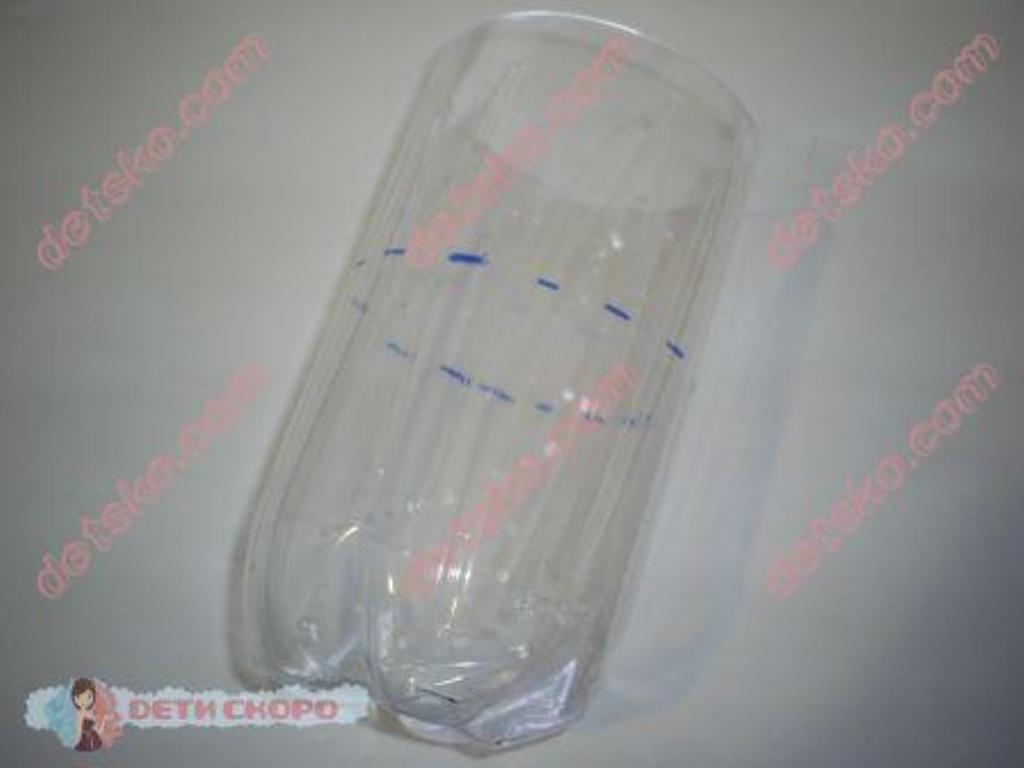
- Take a plastic bottle with a volume of two and a half liters to a height of eight to nine centimeters. At the edges, melt small holes around the entire circumference of the bottle with a hot knitting needle.
- Cut out two circles from thick cardboard sheets. One large diameter of eleven and a half centimeters for the lid of your box and one small circle with a diameter of eight and a half centimeters for the bottom.
- From the fabric that you have chosen as the main decoration for your plastic box, cut out a large circle for the lid with a diameter of about twenty centimeters.
- Then cut out the largest circle for the box itself from the same base color fabric. Its diameter should be about twenty-six centimeters.
- Now, using glue or a glue gun, glue the cardboard circle to the plastic bottom of your bottle.
- Sew a large circle of fabric with threads and gather into a frill along the edge of the canvas.
- After that, insert the base from the plastic bottle into it and tighten the threads so that the fabric is tightly distributed around your plastic base.
- Distribute all the formed folds evenly over the base of the box, and sew the main fabric to the cut-off bottle base. It was for this process that small holes were made around the entire perimeter of the plastic bottle.
- Wrap the upper part of the fabric inward and sew again. Now you have a beautiful blank for your future box.
- Now you need to cover the cardboard cover with a fabric of the main color and sew it with threads. After that, gently sew along the edge of the fabric again to achieve a better fastening of the ruffles.
- Let's start decorating your blanks. Take a fabric in a contrasting color and cut out circles. The size of the lining will depend on the size of your base. The length of the lining will be equal to the circumference of the plastic bottle, the height of the lining will be equal to the height of your box plus seam allowances of about one centimeter or one and a half centimeters. The circle is equal to the diameter of the bottom of the bottle plus a seam allowance.
- Lay the finished lining inside your box. Sew on the contrasting fabric, while carefully pinning it together with the lace. Also sew lace on the bottom of your jewelry box. At the same stage, if desired, you can start sewing decorative beads on the walls of the box.
- Also attach lace to the lid of the plastic box. Cut out a circle from your base color fabric and sew onto the hole in your lid. Decorate it with beads, rhinestones or beads.
- Add a little decoration to the lid of your jewelry box. As a decoration on a plastic bottle box, a voluminous flower. Cut five larger petals and five slightly smaller ones from crepe satin. Burn the edges of the petals with a lighter or candle flame. Then collect all the prepared petals into a single flower.
As a result of such simple manipulations, you will get such an unusual plastic bottle box as in the photo below.

You can include your imagination and creative qualities in order to create unique and diverse options for boxes. This master class provides basic knowledge on the manufacture of this decorative element.

A selection of videos on the topic described
In the final paragraph of our article about creating a box of plastic bottles with your own hands, we recommend that you look at a small selection interesting video on the topic described in the article. We will be glad if the presented material will be useful to you. Happy introduction!
Every girl probably has dolls that are no longer suitable for games, but it's a pity to throw them away. In order not to say goodbye to your favorite things, make a doll box with your own hands with your daughter. On the face of it simple toy Barbie in a voluminous outfit, but few will guess that this is actually a treasure vault. In childhood, all children love to collect different gizmos, and if you make a box, it will put things in order in your daughter's room.
In fact, making a doll is quite easy. Therefore, this toy is perfect for sharing entertainment with a child. To work, you need to take the following materials:

 First, you should try to make a box with a Barbie doll. After collecting the materials, you can proceed to work. Lovely doll box of satin ribbons master class, description of the process:
Measure the height and circumference of the top of the plate. According to the size of the bottom of the fabric bowl, cut out four circles without an allowance from foam rubber and two from satin with an allowance of one centimeter. Sew mugs together from these materials.
Cut out four rectangular shapes from foam rubber: a width suitable for the height of the dish and a length equal to the circumference of the top of the bowl. From the satin, cut out two rectangles larger than the foam rectangle, four centimeters wide and two centimeters long. Sew a satin rectangle along the perimeter of the circle, gathering the edge with small folds.
Paste with foam rubber rectangular shapes plates, you can glue everything in pieces. Cut out 2 squares from the satin so that you can wrap all the dishes. Cover the bowls with a cloth and remove unnecessary material.
 Glue the created bottom with a fabric wall. Glue the upper and lower edges of the casket, which will be combined, with braid, and sew the sides with lace, alternating different shades and making tucks so that the lace is voluminous. On the cover of the product, leave a place for the doll. Cut the toy to the waist and glue it to the chosen place at the top of the box. Glue the satin ribbon on the front and back, then fix the doll on the product. Dress up Barbie by making the top of the dress out of lace.
Create a hat: glue a bottle cap with a ribbon or a piece of fabric, then glue it with lace and, if desired, decorate with beads or rhinestones.
Fasten the 2 halves of the bowls so that the box can open. Put on a barbie hat, beads, bracelets, earrings. The work is completed, just like that you can make a doll box with your own hands.
After making the first box, you can move on to the option, which will be more complex and interesting. The master class on making a casket with a snow maiden is divided into two parts:
First part- making the base of the product from a plastic bottle.
Second part- decor crafts.
Materials that will be needed for work:

 If you don't have some materials at home, you can use a mayonnaise bucket to create a base to hold the toy on.
Make a base for the product. Cut up the bottles and glue to the bottom of the bowl. Insert the lower part of the toy into the neck, smeared with glue.
On the bottom of the second plate, circle the outline on the cardboard. Cut out the circle and set it aside. Paste the "skirt" with synthetic winterizer. From white cloth make two cylindrical bags the right sizes. Their bottoms must be quilted. Glue the bottoms of the bags to the inside of the dishes.
Pull the edge of 1 bag with a thread at the waist of the Snow Maiden. edge 2 pull off outside arc of the plate. Connect these beautiful plates with a small seam (three centimeters) from the back, and sew pieces of Velcro in front. After that, you can move on to decor.
Sheathe the lower edge of the cap with lace, hiding the seam and Velcro. Cover the circle that you set aside with a blue cloth and glue it to the bottom. In this way, you can hide the assembly and make the box more stable. Sheathe the joint with lace fabric.
 Make blue fabric elements for the top of the outfit. Sew blanks and put on the doll. Decorate the product with unusual ribbons, lace, pom-poms, rhinestones in the shape of snowflakes. Braid her hair and sew on a hat. An unusual do-it-yourself doll made of plastic bottles. After completing two such beautiful boxes, you can try to create something in kanzashi technology and decorate the product in a similar way. Good luck in your work and creative success!
Attention, only TODAY!
Good day, my dear friends!
In today's master class, we will make a box from a plastic bottle. In which you can store various trifles, or you can use it as a gift box.
We have already made caskets from different materials(), and today we will do it from a plastic bottle.
To make the box you will need:
- Two plastic bottles;
- Zipper;
- hot glue;
- Stationery knife, scissors;
- Openwork braid.
If you have all this at hand, then let's start manufacturing.
1. Cut off the bottoms of the bottles. There is a strip on the bottom of each bottle, that's exactly what you need to cut along it.


2. Take the zipper longer, then cut as much as we need. Glue on the inside with hot glue. Glue first on one bottom.


3. After the second step, open the zipper and glue the other half in the same way.

This is the kind of preparation we get. Let's decorate it.

4. openwork braid glue on the outside to hide the zipper. Glue so that it does not fall on the teeth.

Here is such a wonderful and unpretentious box came out.

If you want, you can decorate it, for example, make decoupage.
Here is such a short MK turned out today. I hope you found it interesting and useful!
I was inspired by a square box that I found on the Internet. I immediately liked the gift idea as soon as I saw the photo and description of the workmanship. Most of all, I was impressed that all the materials and tools are in almost every home! The most important thing is a plastic bottle and woolen threads. Who doesn't have empty plastic bottles at home?! And the threads are disassembled knitted clothes. I made my first box from threads Brown. I never thought it would turn out so beautiful! And my first box was very happy, and for the second, the description of which is here, my sister thanked many times. And it's not easy to surprise her! So the best gift than a round box can not be invented! For any occasion, for any age…. You can also decorate the box so that it looks like a man's. For example, for a boy, you can paste over cars, and for a man in restrained colors and concisely ....
Well, let's get started! In the photo, all we need is:
List of tools and materials:
- Plastic bottle
- Packing from a pad for an optical computer mouse. Although you can take any other material, transparent, durable, similar to a plastic bottle from which we are going to make a round box.
- Lace ribbon. You can use any other tape that you can find at home. It will be the handle for the box.
- Scissors
- Glue with glitter
- Hole puncher
- Wool thread
The following are not in the photo, but these are simple tools in every home:
- Pen
- Ruler
- Paper
- Marker
- stapler.

Cut the bottle with a knife along the edge of the label.
We determine how high we want the box, and using a ruler around the circumference, mark with a dotted line where to cut.
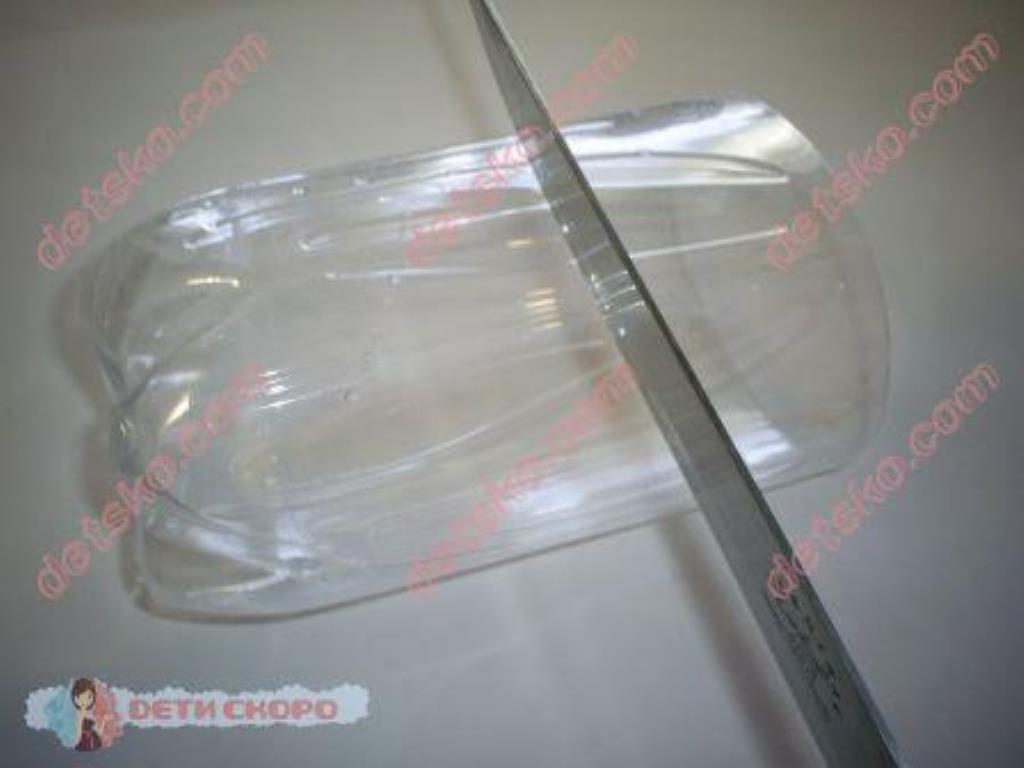
Cut off the plastic.

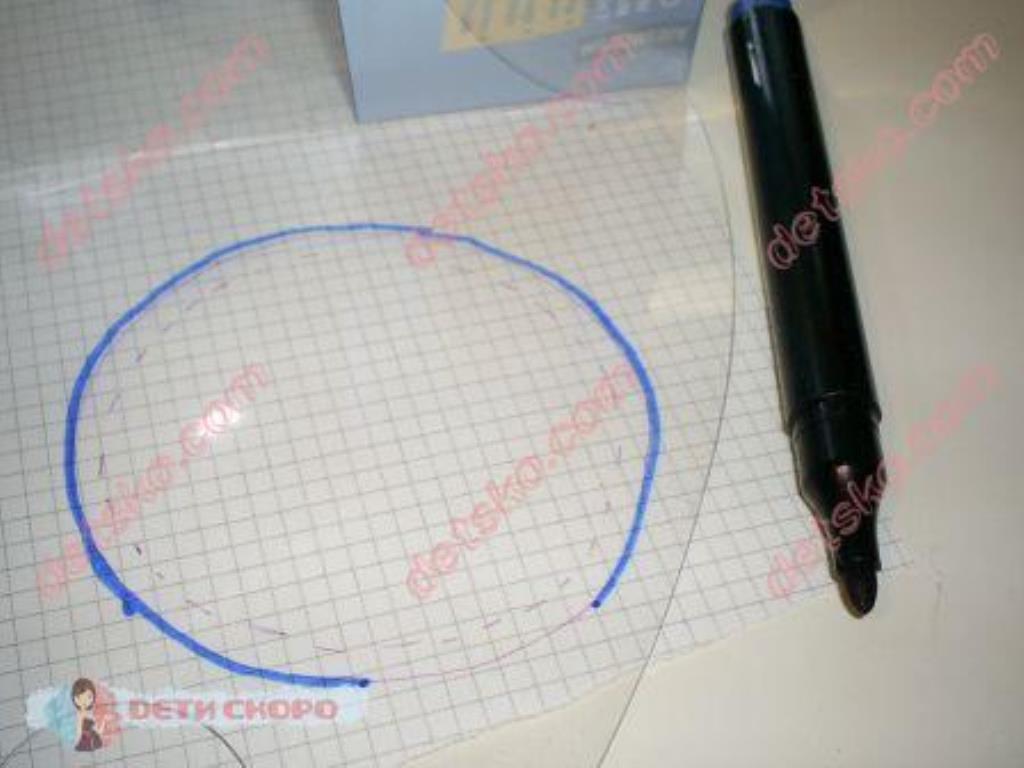
Using the top of the bottle, draw a circle.

In the middle of the circle, stepping back half a centimeter, using a ruler, draw a circle of a smaller diameter with a stroke.
We put the drawn circles under the packaging for the rug, transfer the larger circle to the packaging with a marker.

Draw a smaller circle next to it.

Cut out circles with scissors.
.jpg)
Here's what should happen. This will be the bottom and lid of the box.
.jpg)
We wash all the plastic parts that were cut out.
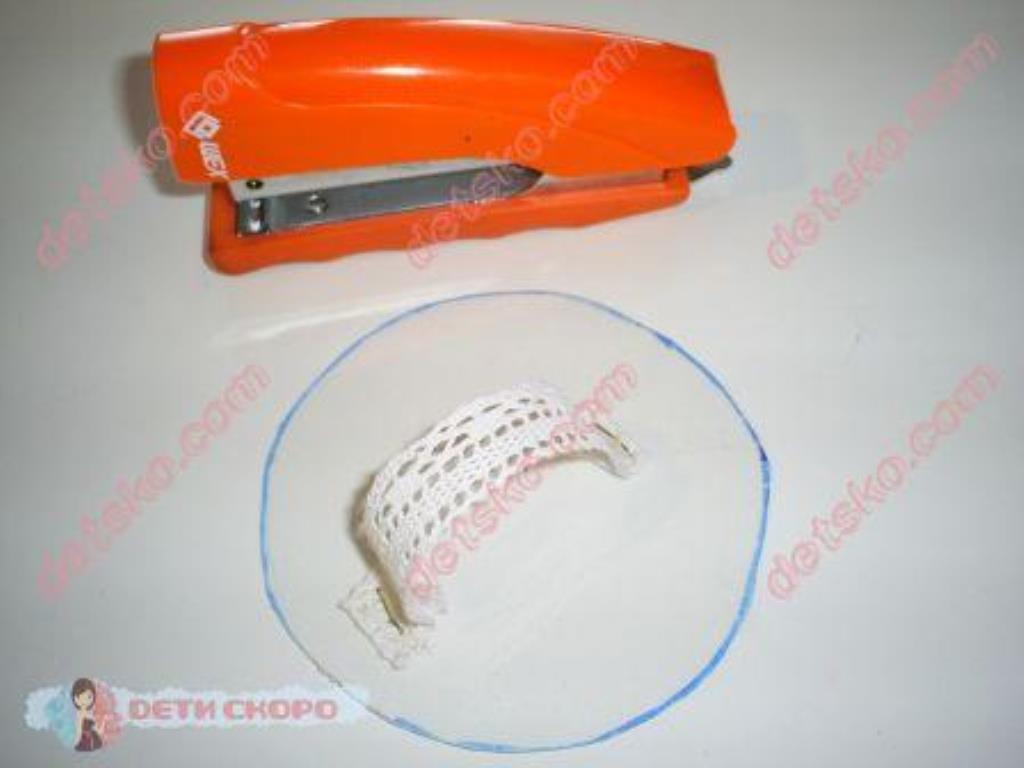
With a stapler we pin a “handle” - a beautiful ribbon.
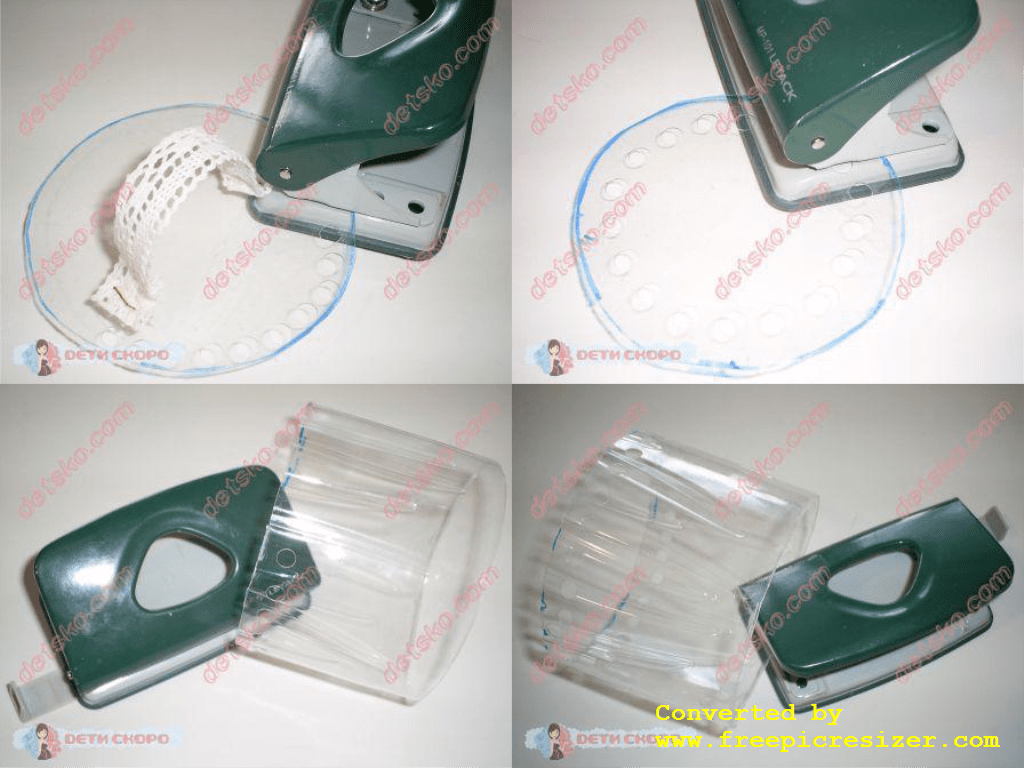
We pierce holes along all edges of the lid, bottom and walls of the box with a hole punch. All holes should be at the same distance from each other and from the edge.

We decorate the walls. In my case, I specifically cut off a part of the bottle with bumps in order to apply glitter glue in them. You can stick or draw something.
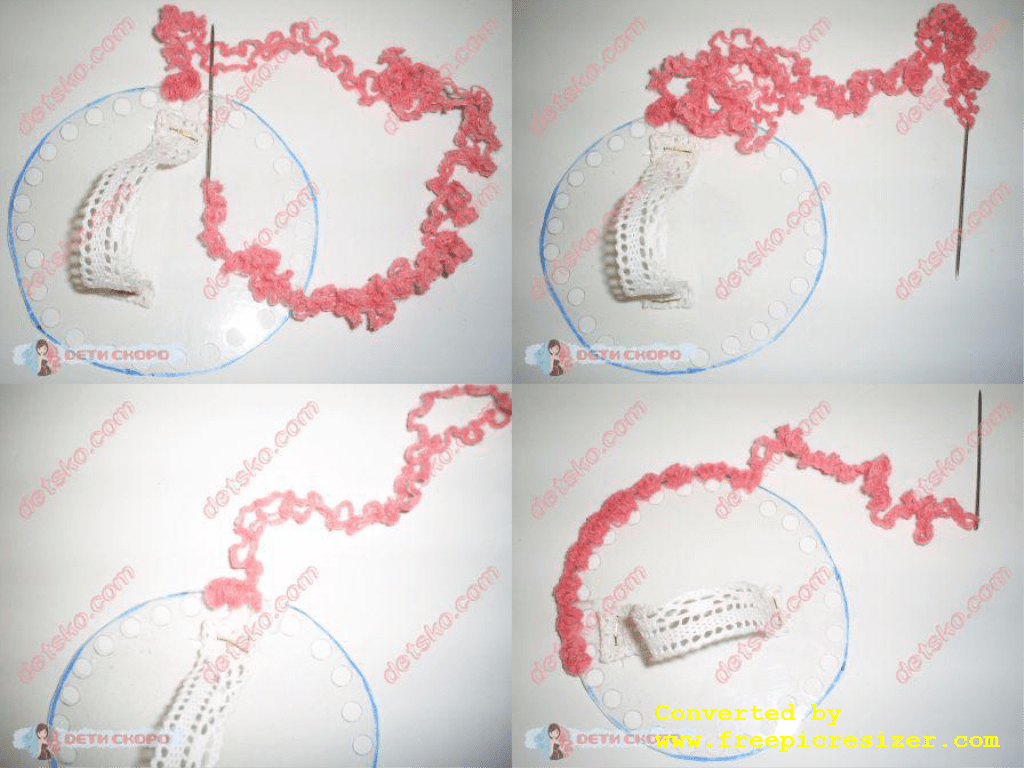
While the glue dries, we wrap the lid with a woolen thread, for me it consisted of three thin ones. We sew with a double folded thread, as a result of my thickness, it turned out to consist of six. We put the thread under the bottom, pull the needle through the hole in the cap and the resulting loop, tighten it. We repeat ... The number of loops in each hole should be the same. I had four loops in one hole. In the description, according to which I made a square box, there was something written about a hook. But I don’t have it, and I think not everyone will find it, but a larger needle - so that you can thread the thread, is indispensable in any home.

We also sweep the bottom.

After the decor has dried, we overcast the walls.
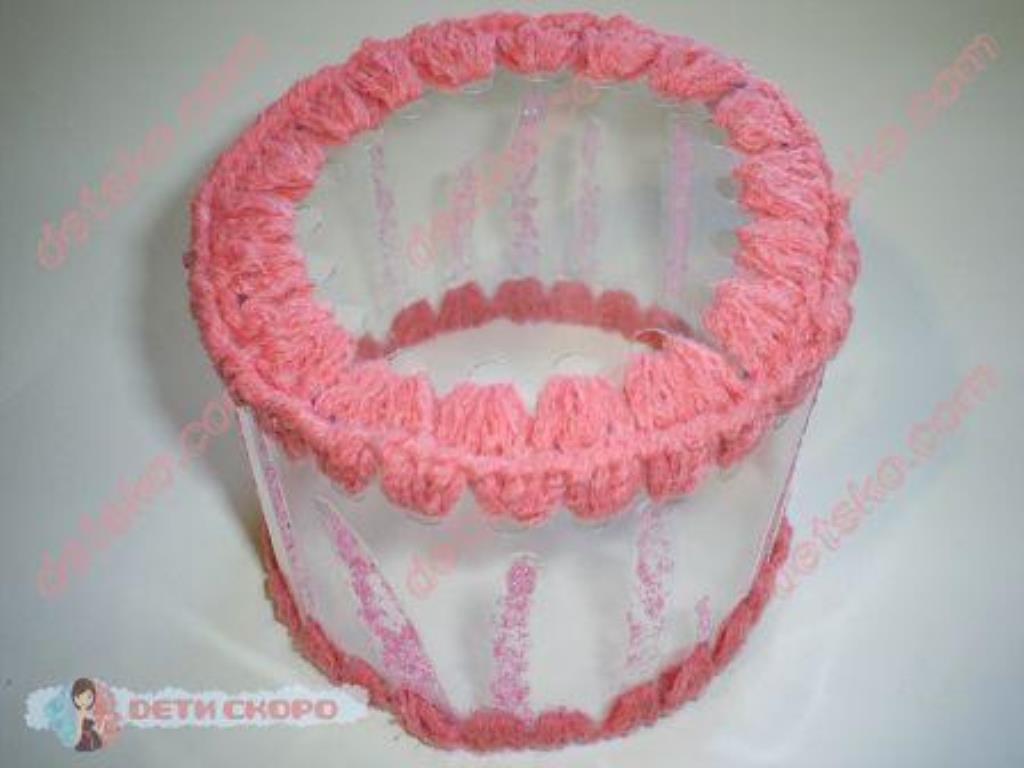
As a result, the bottom will turn out to be just such a size that it can be inserted into the walls. My decor turned out to be like dripping droplets, so I inserted the bottom from this side.
We sew the bottom. In my case, I simply divided the thread with which I overcast - I took one of the three. If you had a uniform thread, choose a regular sewing thread that is the most suitable in color so that it is not visible. We sew the bottom from the outside - in order to see the result and correct the irregularities that could have happened when overcasting.

This is how the bottom is.

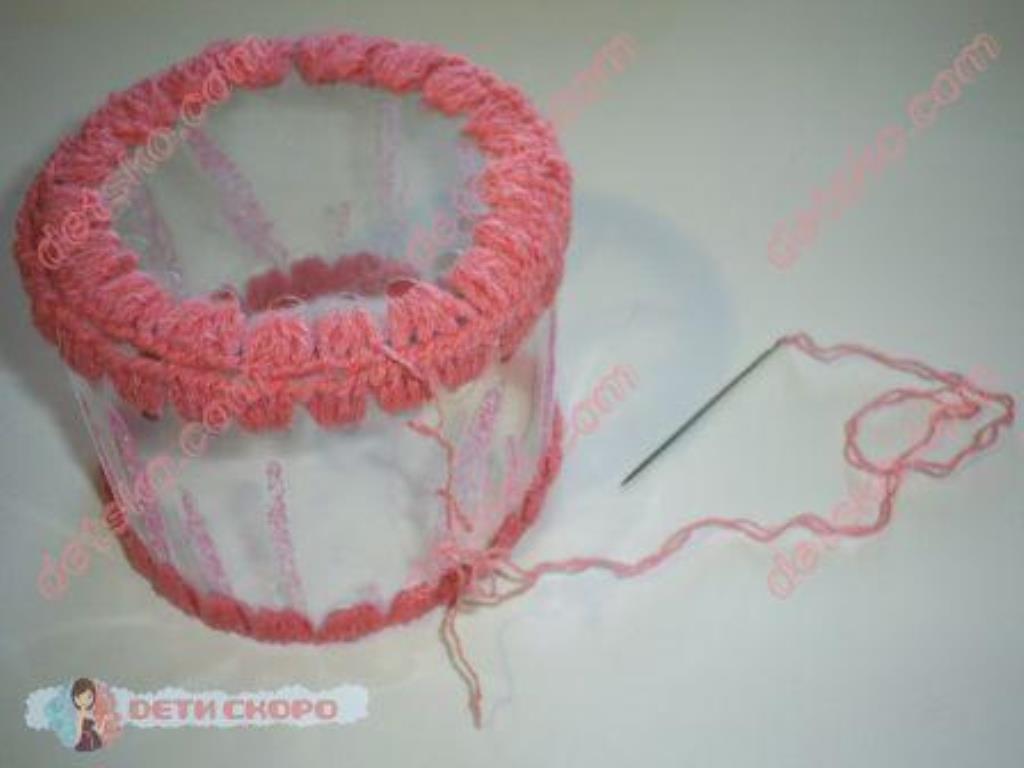
Sew the lid on the inside. As a result, the lid turns out to be slightly larger than the box, it should cover, go beyond the edges everywhere the same. Therefore, sewing over the edge will not work, you must try to sew as close as possible to the center of the cover. We sew a small area - so that it opens easily. I only have four holes.

Here it is ready wonderful gift! You can leave it as it is, or you can decorate with something else. I also added a hook to close.
I chose this color scheme because I know what my sister likes pink color. And the colors of plastic bottles are not so diverse. For example, I only know transparent, blue and brown. For your convenience, I will compile a table of colors that can be combined with three colors of bottles.

Derived tones and colors from these basic ones given in the table should also ooze with the same colors of the plastic bottle. Although it varies... When choosing - to look good, you can use the designers tool - the “color wheel”. There is a lot of information on the Internet about color combinations. But if you still have doubts, write to me, I will be happy to select the best option! :)
round box simple and fast to do. I did this one for only one day, while the square one took three whole days. So if you have a dilemma: you don’t know what to give as a gift, there is little time left or no money for purchases…. Making a round box from a plastic bottle will be the best option for you!
Do you have too many small things and don't know where to put them? An alternative solution to this problem can be a box of plastic bottles. It does not take too much time, money and patience to create it. And the result will exceed all expectations!


Simple and Affordable
The process of making the box can be traced on the example of the following master class with a photo.
For work you will need: a plastic bottle, thick cardboard, a thread, a needle, a fabric of two colors, beads, an openwork ribbon.
Take a 2.5 liter bottle and cut off the bottom to a height of about nine cm. Use the sharp edge of the awl to make small holes around the entire perimeter, as shown in the photo.


Take the fabric of the main color, in our case black, and cut out a circle, twenty cm in diameter.


Then we cut out a circle from a black fabric, the radius of which is 13 cm.

Take the blank cut out of the bottle and glue a small circle of cardboard on its bottom. It is best to use a glue gun.

Let dry a little.

Now we take a large black circle, 26 cm in diameter, and along the edge we stretch a thread with a needle, as shown in the photo.

Insert a plastic bottle inside this circle and tighten the threads. The fabric should fit snugly against the plastic.

Then evenly distribute the folds and start sewing. Especially for this, holes were made on a plastic bottle.


The edges of the fabric must be tucked inward and stitched again.

Here's what we got:

Now you need to work with the lid of the box. To do this, take the remaining cardboard circle and place it in the center of the fabric circle. We sew threads along the edge of the fabric.

We tighten the threads again.

We will not give exact dimensions, but know that the length should be equal to the circumference of the bottle, the height is 1 cm more than the height of the box, and the diameter of the circle should be about 9-10 cm.


We put the lining inside the box and fix it for the first time.

The lining needs to be sewn very carefully. On the outside, you can use openwork lace.

You can also sew lace on the bottom of the bottle.

Decorate everything with beads, it looks much more feminine.


Take another small circle of lace and fasten it to the lid.

Now you need to cut out a small circle from the fabric of the main color, which will cover the cardboard.

Sew on lace, hide the edges of the circle.

You can also decorate with beads.


Now you can make a flower upstairs. To do this, cut out five large and the same number of small petals.

And collect the flower.

This is such a beautiful box. It even reminds a little of Ukrainian symbols.
Video on the topic of the article
We also suggest watching a selection of videos that will show the process of creating other caskets from plastic bottles.