Interesting things from stones. Crafts from stones with their own hands. Rugs, coasters, decorative eco-trays
Facing the basement of the house, facade and interior walls with stone is becoming more and more popular. And this is not at all surprising, since such a design not only protects surfaces from mechanical damage and pollution, but also becomes spectacular. But the trouble is that natural stone has a considerable mass, and creates significant additional loads on wall structures. In addition, working with him is quite difficult, and the cost of such a finish often becomes a reason to abandon this approach.
There is a way out - to use an artificial stone for such purposes. It is lighter in weight and easy to process, so it is not so difficult to work with it, fixing it to surfaces. Artificial stone will perfectly replace natural stone, and it can be used not only for wall decoration, but also for lining flower beds and fountains, as well as for laying out garden paths.
It is also important that this finishing material has a very affordable price. But in order to achieve even more significant savings, many owners with a creative "vein" are asking a fair question about how to make an artificial stone with their own hands at home. Such a possibility exists, and it is not so difficult to make this material if you prepare everything that is required to prepare the solution, as well as to create forms with the desired relief of the future “stone”.
What is an artificial stone?
Before proceeding to the description of the manufacturing technologies of this finishing material, it is necessary to understand what it is and what it consists of.
Artificial stone can be made from various materials, which are selected depending on which of the walls will be decorated with it - facade or interior.

So, for interior decoration, stone is often made on the basis of gypsum, and for exterior - from cement mortar with various additives. The list of such additives includes materials that give the finished stone a relief pattern - it can be fine gravel, sand, stone chips and other components. In addition, to give the artificial stone the desired shades, coloring dry or diluted pigments are prepared. If several of them will be used, then it is important to choose them in such a way that they harmoniously combine with each other.
In order for the finishing stone to turn out to be of high quality, it is necessary to prepare for it good shape. Having made the appropriate purchase or making it yourself once, it will be possible to produce the required amount of stone, which will be used to transform a house or garden plot.
You should not buy a cheap plastic mold, as it may break after the first batch of made stones. The best option would be a matrix made of silicone, as it will last a long time and help produce as much finishing material as needed.
Making a mold for artificial stone
In specialized stores, you can find ready-made kits for the manufacture of this finishing material, which further simplifies the work, but for any owner it is quite feasible to complete the forms on their own.
 The condition for successful work is a well-made mold-matrix
 For example, a certain design of a particular surface is conceived, and a stone that is optimally suited for this style is too expensive, or it was not possible to choose the right variant for its tint at all. In this case, you can purchase one or more store-bought tiles. artificial stone, and on the basis of the acquired samples to make the necessary forms.
In addition, a real stone with a textured pattern you like, which cannot be found in stores, can be taken as the basis for the template.
Monte artificial stone prices
Monte artificial stone
As a "source" for the manufacture of the matrix, stone or tile does not have to be used at all. Often, for this, wood is taken with a beautiful textured pattern, which is pre-deepened.

Forms can be single or complex. The first ones are much easier to make than the second ones, since they do not require too large formwork and the use of a large amount of silicone. However, it should be noted right away that in the future it will become both easier and faster to manufacture the artificial stone itself with a complex version of the matrix, because the output will be several at once. finished products.

In any case, for the formwork, you will have to find a ready-made or self-made plywood box or a cardboard box. This element must have dimensions 10÷15 mm wider and 25÷30 mm higher than the original sample, according to which the mold will be made. If the stone should be very small, then even an ordinary juice box, cut off from one of the wide sides, is suitable for formwork. It has enough rigidity to withstand the silicone fill.
You can do it differently by connecting several juice boxes together, keeping a distance of 10 ÷ 12 mm between them. But at the same time, this gap must be hermetically sealed, as it will become walls between future forms.
Next, you can proceed to the preparation of the initial sample and the casting material. It can be used as a silicone sealant, polyurethane or a compound specially designed for such purposes, consisting of two components.
silicone mold
Silicone sealant is sold in tubes or buckets, and you need to purchase the amount of material that is needed to make the mold.

- When the formwork is ready, any grease is applied to its inner walls - it can even be ordinary grease.
- Further, the original element is laid on the bottom of the formwork - it can be natural stone, tiles with smooth surfaces, a ready-made version of artificial stone, a board or other object on which the form will be made.
- Then, the object laid in the formwork is also lubricated with a greasy substance - this must be done so that the silicone can be easily removed after it has hardened.
Here it should be noted important point- if a ready-made artificial gypsum stone is used as the initial sample, then it is pre-coated with two or three layers of varnish or drying oil, each of which must be well dried.
- The next step is to prepare a soapy solution, which is necessary for wetting the brush and spatula used when laying out and distributing silicone inside the formwork.

- If silicone is purchased in a tube, then it is completely squeezed into the formwork, and then, dipping the brush in soapy water, it is distributed inside the box. In this case, it is very important to ensure that the silicone tightly, without the formation of air pockets, adjoins the stone sample, which is laid on the bottom of the formwork. To do this, the laid out composition is not just smoothed with a brush, but rammed.
 Silicone Matrix Manufacturing Sequence - Continued
 - After filling the formwork to the desired level, the silicone surface is leveled with a spatula, which is also wetted in a soapy solution.
- After the work is completed, the formwork with silicone is left for polymerization.
You should not rush to remove the mold - the longer it stays intact, the better the matrix will turn out, the more cycles of manufacturing artificial stone it will withstand. Polymerization proceeds from the outer surfaces deep into the silicone, and for reference, its rate can be taken as 2 mm of thickness per day. So the process of complete solidification of the forms can take from several days and even up to several weeks, depending on the depth and thickness of the fill. Therefore, if it is decided to start manufacturing artificial stone at a certain time, for example, in the summer months, then the preparation of matrices for this should be taken care of in advance.
After the expiration of the estimated period, the formwork is removed from the structure. The resulting form is carefully removed and washed from the lubricant, and only after that it will be ready for further use.
The presented table shows the main technical characteristics of silicone sealant, which must be considered when making a matrix for artificial stone from it:
| Normal values | Test Results | |
|---|---|---|
| Time of formation of a surface film after extrusion of the sealant from the tube (minutes), no more. | 30 | 5÷25 |
| The viability of the composition (hours), no more. | 8 | 6÷8 |
| Conditional tensile strength MPa, not less than | 0.1 | 0.4÷0.6 |
| Relative elongation at break (%), not less. | 300 | 400÷600 |
| Yield resistance (mm), no more. | 2 | 0÷1 |
| Water absorption by weight (%), no more. | 1 | 0.35÷0.45 |
| Density (kg/m³), no more. | 1200 | 1100÷1200 |
| Durability, conditional years, not less. | 20 | 20 |
Compound matrices
Specialized stores also sell special compositions intended for the manufacture of injection molds. The characteristics of one of these compositions of the domestic manufacturer OOO PO Tekhnologiya-Plast, under the name Silagerm 5035, can be considered in more detail.

This two-component polyurethane compound is designed specifically for mold making. Moreover, when using such specialized compositions, matrices are obtained with excellent physical characteristics and a large operational resource.
"Silagerm 5035" can be used not only in the production of molds for artificial stone, but for the manufacture of matrices intended for casting sculptures or architectural details from plaster and other building materials.
Molding polyurethane compound "Silagerm 5035" is produced in beige and has different hardness parameters - 40 and 30 units. according to the Shore table.
The main physical and technical characteristics of "Silagerm 5035" are given in the table:
| Main indicators of the material | Shore hardness 30±3 | Shore hardness 40±3 |
|---|---|---|
| Surface film formation time after mixing the components (minutes), no more | 40÷50 | 40÷50 |
| Viability (minutes), no more | 60÷120 | 60÷120 |
| Conditional tensile strength (MPa), not less than | 3.0÷4.5 | 3.5÷5.0 |
| Elongation at break (%), not less than | 450÷600 | 400÷600 |
| Shrinkage (%), no more | 1 | 0.8 |
| Viscosity (centipoise, cps). | 3000÷3500 | 3000÷3500 |
| Density (g/cm³), no more. | 1.03±0.02 | 1.07±0.02 |
The time of complete curing of the finished mixture is only 24 hours.
In order for the mold to last as long as possible, before filling it with a solution of gypsum or cement, it is recommended to lubricate its inner surface with a special release agent "Type 90".
Compound "Silagerm 5035" goes on sale in buckets of 1.5 and 7.5 kg.
Fabrication of a matrix using a special compound "Poly 74-29»
« Poly 74-29"- this compound of the German manufacturer is available in several versions, which are determined by the digital marking code. The last digits of this designation indicate such a parameter as the hardness of the material after the mold has solidified.
Excellent reviews from matrix manufacturers deserved a special compound of German production "Poly 74-29"
Below in the table for interested readers will be given step-by-step instruction for the manufacture of a matrix from this compound
| Illustration | |
|---|---|
 | To work in this case, the master prepared the following tools and materials - these are product templates from which the mold will be removed, plastic sandwich panels for assembling formwork 15 ÷ 20 mm thick, double-sided tape, technical petroleum jelly, a brush 12 ÷ 15 mm wide, stationery knife, soft cloth, plasticine and ruler-level. It should also be noted here that any other material that has high strength and a smooth surface can also be used for formwork. Vaseline can also be replaced by any other similar lubricant that is inert to polyurethane. |
 | As the initial samples for the manufacture of the matrix, any material can be taken, with a textured pattern, shape and thickness that you like. In this case, natural stones of different sizes and shapes were chosen as a model. Their artificial counterpart can be subsequently used for both interior and exterior decoration. |
 | The first step is to make a formwork, which should have the size of the future matrix. On a flat surface of the desktop, the bottom of the formwork is laid. In this case, it is a cut-out fragment from a PVC sandwich panel. |
 | Selected samples are laid out on the surface of the bottom part of the future box-shaped structure. The stones should be located at a distance of at least 10 and not more than 20 mm from each other, since this distance will be the thickness of the walls between the individual sectors of the same matrix. In addition, it is necessary to immediately take into account the thickness of the walls that will be installed along the perimeter of the bottom of the formwork. The stones must also be removed from the walls at a distance of 10÷15 mm. |
 | Further, the location of the stones is marked on the bottom surface with a marker. This is done so that after removing them and applying glue, return them to their original place and maintain the already specified distance between them, and hence the thickness of the future walls. |
 | Then the stones are temporarily removed, as they must be fixed on the bottom surface with glue-sealant or double-sided construction tape. The second option is much easier to implement than the first. If this method of fixation is used, then it is best to stick the adhesive tape on the surface of the bottom of the formwork. |
 | If glue is used, then it is applied to the central side of the lower surface of the stone in a relatively thin layer, since it should never protrude at the edges. |
 | After gluing the samples, gaps of various thicknesses will inevitably remain between the surface of the base and the stone. They must be sealed carefully. This sealing will prevent the liquid polyurethane compound from getting under the stones. |
 | These gaps can be sealed with plasticine, which is rolled into a thin strip. |
 | Then the resulting plasticine bundle is laid along the perimeter of the junction of the stone with the base. First, the plastic mass is distributed with fingers, and then finally smoothed out with a stack. Instead of this material, sealant can be used, which is applied in a thin strip, also at the joint, and then spread with a finger dipped in a thick soapy solution. True, in this case, you still have to wait until the silicone sealant seizes well. |
 | However, whatever material is used for this process, it must not protrude beyond the shape of the stone. |
 | It is recommended to cover the surface of the glued original samples with technical vaseline, wax dissolved in white spirit, or use a special wax release lubricant for this purpose. If this is not done, or if this process is carried out poorly, then in untreated places, polyurethane will definitely stick to the stone, which means that the matrix form can be hopelessly damaged. Such a coating should capture all parts of the stone, to the smallest details of the relief, that is, it should be carried out with special diligence. |
 | When the stones are securely fixed, processed accordingly, formwork walls are installed around them, which must be raised from the bottom by two heights of the stone. The formwork walls can be pulled together with clamps (as in the case under consideration) or twisted at the corners with self-tapping screws - it all depends on the material of their manufacture and the availability of the necessary fastening tools and fixtures. |
 | In addition to clamps, a special belt is used to tighten the formwork structure. He will additionally connect the bottom of the formwork with the walls. |
 | The finished formwork box must be well insulated from the inside, covering the joints between the bottom and the walls, as well as the gaps at the corners. This process can also be carried out with the help of plasticine, rolled out into strips and distributed in the desired areas. |
 | Further, it is recommended to treat the entire internal space of the formwork and the stones themselves, fixed on its bottom part, with one of the release agents (anti-adhesive). In this case, the composition "Pol-Ease2300" was used. |
 | After all the formwork inside has been processed, it must be dried well, and only after that it will be possible to pour the compound composition into it. The anti-adhesive agent will provide effective separation of the initial images and formwork walls from the molding polyurethane and will ensure easy removal of the finished matrix. The same compositions are also used in the manufacture of artificial stones, only in this case, it is applied to the matrix, before pouring concrete or gypsum mixture into it. |
 | The prepared formwork box should be checked for horizontal installation. The entire resulting structure must stand perfectly even, otherwise the compound will drain to one side, and the shape will turn out to be uneven, and this, in turn, means that the stones will also have a skewed lower surface, which will make it difficult to install them on the wall when finishing. |
 | Next, the composition is prepared for pouring into the formwork. In this case, the compound of the German manufacturer "Poly 74-29" is used. This composition is suitable for the manufacture of matrix molds that will be used for pouring cement or gypsum mortars into them. Various colors material for the manufacture of matrices are given by adding a color pigment to it. Complete polymerization of this agent occurs after 16 ÷ 24 hours, and its "life" after mixing is only 30 minutes at an average temperature of +25 degrees. Therefore, using this compound, you will have to act very quickly, and kneading should be done immediately before pouring. The compound is two-component. The working composition is prepared in proportions of 1: 1 and thoroughly mixed until smooth. |
 | The components can be mixed with a spatula or a mixer attachment installed in an electric drill - the tool is selected depending on the amount of mass to be kneaded. Using a mixer for cooking, turn on the electric drill at low speed so that the resulting mixture does not become too porous due to the large amount of air bubbles. If the components of the compound are not completely used, then their remains in the standard container should be tightly closed with lids. |
 | Next, the resulting mass is very carefully poured into the prepared form. Another option is that it can be applied in layers with a spatula, but the latter method is more complicated, since for it the proportions of the components must be calculated separately. If the compound will be poured into a small mold, then it is recommended to knead it manually, kneading it until the mass is completely homogeneous. The finished composition, slowly, so as not to “grab” air bubbles, is poured into the formwork so that the pouring thickness is from 7 to 10 mm above the highest point of the original sample. |
 | After the mixture is poured into the box, you must try to rid it of the remaining air bubbles. To do this, the box must be gently moved back and forth, shaking slightly, and repeat this several times. Then it is necessary to let the formwork with the poured mortar stand for 5 ÷ 10 minutes, and then carefully collect the air bubbles that have come out from the surface of the mass with a spatula. |
 | The form is left for a day until the compound is completely cured. It is not recommended to remove it from models before, since all the declared qualities are still gained within 72 hours. Therefore, after removing the matrix from the original sample, it is necessary to withstand it for another two days without operation. So there is no hurry. After this time, the matrix form will be suitable for filling with a solution with a temperature up to + 80 ÷ 120 degrees. Before removing the formwork elements from the matrix, it is recommended to spray "Pol-Ease2300" on its entire inner surface, as well as on the bottom of the finished frozen form - this will facilitate the separation of the walls from the polyurethane. |
 | A day later, first the tightening belt is removed from the box-shaped formwork structure, and then the clamps. |
 | Then, along the outer edges of the frozen form, they are passed with a spatula, that is, they try to separate the polyurethane from the wall surfaces. After such an operation, the walls should easily separate from the matrix. |
 | The last stage of the work, for the sake of which all the processes described above were carried out, is the removal of the finished form from the original samples of stones. |
 | To do this, the edge of the matrix is \u200b\u200bcautiously picked up, and then slowly removed completely. As you can see, with quality preliminary preparation formwork and stone samples, no traces of polyurethane compound remain on them. |
 | Now, having processed the form with the selected release agent, you can start making artificial stone from the most convenient material for yourself, taking into account, of course, the purpose of the finish being prepared. |
Video: an example of making a mold for an artificial stone from a silicone-polyurethane compound
Production of artificial stone
As mentioned above, it can be made from different materials, but in this section, the production of two options will be considered, one of which is used for interior decoration, and the second for decorating the facade.
Gypsum-based artificial stone
Gypsum artificial stone is most often used for finishing interior walls, but with proper processing and impregnation, it is also suitable for some facade surfaces.
It should be said that gypsum is more popular for creating artificial stone than cement. It is easier for this material to give the desired shade, after hardening it is a little lighter than cement composition products, and has better adhesion to wall surfaces.
For the manufacture of gypsum artificial stone, the following materials and tools will be required:
- Form-matrix of elastic material.
- Electric drill with mixer attachment.
- A container for mixing ingredients - this can be an ordinary plastic bucket.
- Tray for drying tiles.
- Brushes.
- Spatulas.
- White plaster.
- Washed river sand.
- Citric acid and PVA glue.
- Composition of wax and turpentine.
- Water at room temperature.
- Dry coloring pigment of the desired shade.
To carry out work, it is necessary to prepare a small work area equipped with a workbench, the surface of which is leveled horizontally with a level, otherwise tiles with different thicknesses may turn out.
If a large amount of finishing material will be produced at once, then racks will be needed for the final drying of the products, which should take place over several days.
Prices for artificial stone White Hills
artificial stone White Hills
And, of course, you need a free place where the solution will be mixed.

When preparing a gypsum molding mixture, a number of important nuances should be taken into account:
- Gypsum is added to water, and not vice versa, otherwise the mass will turn out to be heterogeneous, with lumps and inclusions.
- It is important to remember that gypsum sets very quickly, literally within 5-7 minutes. Therefore, if there is a need to extend the period of its solidification, citric acid is added to the solution at the rate of 0.6-0.8 g of the crystalline composition per 1 kg of gypsum. By adding this ingredient to the mass, you can extend the liquid state of the gypsum solution up to one and a half hours. Citric acid is diluted in warm water, then, while kneading, added to the solution.
- If a single form is poured with a solution, then the mass must be prepared in a small amount.
- Sand is added to the solution for the strength of the finished product. The size of its fraction (from 0.01 to 1 mm) will depend on which model of artificial stone will be chosen.
- The mixture after mixing should have the consistency of thick, but fluid sour cream.
- The composition is collected in different proportions, but usually 100 grams of sand is added to 1 kg of gypsum.
- PVA glue is added as a plasticizer to the mixture. By the way, just like citric acid, it is able to somewhat extend the setting time of the mixture.
- Gypsum with water is taken in proportions of 1.5: 1, and this liter also includes the water in which citric acid is diluted.
- The required amount of water is poured into a clean bucket. Further, if an additive is provided for a dry coloring pigment solution, then it is immediately added to the water and mixed well.
- The next step is to pour a measured amount of gypsum into the water and again mix the solution with a mixer.
- Then, sand is added to the solution and mixed again.
Before mixing the molding solution, it is necessary to prepare the matrix. If it is made of silicone or plastic, then it must be lubricated with a special compound consisting of turpentine and wax (or a special release agent). If the form is made of polyurethane, then it does not require special preparation, although the lubricant will still not be superfluous.

"Rock" is one of the most popular types of artificial stone, used both for facing facade walls and plinths, and for interior decoration. With a similar imitation, the entire surface is finished completely or only certain sections of the walls. Such an artificial stone is well suited for many interior styles, so such cladding practically never goes out of fashion.
Find out a few options on how to do it from a new article on our portal.
If the matrix form is made independently or purchased, then, having prepared the desktop, you can proceed to the process of creating an artificial stone.
| Illustration | Brief description of the operation to be performed |
|---|---|
 | This silicone mold for the manufacture of artificial stone "Rock" consists of five large and five small compartments. The convenience of such a matrix is that you can make the right amount of large or small stones separately, or you can make ten tiles of different sizes at once. |
 | To make a mixture for pouring into such a matrix, some building materials will be required. It is desirable that the recommended proportions be observed exactly, otherwise the products may turn out to be fragile, crumble and excessively absorb moisture. So, the solution will require five kilograms of GVVS-16 gypsum, which must be weighed, since the hardening time and plasticity of the solution will depend on the exact amount of this material. |
 | In addition to gypsum, you will need dry sand of a large fraction - one and a half kilograms, as well as clean water - two liters. These ingredients also need to be measured accurately, because their quantity also affects the quality of the finishing material to a certain extent. To make the stone more picturesque, the water should be tinted by adding 30 grams of black and 45 grams of yellow special coloring powder. |
 | Separately, you need to prepare 400 ml of water, into which a pinch is poured citric acid and then the solution is stirred. Citric acid must be completely dissolved, otherwise its grains can also adversely affect the solution. |
 | While the acid is diluted in water, with the help of a mixer nozzle installed in an electric drill, water is mixed with the color added to it, since it must also dissolve and give a certain color range to the created “stone”. |
 | The next step is to pour sand into the gypsum, and then this dry mixture is thoroughly mixed, also with the help of a mixer, with the drill set to low speed. |
 | The next step is to add water mixed with citric acid to the bucket with the tinted solution. The result is 2.4 liters of liquid, on which the molding solution will be mixed. Then the colored water must be mixed well again. |
 | Next, the solution is poured into a bucket with a gypsum-sand mixture and thoroughly mixed for a homogeneous state. This process should last at least 5÷7 minutes. |
 | As a result, the mass ready for pouring into the matrix should be quite liquid and look something like the one shown in the illustration. |
 | Now we need to work a little on the silicone matrix. In order for the stone to have several shades, that is, to be picturesque and as close as possible to natural natural colors, the shape also needs to be slightly tinted. |
 | For tinting, a dry pigmenting powder is used, which is applied with a soft brush to certain parts of the form, selectively. At the same time, it should be taken into account that in order to maintain the reliability of the imitation, the coloring composition is applied not only to the bottom of the mold, but also to the edges of the relief. To make the finishing material more picturesque, you can use several different shades but they must be in harmony with each other. |
 | You should not paint over too large areas of the form, as the finished stone will lose the effect of naturalness. The color that was given to the molding solution should remain the main one. After the dry pigment is applied to the form, its excess must be shaken off. To do this, the matrix is turned over and shaken off - this procedure will help not only get rid of excess powder, but also evenly distribute it over the sections of the form. |
 | Next, the form is installed on a flat desktop, on which it is recommended to lay a sheet of plywood, the same size as the silicone matrix. In the form, first in small portions, the solution is laid out, and it is laid out in each compartment separately. This amount of mass is better distributed along the bottom of the mold, filling all the deepest places in the relief. |
 | Then, the form, together with the plywood stand, is lifted by one edge and shaken several times. With such a vibrational effect, the solution spreads in the compartments of the mold, densely filling all the folds of the relief. |
 | When the first batch of mass is settled, the rest of the solution is laid out on top of it. Most often, the remainder of the solution already has a thicker consistency, so it turns out that the gypsum-sand mass protrudes from above the edges of the matrix, that is, “with a slide”. |
 | Since gypsum is part of the solution, it will begin to thicken very soon, so everything needs to be done quickly enough. Having laid out the rest of the solution, it should be shaken again, no longer raising the form, but moving it sharply with the help of plywood placed under it, grabbing the sides of this stand. |
 | Then, using a spatula, you need to quickly, removing the solution protruding above the walls of the mold, evenly distribute it over all compartments. |
 | The distribution is carried out until each of the departments is completely filled with gypsum-sand mass. During the distribution process, the form should be periodically shaken. |
 | The surface of the solution is also compared with the edges of the matrix with a spatula. This process will be easy to perform if a spatula is taken for it, having a width greater than the distance between the walls of the compartments. |
 | Finishing leveling, with a spatula, the upper part of the walls and partitions between the individual compartments, the so-called paths, must be well cleaned of the mortar. This must be done carefully so that after the solution has solidified, it is easy to remove the mold from the finished products. After filling the matrix, it is recommended to immediately clean and wash all the tools from the remnants of the solution, otherwise, if it hardens, it will be quite difficult to bring the working surfaces of the spatulas to a normal state. |
 | After 20 ÷ 25 minutes, depending on the thickness of future products, it is possible to check the solidification of the solution. The check is made by hand, while the heat emanating from the hardening tile should be clearly felt. The fact is that when gypsum is mixed with water and the solution sets, a certain chemical exothermic reaction occurs, accompanied by the release of thermal energy. |
 | The next step, you need to take another sheet of plywood, also cut to the size of the form - with it the matrix is \u200b\u200bcovered over the filled blocks. Then the bottom substrate, the silicone mold and the top plywood sheet are captured at once. Then the whole structure is turned over so that the bottom of the mold is on top. |
 | The plywood that originally served as the backing is removed. Well, then, having captured the matrix from the corner, it is carefully removed from the molded products. Ready "stones" remain on the plywood sheet. |
 | After the matrix form is removed, it must be inspected - it must be clean, without solution residues. In the folds of the relief, as a rule, the coloring pigment remains, but if a batch of finishing stone is made, the same areas are usually tinted before each pour, so this is not critical. |
 | The next step is the sorting of finished products. If suddenly a tile is found that has certain flaws, they are put aside for the time being. Perhaps it is useful for cladding in the peripheral, least noticeable areas of the finish. |
 | At the end of the work, the finished “stones” can be laid out in different configurations, achieving a uniform distribution of tinted areas over the entire surface. Thus, it will be easier to form a certain pattern from them than to carry out this procedure on the wall, already during the cladding. |
Additionally, color can be applied to ready-made "stones". In this case, coloring is done using brushes of different widths, and it is not necessary to draw even, neat strokes, since the more chaotic they are, the more picturesque and natural the color of the stone imitation will turn out.
The final stage of the painted "stones" can be coated with a special matte varnish for outside work. Do not use glossy varnish, as this finish will look unnatural. If the facing tiles will be used in a dry room, then covering them with a protective varnish is an optional condition.
A finishing material made from a gypsum-sand mixture has a fairly high popularity and is widely used for decorating interiors and facades. Such tiles are not used for laying out paths, as well as fountains and fireplaces. To design these elements more suitable an artificial stone made from a mass based on cement. More on this in the next section of the post.
Video: an example of casting gypsum-based artificial stone
Artificial stone from cement-based mortar
The cement-based composition opens up more opportunities, since an artificial stone made from it can be used in any area of \u200b\u200bdecorating a suburban area, including laying out garden paths or building an alpine slide.
To make an artificial stone from concrete, you will need the same tools as for a gypsum mortar, and the following should be prepared from the materials:
- Gray cement M200÷M400 or Portland cement.
- River washed sand.
- PVA glue as a plasticizer, but you can do without it.
- Coloring pigments.
The workplace, as in the first case, should be equipped with a level table with a horizontal surface. Having prepared everything you need, you can proceed to the manufacture of finishing material.
It should be noted that an artificial stone from cement mortar can be made in different ways. For example, if the stones imitate cobblestones on an alpine hill or in a flower garden, then they do without a silicone mold at all. Further, both manufacturing methods will be considered in the publication, but the composition for both options is made in approximately the same way.

The molding solution is made up of sand and cement in proportions of 3:1. The components are mixed in dry form, and then water is added to the mixture in small portions, and the composition is again mixed with a mixer. This continues until the solution becomes the desired consistency and uniformity. If you want to make the solution more plastic, PVA glue is added to it. It must be taken approximately 50 grams per liter of cement-sand mixture.
During the kneading process, a coloring pigment is added to the mixture if it is supposed to change the color of the cement or add any tint blotches to it. The amount of pigment can only be determined empirically, that is, by adding it little by little and mixing, achieving the desired shade of the entire solution or its layers.
The first option is an artificial stone for paving paths or for wall decoration.
To begin with, the process of making stone for decorating garden paths will be considered. However, the material for wall decoration is also made in the same way, just for the tracks they usually make blocks with a flat surface or with a relief that is shallow in depth.

- The prepared form is filled with the prepared solution, which periodically needs to be shaken, moving forward and backward, so that the mixture fills the entire relief completely. When the matrix is filled, a medium width or wide spatula is passed over its surface, collecting excess mortar and cleaning the upper sides of the partitions between the individual matrices, if pouring into a common mold. In this case, the walls will serve as a kind of beacons for leveling the poured solution.
- If artificial stones of a large size are made, that is, a single deep matrix is \u200b\u200bpoured, then only half of its depth is first filled with a solution. Then, a reinforcing mesh or rods is laid on top of the poured mixture, and only then the form is filled with the mixture to the top, and the mass is leveled along the upper edge.
- When the cement mixture sets, but still retains plasticity, hatching in the form of a lattice is applied to its surface with a nail. It is necessary for better adhesion of artificial stone to the surface of the walls during cladding.
 Production of single large-format "stones"
 - The initial solidification of the solution is given from 12 hours to a day. Then the resulting "stones" are removed from the mold and left on the racks for the final maturation of concrete and curing for at least two weeks.

- If the next portion of the solution is to be poured into the matrix, then before that it must be washed with soapy water.
- After the stone is completely ready, it is cleaned of dust and dried small fragments, and, if necessary, coated with one or more paints of the selected shades. The created “stone” can be colored while pouring the solution into the matrix, as shown in the table above, or after it has solidified. However, it should be noted that the second coloring option will be much more difficult, since it is necessary to maintain harmonizing shades on all stones produced in this batch.
The final treatment may also include coating the surface with a durable atmospheric varnish.
The second option is an artificial cobblestone
Making imitation stones with beautiful shapes becomes a kind of hobby for many. This is especially true for those owners who want to have a corner on their site that is close to natural conditions, which they want to decorate in a special way. This direction in landscape design has received a specific name - "Art-concrete".
 In appearance - no different from a natural boulder
 Artificial stones, qualitatively made in this technique, are almost impossible to distinguish from natural boulders. The advantage of this manufacturing method is that you don’t have to look for the sample for exactly the option that you would like to see on your site, but you can take it and make it yourself. Moreover, making such a “stone” is quite simple.
For work, in addition to the cement mortar already considered, the following materials will be required:
- Styrofoam. It can be of any thickness, but it is better that it be 100 ÷ 150 mm, since it will be much easier to cut the desired shapes from such material.
- Reinforcing fiberglass mesh.
- A plastic bag or foam rubber sponge to give relief or, conversely, to smooth surfaces.
- Glue for foam. For this, cement-based tile adhesive, polymer adhesive, or even mounting foam can be used.
- Sandpaper with coarse and medium abrasive grit.
- Acrylic paints and resistant atmospheric varnish to decorate the resulting "stone".
Having prepared everything you need, you can get to work.
| Illustration | Brief description of the operation to be performed |
|---|---|
 | The first step is to prepare foam panels of the desired size. Then they are glued together to such a thickness as the height of the stone is planned to be made. This design is left to dry completely. Further, the planned shape of the future “stone” is cut out from the resulting foam block-blank with the help of a construction knife. It can be anything, but in order not to invent it on the go, it is best to make a sketch of the planned decorative element in advance. |
 | Having cut out the desired shape, it is wrapped with fiberglass reinforcing mesh, trying to exactly repeat all the bends and irregularities of the future “stone”. You can temporarily fix the mesh with the same polymer foam adhesive. The protruding parts of the relief can additionally be depicted by placing lumps or knots of dense fabric under the fiberglass mesh. |
 | The next step is to make a cement mortar. It must be said that it is quite possible to use cement-based tile adhesive intended for outdoor use or “for complex bases” instead. This building mix is sold dry and mixed according to the instructions on the package. Glue is more plastic than ordinary cement mortar, but its cost will, of course, be somewhat higher. To give plasticity to a conventional cement-sand mixture, PVA glue can be added to it. |
 | Using a spatula or trowel, the solution is carefully applied to the foam mold on top of the reinforcing mesh. This is done with chaotic strokes - it will be easier to give the surface a relief of natural stone. If it is planned to make a “smooth cobblestone”, then the applied solution is wetted and smoothed with a rubber-gloved hand, or a thick polyethylene bag is placed on top of it, leveled and gently pressed against the damp concreted surface. |
 | When the entire base of the future artificial stone is covered with a solution approximately 15 ÷ 20 mm thick, it must be left for 20 ÷ 30 minutes for the initial setting. |
 | The next operation is carried out if it is not planned to make the surface of the “stone” smooth, but you want to give it a “natural” relief texture. This can be done with a foam sponge or the same plastic bag, which is crumpled and applied in this form to a wet solution, leaving a relief on it. |
 | After the cement (tile adhesive) has set, the “stone” is turned over, and its bottom is also sealed with mortar. When the mixture in this area is slightly seized, you should not wait for it to dry completely - the “stone” is placed on the bottom and pressed a little against a flat surface (for this you can use, for example, a sheet of plywood). Further, before leaving the resulting “stone” for complete solidification and strength gain, it should be treated with coarse sandpaper. This operation is carried out three days after applying the solution to the reinforced form. |
 | In order to completely complete the process of manufacturing an artificial stone, a lot of time is needed, since the solution applied to the surface must dry well and gain the required strength. Therefore, for full readiness, it will be necessary to wait at least 10–12 days, and if the cement mortar is applied in two or three thinner layers, then you will have to pause in work to dry each of them, and this will take even more time. |
 | When the solution gains the necessary strength, the “stone” will need to be decorated, that is, the selected shade should be applied to it. Before proceeding to painting, the workpiece is well cleaned - dust is removed, small dried pieces of the solution are removed, and then washed with water. |
 | The next step, after the washed surface dries, is its staining. The paint can be purchased in an aerosol can, or you can use an acrylic compound sold in regular packages, which is applied with a brush. The paint must be applied in at least two layers to completely cover all the recesses of the relief pattern. |
 | To give the surface natural naturalness, it is necessary to “show” the relief pattern, make it visually more noticeable, convex. This is done with medium grit sandpaper. After such processing of the protruding irregularities of the “stone” relief, they are somewhat lightened, and the recesses remain darker, toned, which creates the necessary smooth contrast transition. |
 | After such treatment, the “stone” is washed again with water and dried. |
 | In order to protect the color of the “stone” from ultraviolet rays, so that this decorative accessory does not lose its original appearance, its surface must be coated with a matte varnish for exterior work. It is recommended to update this protective layer annually, then the artificial stone will decorate the garden plot for many years. |
 | Depending on the size and shape of the manufactured “stone”, it can be used to mask various elements that “fall out” of the general style of landscape design of the site, but which cannot be dispensed with (for example, drainage or water wells hatches). Therefore, before choosing the shape of the future "boulder", you should decide in advance on its installation site. |
A few words about laying wall artificial stone
In order for the manufacturing process to be fully meaningful, it is necessary to make a number of remarks about the features of laying artificial stone on the walls.
- must be mounted on an adhesive made on the basis of the same material from which the finishing material itself is made. In this case, perfect adhesion of the decorative cladding to the wall surface will be guaranteed.
- Masonry can be seamless or have perfectly even seams.
In order to maintain the desired seam size, throughout the entire masonry, special silicone or plastic calibrator strips are used, with which rows of finishing material are laid. These elements are removed as the mortar sets, which is completely removed from the seams. After the glue has completely dried, the gaps in the joints are filled with special grouts.

The seamless masonry method is made in the case when it is planned to make an imitation of a monolithic wall covering with stone.

Seams, of course, with this approach still exist, but they are made as invisible as possible. To obtain such a masonry, it is necessary that the “stones” ideally fit together, both in size and in the evenness of the edges.

Separately, masonry should be distinguished, having different sizes and shapes. In this case, the seams can have different thicknesses and be at different heights relative to each other. This masonry option can be called the most difficult, since even in the manufacturing process it will be necessary to carefully consider the “docking” of the finishing elements both in color and in shape.
In conclusion, it should be said that the manufacture and independent laying of artificial stone will certainly be interesting and exciting for creative people who are able to independently develop and implement their own projects for the design of individual objects of a suburban area or surfaces of the walls of a house, both outside and inside. Even if there is absolutely no experience in such work, but there is a great desire to try your hand at such a field, you should not deny yourself this pleasure. Moreover, nowadays in construction stores it is easy to find any materials necessary for work.
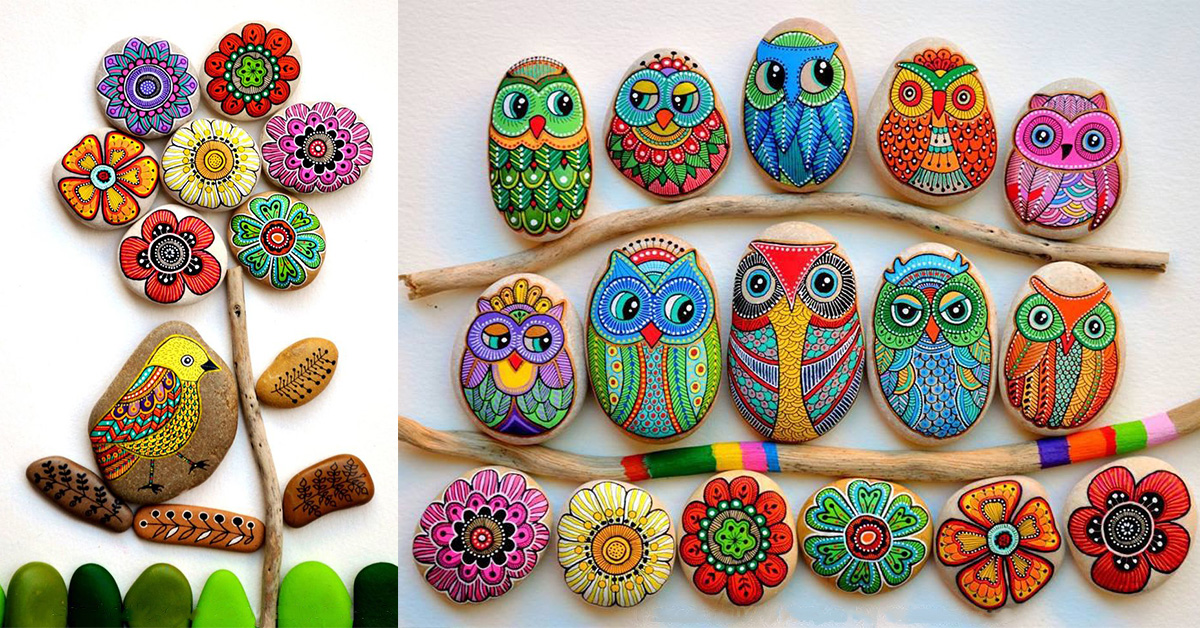
Stone is a natural material that has been used by man since ancient times. From it they made tools, built a dwelling. Over time, people began to make real objects of art out of the material. Today, there are many craftsmen who can make amazing decorations from stone for a house or a personal plot. DIY stone crafts can be both complex and very simple.
Easy Pebble Crafts
Even without great abilities, you can build something unusual from this material. Anyone can make cacti out of stone. To make a craft, you will need an ordinary flower pot, sand, but not fine, and pebbles. In addition, you need to buy green and white paint to paint the pebbles.
The process of doing work:
- Pour sand into the flower pot;
- We paint the pebbles with green paint, in the color of the plant, and wait for the paint to dry;
- With a thin brush, draw stripes and needles on the plants with white paint;
- We are waiting for the paint to dry, and we bury the resulting plants in the sand by one third.
Pots with these "indoor flowers" can be placed in the garden or on the window, or you can decorate them with a veranda in the backyard.
With the help of stone, you can unusually decorate a fountain, decorate garden paths, or even make furniture. But most often they make crafts from sea stones. Many of them will be an excellent decor for the backyard. Depending on the size of the boulder, it is possible to make animal figurines. Large cobblestones are set near the entrance to the house, like guards, and small ones are suitable for home decoration.
Many are interested not only in what can be made from cobblestone, but also which stone is best used for crafts. Preference is given to natural because of its unusual beauty. It is not for nothing that many designers use only natural boulders to create unusual interiors.
stone flowers
 Many people know the tale about Danila the Master. The young man worked hard to create a flower of incredible beauty from a stone. It takes years to learn how to work as a stone cutter, but unusual item to decorate a site or room can be done using only brushes and paints.
Stone flowers or a composition of flowers is easy to draw on a boulder. This requires a large cobblestone with a flat surface. It needs to be washed and dried well. For the drawing, acrylic paints and brushes of various types are used to draw both small and large details of the composition.
From below, the stone must be designed so that it looks like a basket made of branches. Then draw different flowers. You can depict scarlet roses, large poppies or original pansies. The main thing is that the surface of the stone should not be visible from under the drawing. To give the composition a shine, you can varnish the dried paint.
Fancy rugs
Pebbles are perfect for making a rug that can decorate any interior.. It can also be used instead of a massager. Then the craft will have a healing effect for a person, foot massage is considered especially useful.
The stone itself will tell you what intricate patterns can be made. To create a rug, you need a base made of rubber or carpet. To form an unusual image, the stones must be of different sizes and shades.
Before making a rug, you need to depict it on paper. It is also necessary to prepare the base: thoroughly clean and give it the desired shape. To make the process easier for yourself, first all the pebbles are placed on the substrate according to the selected pattern. Then each is attached separately.
Most often, a transparent glue that is resistant to water is used for this. All pebbles must be positioned so that they tightly cover the substrate. It is necessary to check that there are no significant gaps.
If the rug is made for a bathroom where the floor is made of tiles, then you need to take a rubber base so that it does not slip on the tiles. For a massage mat, pebbles with a large bulge are used.
stone jewelry
 What else can be done from this natural material? If there are children in the family, then needlework will only benefit them, as it will develop them fine motor skills hands To make original decorations, small pebbles from the seashore are used. Preference is given to her because of the streamlined shape.
With a drill, holes are made in the pebbles for collecting unusual beads or bracelets. You can also make beautiful unusual earrings from stone. To do this, in a special supermarket you need to buy a base, glue and paints. From all the stones, a pair of similar ones is selected, which are then attached to the base. First, the joints must be degreased with an alcohol solution.
If necessary, the stones are covered with "gilding". It is necessary to paint the pebbles before it is fixed on the base. According to the same scheme, you can make a small ring to make a beautiful set. However, it is necessary to choose a smooth base to facilitate the selection of stones.
Artificial stone products
Artificial stone is an unusual material that is similar to natural. He gained fame and wide distribution in construction. They line the walls both outside and inside. Advantages of artificial stone:
- In beauty, it is not at all inferior to natural material;
- Has a small weight;
- Easy to handle;
- Great economy.
However, there are also disadvantages, among which is a significant level of surface wiping. But this matters only in cases where this material is used to form garden paths. After some time, the coating on the material loses its color under the influence of sunlight.
Artificial stone is perfect for making original compositions in the garden.
It is required to comply with simple but important conditions:
- The composition must be positioned relative to one point of view.
- It is necessary to observe the contrast between emptiness and fullness. Asymmetry should be clearly expressed in the design of the site. Professionals in Japan also take into account the reflection of objects in the water and the shadows they cast.
- The number of items in the composition must be odd. According to the classics, the composition is based on a regular heptagon.
- It is also necessary to align the longitudinal and vertical lines of the composition. More boulders with longitudinal orientation are required, since there are already plenty of vertical objects in the garden: trees, a fence, a house, etc.
Applying these rules, it is possible to make a dry stream on the site or arrange a natural small pond. Small waterfalls or fountains look great. By forming walls for support, it is possible to decorate the yard of your site, this solution will be relevant for cottages located on the mountain.
If you dream up, an unusual solution will arise in your head: arrange flower beds or flowerpots for plants. It is possible to enclose a plot with plantations with borders of small pebbles, placing them in a direct order or disorder, in several layers at a certain height.
Crafts from stones - simple but enough interesting needlework, which can captivate kids, developing their imagination and the ability of a professional designer. In the process of making crafts, time will be spent with benefit, and people around will admire the work done.
Having familiarized yourself in detail with what can be made from stones, you will make paintings, a mini-hanger from this natural material, and you can make a beautiful painting of stones.
This natural material is good because beautiful specimens for crafts can be found right under your feet. A wide variety of stones will allow you to make many interesting things from them.
DIY stone paintings
They are very interesting and durable.

To do this, take:
- sea stones;
- dark marker;
- pencil;
- a sheet of cardboard;
- hot glue gun or Moment glue;
- gouache;
- acrylic paints.
Wash the stones and dry them. While this is happening, draw with a pencil on a sheet of cardboard where you will have what will be located.
Then prime the surface of the cardboard with acrylic paints to create the background of the painting. It will be blue at the top and darker at the bottom. After all, this is the sea. Take small pebbles and glue them as a frame. And from the flatter ones, make waves. Glue them in place and paint over with blue paint.
Take dried seaweed, turn it into a tree. Glue this piece on left side your landscape. The following photo shows how to fix flat stones.

In this case, the boat is tied from a plastic bag. It must first be cut into long thin ribbons, and then crocheted with a double crochet like this figure.

The sail also needs to be tied from plastic bags giving it a triangular shape. Take a round pebble, paint it with yellow acrylic paint. Glue to the top right corner. Attach smaller pebbles around it, they will play the role of the rays of the sun.

Draw birds with a black marker, they look like semicircular checkmarks. Now create a land shore. You can stick real sand here or replace it with millet. To do this, apply glue here, then sprinkle the grits. You can also use semolina, and when the glue dries, paint it yellow.
This is how stone paintings are made, which are original and durable.
See what else you can make with your own hands.

It is pleasant to hang towels, potholders, light things on such a hanger. For such a picture of stone you will need:
- wooden plank;
- drill;
- stones;
- acrylic paints;
- tassel;
- rope;
- hooks.
Master Class:
- Saw off a piece of board, sand it from all sides so that there are no nicks. Then you can paint this blank with varnish or stain.
- Make a hole at the top right and left with a drill, thread a rope through here and tie knots on both sides. Fasten the hooks at the bottom.
- Paint stones of almost the same size green, and two larger ones white. Also paint the two larger ones and the 3 smaller ones black.
- On the larger ones, then draw the eyes. Glue all these blanks in place when the paint dries, so that you get two lambs sitting peacefully on the grass.
For the next stone painting you will need:
- thick cardboard or other solid base;
- tree branches;
- stones;
- heated gun with silicone rods;
- White paper;
- scissors.

For a picture whose main focus will be light pebbles, take a dark background.
From two stones create the head and body of the stork. From straight twigs make his beak and legs. From other branches you need to make a semblance of trees. Use scissors to cut pieces of paper into small pieces and glue them to create a path.
You can turn another branch into a picturesque tree.

To do this, place the branch horizontally and glue it on a dense base. At the ends of the branches there will be a semblance of leaves. Make them out of small stones by gluing those.
If you don’t have an aquarium, but sometimes you want to admire the fish, then make it look like from stones.

Turn some pebbles into the seabed. Glue small shells here as well. See what stones can be turned into fish, tails and fins to them. Glue a few sprigs of greenery to complete this work. And the base will be blue cardboard.
For the next picture of stones you will need:
- stones of three types - small, medium and one large;
- hot glue gun;
- picture frame.
Arrange the stones so that they form the center of the flower and its petals. And a small branch will become a stem. Thus make 2 stone flowers. Prepare the moss. Glue a convex stone to the bottom of the picture. Attach moss on top of it. Put this picture in a frame, put it in a conspicuous place to periodically admire this original canvas.

With a child, you can make color paintings from stone.

To do this, pick up flat pebbles, then paint them to turn them into houses of different sizes. Glue the resulting blanks onto a durable canvas.
You can use a piece of board for the base, which must first be painted.

Also turn the pebbles into the moon, into trees, rocks, after painting these blanks.
For the next picture of stones, take:
- burlap;
- thin strong thread;
- shells;
- stones;
- sticks.
Tie 4 sticks in the corners so that you get a frame. According to this size, cut a rectangle of burlap, attach it to this frame with a thread. To do this, insert the thread into a needle with a large eye and flash it, capturing both the canvas and the twigs at the same time. You can glue a sheet of paper in the center of this rectangle, and attach shells and pebbles to it to make such a masterpiece.

What can be done from stones in the interior?
The following ideas will show how widely this material is used. If you want to make an original table for the kitchen, use stones too.

To attach the stones, you can use a mixture of sand with cement and water or special tile adhesive. It remains to put the countertop on top, and the table is ready.
If you want to make a round coffee table for the living room, then also use stones, but take a smaller size.

To connect these elements, transparent titanium glue is well suited. It is invisible and leaves no marks. You can also use epoxy resin.
Place a table lamp next to it, the leg for which you will also make from this material.

It is necessary to make a hole in each with a drill in the middle, then put it on the lamp stem.
If you need to make a container for storing cosmetic brushes, then take two transparent ones of different sizes. Place stones between them and connect them using transparent glue.

If you need to update old handles, take stones. Glue to the back of each mount and use these blanks for their intended purpose.

If you want to make the head of the bed not like everyone else, then cut it out of solid wood, varnish it, make a recess in the center into which you will glue the stones.

Place a flower near the bed and decorate with stones. To do this, you need to choose the same. Use the same river pebbles and cover the old pot with it, and it will turn into a new one.

In the bathroom, you can also make a lot of interesting things out of stones, for example, such a wall. It will allow you to make a bright accent on this place.

Cover the shower floor with smooth pebbles. This coating will be durable, safe and very useful for the feet, as it has a massage effect.

By the way, a country shower can also be made by filling a wooden box with pebbles. Here you will stand comfortably, your feet will not get dirty, and the water will flow naturally.

Speaking about what else can be made of stones, one can also note such an original shelf. The vertical wall for her is pasted over with beautiful pebbles.

The hot plate is sure to please you as you can get a morning breakfast that is so beautifully decorated.

Stone painting? an exciting activity. You can turn this natural material into anything using paint.
DIY stone painting - master class and photo

It is best to use pebbles for such art, take the one with a dense texture. If you use a porous one, a lot of paint will be absorbed inside, and if you take it with sharp edges, you can get hurt.
Here are some tips to follow:
- Having found suitable specimens, they need to be brought home, washed, and dried.
- For coloring, you should use a palette, because you need very little paint to paint one stone.
- Since the surface is specific, the paint will dry quickly, the same applies to the brush. Therefore, it must be periodically moistened in a container with water.
- Make sure that the work surface is covered with newspaper or cellophane so as not to stain it. The same goes for clothes. Wear one that is not a pity if drops of paint get here.
- You can use acrylics, watercolor or gouache. If you want to see a metallic sheen on the surface, then use metallic acrylic paint or paints designed for painting ceramics or porcelain.

To decorate stones, use contours that can create non-bleeding thin lines and drops. You can also decorate this natural material with waterproof felt-tip pens.

Use brushes to paint on stones different kind. For the background, they take large ones, and for drawing thin strokes, small ones.
If you are a beginner artist, then you can buy 2-3 brushes, if you decide to seriously engage in this interesting business, you can buy a set of brushes.

To make the coloring on the stones more durable, varnish the stones at the end of the work steps. Then they will shine beautifully and these can be placed directly under open sky because they are not afraid of precipitation.

See how to paint on stones.
Decide if this natural material needs to be primed first. Usually white acrylic paint is used as such a coating. Then subsequent layers will be more juicy. You can also primer when the stone itself is dark, and the pattern should be light.

When the primer dries, draw the outlines of the plot with a pencil. Then you need to cover the workpiece with paints of the appropriate color. Acrylics dry quickly, so you don’t have to wait long to use the next after the first color.

If you need to apply the finest details, use a contour or a thin brush for this. If some stroke is applied incorrectly, you can quickly remove it without waiting for the paint to dry by moistening cotton swab in a solvent and acting on it.

In conclusion, it remains to cover such stone masterpieces with varnish and you can decorate a room or a summer cottage with them.

The next master class will allow you to fill your hand and consolidate the past. We propose to make this original craft, taking for her stones of a similar shade and a slightly different size. Turn them into little chicks.

You will need a foundation. In his role will be a larger flat pebble. And small elongated pebbles, placing them vertically, glue on it. Now take a thin brush and paint two eyes on the top of each pebble with white acrylic paint, and when it dries with an even thinner brush, apply dots.


If you find a large rounded stone desired shape, you can decorate the local area with them.
First, this find must be washed and dried. Now prime it on all sides, when the primer dries, apply the main background. If it is white, then paint with another layer of this paint. In this case, decoupage glue was used. You need to cut out the selected pattern and stick it with PVA glue diluted with water or using decoupage glue.
After the coating has dried, apply the background with a foam rubber brush in dabbing movements. When it dries, cover the stone with waterproof varnish in 2 layers.

Another master class and a step-by-step photo will help you get a beautiful Dawn landscape. Take a flat stone. Apply your chosen drawing. In this case? these are elegant two-story houses, as well as trees.

Now dilute the pink paint and cover the place above the roofs with this composition. A little higher, make the shades a dilute blue. The clouds will be white. Paint the tree leaves with green paint. Just behind the rooftops, it should be a little darker.

To make bright cheerful houses, use paints of various colors. For the roofs, apply different shades of brown. Draw white windows with a thin brush.

Take a thin brush and select fragments of tiles, the contours of the roof of houses, as well as some other small strokes. Draw some birds in the sky that look like checkmarks from afar.

Here is such a wonderful painting on the stone turned out.
Speaking about what can be made from stones, it is important to note that stones are made from them, but not simple ones, but fabulous ones.
How to make stones with your own hands?

These will come in handy for some kind of staging or in order to install doll figures, as in this case.

To get started, take:
- flat sea stones;
- toilet paper;
- plasticine;
- PVA glue;
- acrylic paints;
- brushes.
Apply plasticine to the washed and dried stones, giving these blanks the desired shape. Help yourself with a plastic knife.

Tear toilet paper, apply PVA glue on the stone, attach it to the base. Wait until the desired shape is reached.

Mix black and white acrylic paint to create a dark gray color. Paint over the stone and let the surface dry.

Take another brush so that it is almost dry and cover the bumps with a light gray color. You can also add a little green to give these natural materials touch of antiquity. Do the same for the second stone.

It remains to cover them with varnish, and you can put the selected heroines on these blanks.

Instead of acrylic paints you can use oil or those that are at hand.
If you want your windows to be decorated with stone cacti, then you can make such unusual plants. They will not need to be looked after, they do not require watering and do not prick.
How to make cacti from stones - a step by step master class
Take:
- smooth flat stones of an elongated shape;
- transparent matte varnish;
- gouache;
- brushes;
- flower pots;
- sand or earth;
- small pebbles;
- corrective stationery pencil;
- glaze or epoxy.
Select stones of the desired shape, soak them for half an hour in warm soapy water, then rinse and dry.
If you want to create a cactus made up of several stones, then glue them together with epoxy glue.
Cover the stones with green paint. When this layer dries, apply dark and light shades Green colour. With a thin brush or corrector, draw light needles. When the paint is dry, cover the stone cacti with a matte varnish.

Pour in flower pots sand or earth, stick blanks here. From above, cover a layer of this soil with small pebbles.

If you still have green paint left, you can paint the stone to look like a turtle. To do this, you first need to paint it in green, then with a corrector or brush, taking black paint, apply the corresponding lines. You can also use yellow. Next step by step photos show in what sequence, how and where to apply this pattern.

Here's what you can do with stones, showing imagination. The videos below will help you make chess, a beautiful transparent vase, teach you how to draw on heated stones, and give you many more life hacks on this topic.
And from the second video you will learn what can be made of stones in the country.
Crafts from stones - unusual way draw attention to your site or the interior of the apartment. Such designs fit into the natural environment as organically as possible due to their naturalness. Crafts made of stone always look stylish and allow you to add an economy note to the design.
Applications
Crafts from stones that you can build with your own hands are divided into several types.
Landscape crafts that are performed directly to decorate summer cottages and suburban areas. Around them, you can form a local landscape, for example, equip a recreation area or make a pond.
Crafts made with glue and painting on a stone surface. Such products can be used for decorating both a suburban area and indoors. It can be a painted boulder of the original form or a hot stand made of pebbles.
By the way, such crafts in combination with shells form a special water area in the room, especially if there is an aquarium. So you can decorate the interior of a living room or office in a marine style.
Accessories and various gifts. Such crafts allow you to convey all the warmth of the hands and love to the donee from the master. Most often, crafts of this type are made of small stones in the form of figures of animals or plants. Special breeds of stones can become a talisman of a person.

Learning how to make stone crafts is not so difficult. You can borrow some of the ideas that are presented in this material, or create something of your own.
stone craft options
As mentioned earlier, stone crafts can be used for various purposes, so it is worth considering each type separately with examples.
garden crafts
This is the most common version of crafts for decorating the local area. Usually in a suburban area there is a large amount of material for the manufacture of this kind of crafts. If it is not there, then there is nothing difficult to collect the pebbles of the required size on the river bank or elsewhere.
Easiest to do ladybug or a caterpillar according to this algorithm:
- Preparation of stones of the desired shape and size.
- Applying paint to a surface.
- Painting each pebble in accordance with the idea.
- Drying the finished craft.
- Coating the product with varnish to preserve the external and quality characteristics for a long time.
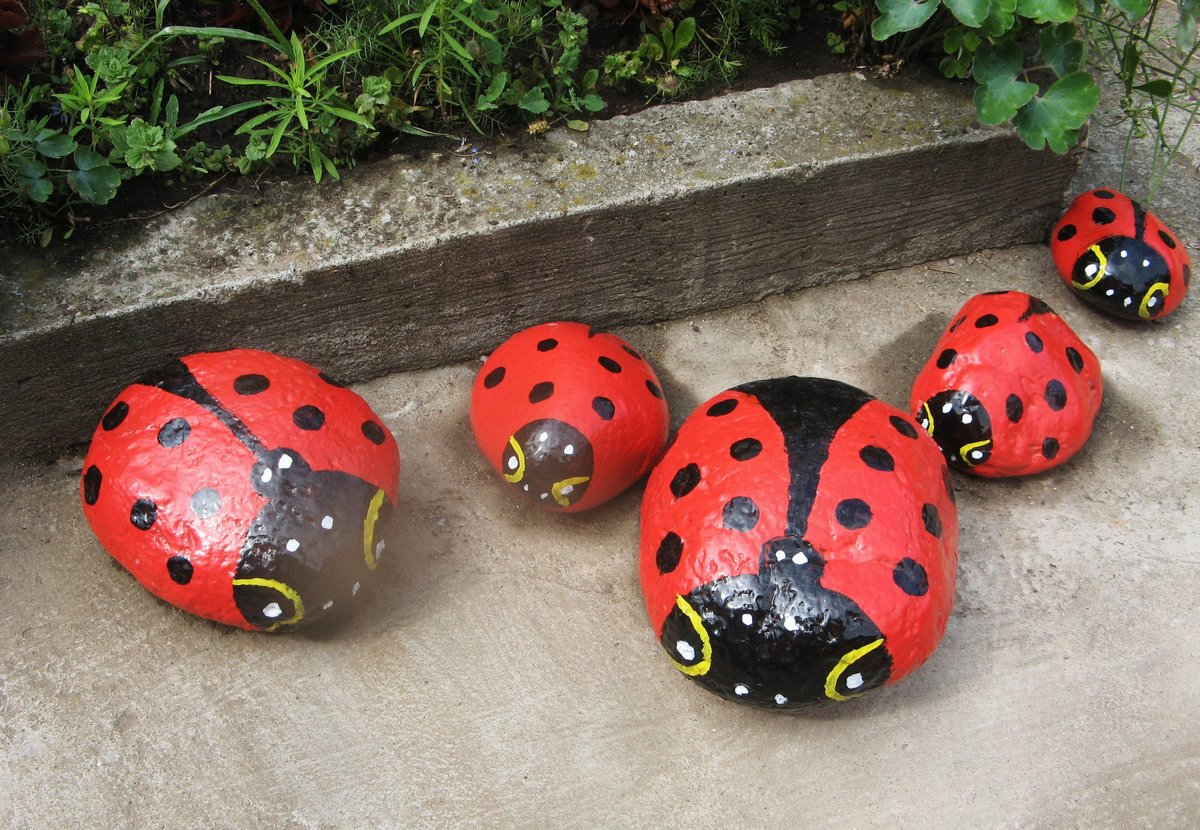
Advice! Children can be involved in the manufacture of such simple stone crafts, who will be happy to decorate the structure.
Some stone figurines can serve as a flower garden or frame a decorative pond on the site. For example, you can lay out a star, a turtle or any other pattern from boulders, which will become the basis for planting flowers inside it.
Pebbles painted like fairy-tale houses are ideal for decorating a playground. In such an environment, the child's play will be more interesting, and the territory of the site will change.

Chaotically interconnected sea pebbles perfectly complement any area. With their help, you can dilute the appearance of the lawn or frame a recreation area.
Spatial figures can be found less often in suburban areas. But such options for crafts look just great and soundly. They are made necessarily with the use of a metal frame, so that the stones hold more securely. For example, from stones you can make crafts in the form of a dragon or any other creature. To do this, follow this technology:
- A schematic representation of a future craft on paper, specifying its size and the required amount of material.
- Selection of material suitable in size and shape.
Important! It is best to use limestone for crafts, which is much easier to process than other rocks.
- Making a concrete base for crafts, since even a small figure has a significant weight. In the process of pouring in concrete, it is necessary to place pieces of reinforcement or wire for later stones to be mounted on them. In this case, the diameter of the reinforcing bars is chosen to be 8–12 mm.
- During the solidification of the foundation, you can start preparing the stones and drill holes in them with a puncher.
- Formation of the frame by bending the reinforcement.
- Planting stones on the completed frame.
Advice! To prevent the stones from turning on the wire, they are fixed with concrete mortar.
- Refinement of individual fragments of the craft to designate its constituent elements, for example, the mouth and eyes.
- Adding accents to crafts by coloring its details.
Here is an example of a turtle gabion:

It is not necessary to make such large figures; stone crafts on the site can be small. For example, animal figures are assembled from small stones that are attached to each other with pins and cement mortar. Such a family will give the garden a family atmosphere and comfort.

A stone flower - a symbol of an energy charge will appeal to all those who are interested in oriental practices. It is also easy to make this craft near your home. For the reliability of the structure, a small base is poured under it, and sharp-angled stones are fastened together, forming a half-opened bud.
Decorative stone crafts
For the interiors of apartments and houses, stone is also often used. This addition looks like a very advantageous one. Most of those who have vacationed or live near the sea have fancy pebbles at home. Most often they just lie idle, as a reminder of a fun holiday. What if you build from them unique craft, which will further decorate the interior of the home.
In the manufacturing process, you can ask for help from children, which will help you get more original options for crafts. Bright fish are perfect for decorating the bathroom. To make them, you just need to color the pebbles at your discretion in the form of fish. Such crafts can be laid out on shelves or glued to the wall. If you collect them on some basis and supplement them with other marine attributes, you will get an original panel that fits perfectly into a room in a Mediterranean or other style that reminds you of a light sea breeze.

No less attractive are panels of small pebbles, which are folded in the form of a flower or a combination of plants. You can even “plant” a suitable stone in a pot with gypsum and paint it like a real plant. Such a decorative craft diversifies the modest interior of a bedroom or office space, and guests will not immediately guess that the flower is not real.

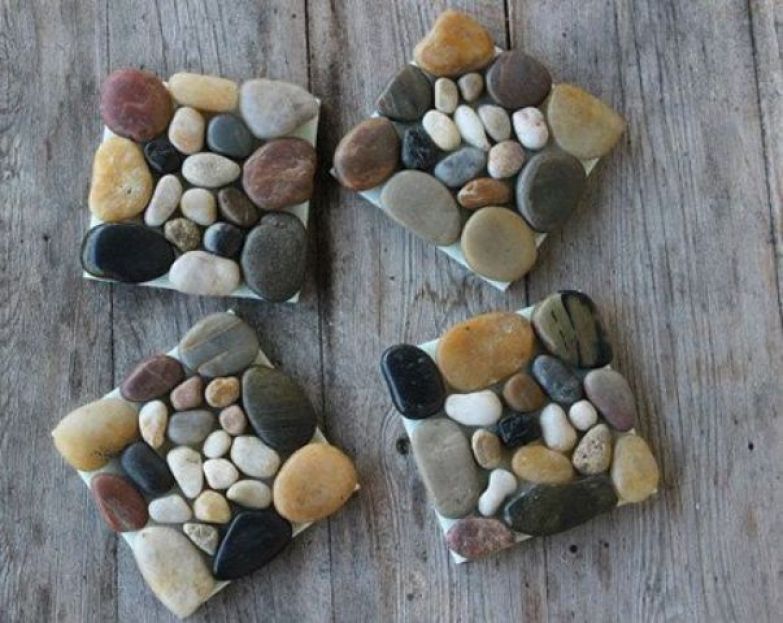
Decorating rooms with stone does not end with ordinary panels. For the kitchen, for example, heat-resistant coasters for pots made of stones glued together, located on a rigid base of plywood or cardboard, will become relevant.
An interesting and functional solution is a stone shoe stand. To design such a craft, you need to take a pallet and carry out the following steps:
- glue stones over its entire surface;
- pour soil on the bottom;
- cover it with a layer of stones on top.

So, wet shoes placed on this stand will become dry faster, due to the absorption of moisture by the ground.
Optimum stone is suitable for the bathroom. A rug made of this material will be convenient not only for the possibility of quick drying, but will also serve as a certain massage tool for the feet.

Important! Designers advise using stones as much as possible in any room, as it is a natural and versatile material that does not change its properties over time.
The use of stone finishes for interior items is allowed even in modern styles, for example, high-tech. If you put a couple of large tubs with flowers, which are pasted over with stones, in such a decorated room, you can get an eco-style atmosphere.

Photo frames - these are the crafts that will definitely please the owner and guests. If the house has an area with photos of family members posted, or just a few photos in the usual frames, you can beat them with stones. Usually, shells are also taken in addition, so that the composition of the craft looks more organic. To fix the elements, you need good glue, it is better to use hot glue from a gun. Decorations are taken at your discretion and depending on the desired result.
Important ! The base of the frame should be wide enough without relief so that you can easily fix all the stones and shells on the craft.

The technology for creating a frame of stones and shells is as follows:
- Preparing the workplace - decorating the table with newspaper or paper.
- Sorting shells and stones and selecting suitable ones.
- Making the first row of the frame with large shells and stones, the second with medium ones, and the subsequent ones with small ones.
- Filling empty spaces with decorative ones starfish, ribbons and other thematic attributes.
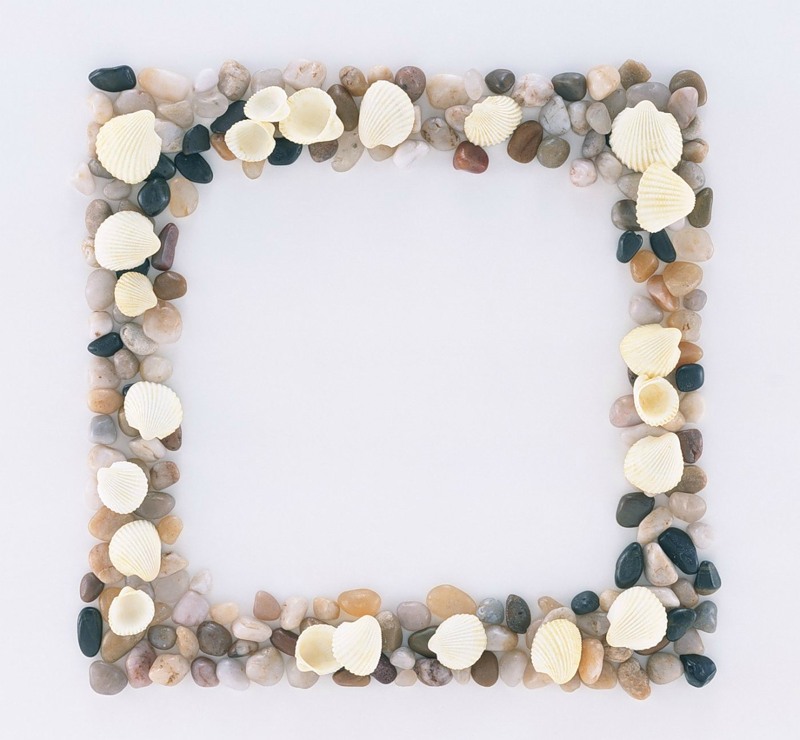
Almost every house has paintings. Ordinary, painted on canvas, are no longer as interesting as those made with their own hands from stones. This painstaking work requires perseverance and attention, but the result is worth it. Pebbles laid in a certain sequence on the craft make it possible to appear on the base surface interesting pattern, which will successfully fit into the design of any room in the house, whether it be a kitchen, an entrance hall, a living room, a bathroom, a bedroom and even a nursery.

Conclusion
Stone crafts are not only original decoration garden plot, but can also be presented as a gift. No connoisseur of beauty will remain indifferent when receiving such a present. And the fact that the handicraft is made by hand is only a plus for the donor.
What can be done from pebbles with your own hands? Use these ideas and you will see that stone is the perfect decor material.
Sea stones do not have to be brought from vacation - today pebbles can be bought in stores for construction, decor and needlework. Go through those that are nearby, most likely, the problem will not arise. Of course, natural seafood can also be used for crafts from sea stones, but keep in mind that sea pebbles tend to be covered with white bloom, so you can’t choose for some types of work. It is better to find river pebbles or give preference to artificially created pebbles.
And now, it's time to move from theory to practice - how can you use pebbles in creativity and what can you do with pebbles with your own hands?
If you want to create something useful, then start with rugs in the bathroom or in the hallway. In addition to spectacular appearance, these mats have a healthy massage effect, acting on the points of the foot.


It is easiest to make a stone massager using any rubber mat as a basis. You need to glue the pebbles with a transparent waterproof glue, selecting the elements so that unattractive rubber is not visible.

Similarly, you can make a stand for hot.

Another useful application is . For indoor plants choose the smallest stones, and for large flowerpots, look for large stones. It is convenient to stick small pebbles on a transparent “Moment” or with a glue gun, and large pebbles can be attached to concrete mortar or tile glue. For smooth products, it is important to use a reinforcing mesh.


By the way, wonderful cacti are obtained from pebbles, if you paint them beautifully and choose the right shape. Do not be afraid to make a mistake - the stones will endure everything!


If you know how to or are just learning to paint, try to paint the stones using the suggested photos as a basis. The simplest decorations - eyes, can be realized even by a child.


With the help of small pebbles, it is easy to build stylish candlesticks and. For such work, even glue is not required.


A little imagination and from the ore of stones, magnificent photo frames, boxes, jewelry and much more are obtained. The only downside is that now you will bring more from your vacation. more stones. But craft pebbles can also be bought at hardware stores.
Do not stop at one thing, they are waiting for you, try yourself in different types creativity.